A complete guide on how to make the perfect tart crust! You can make the tart dough easily, and there is no need to blind-bake the crust. Bake once (for any tart dessert!), and you can make beautiful and delicious tart shells. Read through this in-depth tutorial to successfully make them from scratch!


Have you ever had issues with tart crusts before and haven't figured out why? This was me a decade ago. I faced so many issues, including:
- The dough is too sticky to handle.
- The tart dough cracks easily while rolling it
- The rolled-out dough is very uneven.
- The tart crust shrinks in the oven.
- The bottom of the crust rises in the oven.
- The tart crust is stuck to the tart ring
... and so on. 😫
Making tart dough is very easy, like pie dough, but the reason most people feel intimidated to make the tart crust is that - rolling out the dough thinly, fitting it into tart pans or rings, and baking it. It is challenging to do without knowing all the tips and tricks.
That is why I made this tutorial to share all the troubleshooting tips for making perfect tart crusts I gained over the past decade.
I'll tell you in advance - this tutorial is very in-depth. That is because there are many tips I want to share that I truly believe are going to help you get better results. I encourage you to take time to read through each section so you can truly feel ready to bake them.
I also encourage you to watch the video tutorial in this post to understand each movement on a deeper level and master making the tart crust.
Let's get started!

📌 Why You'll Love This Tart Crust
1. No blind bake is needed.
You don't need to bake the tart shell twice with pie weights, which will save you a good chunk of time and effort! By baking it without the pie weights, you can also make a more even, beautiful-looking tart crust. This is one of the big reasons why I LOVE this tart crust!

2. Easiest tart dough recipe
This is by far the most simple and easy tart dough recipe I've ever made. Today, I am sharing how to make it with both a stand mixer and a food processor.

3. Lightly crispy!
The tart crust is lightly crispy and flavorful and not overly sweet. This is the ONLY tart crust recipe I use for all types of tart desserts. Read the "uses for tart crust" section to get inspiration for what dessert you can make using it!

📌 2 Types Of Tart Crust
Sweet tart crust, pâte sucrée, pâte sablée... there are a few ways to call tart crust, and that may make you wonder - "how are they different from each other?"
Read the simple categorization below to get the answer! (As a note, this is solely my opinion based on my experience. Some chefs might have different opinions about it!)
Sometimes, even a pie crust is categorized as a tart crust just because it is baked in a tart pan, but I define tart crust simply as a sweet crust.
Here are 2 types of tart crust:
1. Pâte sablée
"Pate" means "dough" and "sablee" means "sandy" in French, which describes the way of making the tart dough - It is made by rubbing pieces of cold butter and dry ingredients first and adding eggs to it at the very end.
The method is called the sablage method. By coating the oil (butter) all around the flour first before adding liquid (eggs), you can prevent the dough from creating too much gluten, which makes a more crumbly and lightly crispy texture. This is the method I am using today.
2. Pâte sucrée
"Sucre" means "sugar" or "sweet" in French. The tart dough is made by creaming softened butter and sugar first and adding flour at the very end.
The method is called the creaming method. It is also the most popular way of making cookies.
The illustration:

Should I make the tart crust with the creaming method or the sablage method?
I personally prefer making the tart crust with the sablage method since the tart crust tends to get more even with it. With the creaming method, we tend to whip butter slightly when mixing it with a whisk (or paddle attachment). By doing this, the dough contains more air, and it expands in the oven, which makes the crust slightly thicker and uneven.
But ultimately, it is up to you! - the most important thing is that you love the recipe and have fun baking! When using the creaming method for making the tart crust, try not to whip the butter.
📌 Tips For The Tart Crust Ingredients
- All-purpose flour: Gluten in flour creates a crispy texture for the tart crust.
- Almond flour: It adds a toasty flavor and more delicate, light crispiness to the crust.
- Powdered sugar: The confectioners' sugar creates more crumbly, light crispiness than granulated sugar.
- Salt: I use regular table salt.
- Unsalted butter: Use cold butter for the process to work properly.
- Egg: The egg helps to connect all the ingredients to make the crust.
- Bread flour to dust on a working surface: Bread flour spreads more evenly and does not stick on the dough as much as cake or all-purpose flour.

Can I omit almond flour?
Although I highly recommend adding almond flour for the best result, you can also replace the same amount with all-purpose flour. The crust gets slightly more crispy due to more gluten in the flour. Rest the dough well in the fridge before baking it to rest the gluten well.
📌 The Tools You'll Need
- Stand mixer or food processor to make the tart dough
- Plastic wrap to wrap the dough
- Rolling pin
- Parchment paper: Use it when you want to roll out the dough on it.
- Tart pans or rings: Use any kind you like. When using a large pan, I recommend getting a non-stick pan with a removable bottom to remove a crust easily. Read the section below about the 4 types of tart pans and rings.
- Knife, Pie roller, or cookie cutter to cut out the rolled-out dough
- Fork or pie docker
- Baking sheet
- Silicone mesh mat or parchment paper for rings: Place parchment paper or a silicone mat on a baking sheet when baking the crust with rings. Without them, the crust often sticks to the baking sheet.
4 types of tart pans and rings
You can use whichever pans and rings that best suit your occasions!
1. Classic tart pan


This is the most common and classic tart pan. It often has ruffle patterns on the side.
2. Classic tart ring


The ring is easy to wash. I often use it when I want to make tarts with straight sides.
3. Perforated tart ring


This ring is often used among pastry chefs since it creates a very neat-looking crust.
The steam in the dough gets out from the tiny holes as it is baked in the oven, creating an even, beautiful-looking crust with no air bumps:

I used 2.37-inch perforated tartlet rings and an 8-inch perforated tart ring for this tutorial.
4. Perforated tart pan (NEW!)


The classic tart pan meets the perforated tart ring! - it's the new "hybrid" tart pan, perforated tart pan.
Mesh silicone mat
The bottom of the crust gets evenly flat when it's baked with a silicone mesh mat. There is no need to dock the surface with it. I recommend getting it if you often bake tarts or want to make it look super neat for your special occasions. You can also use parchment paper instead.


📌 9 Tips For Making Perfect Tart Crust
1. Chill the tart dough before rolling it
By doing this, the glutens in flour get rested well, which prevents the tart crust from shrinking or becoming very uneven while it's baked in the oven. Chill it in the fridge for at least one hour, or ideally more than a few hours before rolling it.
2. Work in a cooling environment
The butter in the tart dough gets softened quickly when left in a warm environment. The soft dough tends to stick to the working surface and tools and gets a lot harder to spread thinly and evenly! I highly recommend working in a cooling room with AC on.
3. Use parchment paper to roll out the dough
In this post, I'm sharing how to roll out the dough directly on a counter table or parchment paper. Parchment paper helps to roll out the dough a little bit more easily by preventing the dough from sticking to the table. You can also easily carry the rolled-out dough to the fridge when using parchment paper.
4. Roll out the dough very thinly
I HIGHLY recommend rolling it into 2-3 mm (0.07 - 0.1 inch) to make a lightly crispy crust! The crust feels too crispy when it is a lot thicker. 2-3mm might look too thin, but do not worry; it'll get thicker once baked due to the eggs inside the dough.
5. Chill the dough whenever it is getting too soft to handle.
If you feel the dough is getting too soft to roll out or fit it into the tart pan/ring, don't hesitate to chill it back in the fridge until it gets firm enough to handle.
6. Ensure that the dough fits in the pan completely.
Ensure that the dough fits in the sides of the pan and that there is no space in the bottom corners of the pan. Otherwise, the dough slides down in the oven while it's baked!
7. Dock the bottom well when using a tart tin
The liquid in the dough turns into steam in the oven, and push the dough up, trying to get out. And the holes will be the exits for the steam. Without them, the bottom gets pushed up too much and gets winded.
When using a tart ring instead, you can use a mesh silicone mat instead of docking the bottom - the steam gets out from the tiny holes in the mesh, creating a flat, beautiful surface!
8. Rest the dough in a tart pan completely before baking it
Right after the dough is rolled out, the glutens in the flour get activated again and strengthened, which causes more shrinkage and uneven surface of the crust. Always rest the dough for 1 hour or longer to get the best result. You can also freeze it to speed it up!
9. Bake the crust until golden brown.
Baking it until golden brown makes a toasty and pleasantly crispy tart shell. The underbaked tart crust does not have the same crispiness. The crust also shrinks slightly when it's baked enough, making it easier to remove it from the pan or ring.
📌 3 Steps To Make Tart Dough
1. Add the dry ingredients.
Add all-purpose flour, powdered sugar, almond flour, and salt to a stand mixer bowl.

💬 You can sift the flour in advance, but it's unnecessary! The lumps disappear through the process.
2. Add cold butter and mix until sandy.
Cut cold butter into small cubes and add them to the dry ingredients.
Mix it at low-medium speed with a paddle attachment until it looks very sandy:


It looks like fine almond flour!

3. Add egg and mix.
Add the beaten egg and mix it at medium-low speed until evenly combined.


Check if it's evenly mixed at the end.

4. Chill it in the fridge.
Divide the dough in half and wrap it with plastic wrap.


Roll it into a wide rectangle shape (or square) so it'll be easier to roll it out later. Pinch the edges to ensure it's not cracked. (The cracks open up wider while rolling the dough if you don't fix it at this point.)


Chill it in the fridge for a few hours or up to overnight before rolling it.

One batch of the dough is enough for about 2 9-inch tart pans (2 10-inch pans if the sides are not so high).
When using a food processor
You can also make this tart dough quickly with a food processor!
- Process the dry ingredients and cold cubed butter until it looks sandy, like fine almond flour.


- Add a beaten egg and process until evenly blended.


📌 How To Roll Out Tart Dough
Leave the dough at room temperature for 5 - 15 minutes to soften it a little bit so you can finish rolling it out in a shorter time.
1. Dust flour on the working surface.
Dust bread flour on the working surface, a rolling pin, and all over the dough to prevent it from sticking to each other.


Bread flour 🍞
Bread flour spreads more evenly and does not get absorbed in the dough as much as cake flour or all-purpose flour.
2. Press the dough and make it softer.
Press it gently with a rolling pin upward from the edge bottom. This process is to ensure the dough is softened enough to roll it out. (The dough can crack when you start rolling it out vigorously without this step.)


Turn it 90 degrees using a dough scraper and repeat the same process until you feel the dough is soft enough to roll out.

3. Roll out the dough.
1. Roll it out upward from the middle.


⚠️ Avoid touching the dough directly with your hands too often, especially when your hands are warm. Use a dough scraper as your hand!
2. Roll it out downward from the middle.


3. Turn it to 90 degrees. Apply more bread flour.
Check if the bottom of the dough is not stuck on the working surface using a dough scraper and dust additional bread flour on it. Also, apply it on the rolling pin and the surface of the dough as needed.

4. Repeat steps 1 - 3 until the dough becomes thin.
Roll it out to 2 - 3 mm (0.07 - 0.1 inch). You'll see through the color of a table or dough scraper when it's rolled thinly enough:

3 important tips for rolling out tart dough successfully
- Add the same pressures from both hands to get an even thickness.
- Move as quickly as possible to prevent the dough from getting too soft. (Nobody can roll fast at the beginning - You'll get used to it each time you practice!)
- Don't forget to apply more bread flour as needed while rolling it out. The dough sticks to the working surface when the four is not applied enough.
When using parchment paper
The steps are exactly the same as when rolling it out directly on a table. I still dust bread flour on parchment paper since the dough spreads more easily by doing so.

📌 How To Fit The Dough Into A Tart Pan (Or Tart Ring)
The way changes depending on which types of tart pans and tart rings you are using. I am guiding you through the steps with each tart pan and ring.
Watch the video tutorial to check the movement and better understand the processes!
1. Classic tart pan

1. Cut the dough with a cookie cutter, pie roller, or knife.
It should be large enough to cover the sides of the pan.

2. Dust some bread flour on the pan.
The crust can be removed from the pan more easily by doing so.

3. Roll it onto a rolling pin and place it on top of the pan.
Ensure it's in the very center.


4. Push the edges of the dough and let the dough sink into the pan.
Do this quickly, as it can be easily cut off with the edge of the pan.

5. Fold the dough in the bottom corner.
By ensuring there is no space/gap between the pan and the dough, the side of the dough does not slide down while baking it.

6. Add firm pressure on the sides with a thumb (or 2 thumbs).
Let the dough stick to the pan all around. Do not push it too hard to prevent it from getting uneven.

7. Lean the excess dough outward and cut the excess dough on top.
When cutting it with a rolling pin: Roll it on the surface, leaving the edges unrolled. Turn the pan 90 degrees and do the same thing to cut off the remaining dough.


When cutting it with a petty knife: Slide it outward. Be careful not to hold the bottom of the pan when using a pan with a removable bottom! You can do it on a table as well.

8. Dock the bottom with a fork.
It prevents the dough from rising up as it's baked in the oven. Dock well for it to work!

Small tartlet pan

Use a cookie cutter, knife, or pie roller to cut the dough into a circle. The size should be big enough to cover the side of the pan entirely.


To sink the dough into a tartlet pan, you can pick one from the 2 ways:
- The same way as shown earlier with a large pan. (pushing the edge in) In this way, the side of the dough gets gathered more with small tartlet pans. Be sure to push the side well with a thumb later to make the thickness even.

- Take the edge of the dough and slowly curve it while turning it. In this way, the side of the dough won't get gathered. (Images below.)


Fold the bottom corner to create a sharp edge.


Press the side with a thumb (or thumbs) to ensure it's fit entirely.


Cut off the excess dough on top.

Dock the bottom!

2. Basic tart ring

For a large tart ring, follow the same steps as a large tart pan.
For a small tartlet ring, follow the same steps as a small tartlet pan.
Tip💡: Dust some bread flour inside the ring to prevent the dough from sticking to the table.
Place the cut dough on top of the ring. Ensure it's centered.


Take the edge of the dough and slowly curve it while turning it. In this way, the side of the dough won't get gathered.


Fold the corner edge.


Press the side with a thumb (or thumbs) to ensure it's fit entirely.


Cut off the excess dough on top.

Dock the bottom. There is no need to dock the surface when using a silicone mesh mat.
3. Perforated tart and tartlet ring

Apply a thin layer of softened butter. The crust comes out from the ring more easily by doing so.

Dust some bread flour inside the ring to prevent the dough from sticking to the table.

Here are two ways to fit the dough into perforated tart/tartlet rings. Pick whichever you like!
The Method 1
Cut the dough into stripes using a knife or pie roller and attach it to the ring, ensuring it fits all around.


Cut the dough with a cake ring or cookie cutter that is slightly smaller than the tart ring you are using. Place it inside the ring. Ensure the edges are attached to the stripes by pressing them.


Add good pressure on the sides with a thumb to let the dough stick to them entirely.
TIP💡: Do not push it too hard until the dough comes out from the holes. It can be stuck to the ring after the crust is baked!

Lean the excess dough outward a little bit and cut it with a sharp knife or a dough scraper.

Dock the bottom with a fork to prevent it from rising as it's baked in the oven. It is not necessary when using a mesh silicone mat.
Insert a dough scraper under and transfer it to a baking sheet lined with parchment paper or a mesh silicone mat.


The Method 2:
Cut the dough with the perforated ring. Ensure it fits to the bottom of the ring.


Cut the dough into stripes using a knife or pie roller and attach it to the side of the ring, ensuring it fits all around.

Add good pressure on the sides with a thumb to let the dough stick to them entirely. Do not push it too hard until the dough comes out from the holes.

TIP⚠️: Press the corner edge well so that you won't get a large gap between them:

Lean the excess dough outward and cut it with a sharp knife or a dough scraper.

Dock the bottom with a fork to prevent it from rising as it's baked in the oven. It is not necessary when using a mesh silicone mat.
Transfer it to a baking sheet lined with parchment paper or a mesh silicone mat using a dough scraper. Chill it in the fridge.
4. Perforated tart pan (NEW!)
Follow the same steps shown with a classic tart pan.

📌 How To Bake Tart Crust
Chill the dough before baking it.
The dough slides down more in the oven when you bake it while it is still soft. You can also rest the gluten in the flour by chilling the dough, which leads to a more even surface.
Bake the tart crust
Bake (Preheated) at 350ºF (175ºC) for 10 - 20 mins (or longer, depending on the size) until golden brown.
Rotate the baking sheet toward the end if necessary to brown them evenly.
Bake enough until the crust shrinks a little bit:
The slight gap makes it easier for you to remove the crust from the pan or ring. Underbaked crusts are often still stuck to it!


They are more fragile while they are warm. Let them cool at room temperature before taking them out from the pans or rings.

How to remove the crust from the pan
- Place the pan on a cake ring or cookie cutter to remove the side of the pan.


- Push the side of the crust gently and see if you can remove the bottom of the pan. If it is still attached, find a small gap between the crust and the pan and insert a small cake spatula between them. Slide it carefully to detach the pan.


How to remove the crust from the ring.
I find it easier to remove the crust by pushing it upward:

And it is DONE!! 🙌🏻

📌 Uses For Tart Crust
Use this homemade tart crust recipe for any sweet tart. Here are some ideas:
Large tarts
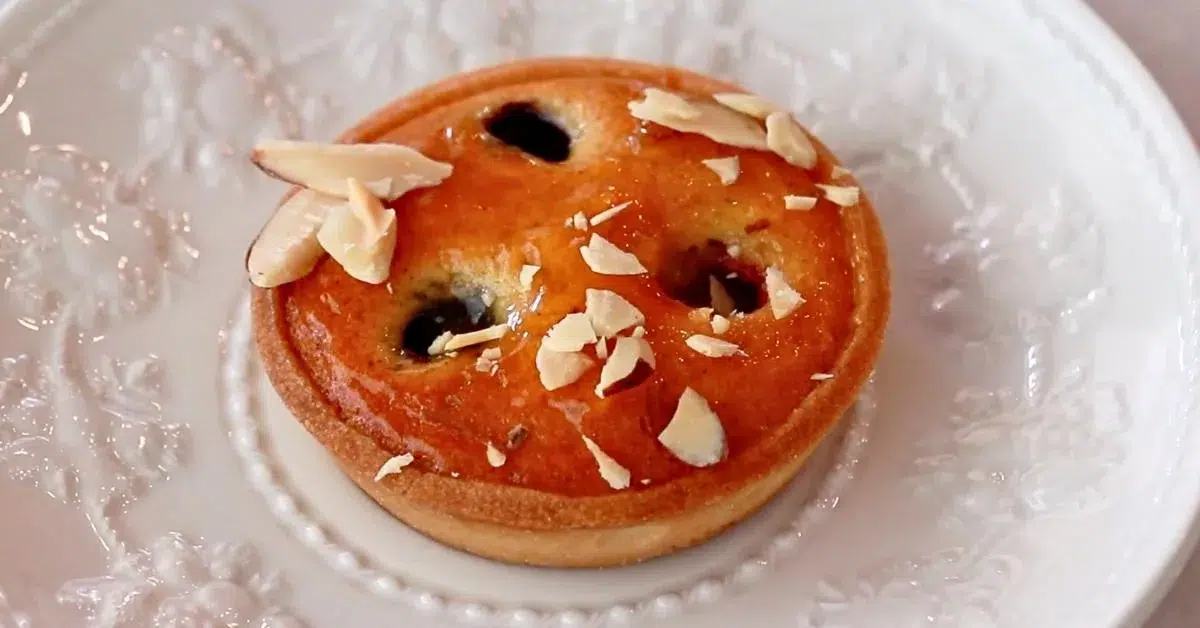
Make various kinds of tarts, such as fresh fruit tart, chocolate tart, pecan tart, peach almond tart, apple tart, lemon meringue tart, cheesecake tart, etc. What is your favorite?


Small tartlets
Enjoy making mini tartlets for parties, catering events, afternoon tea, etc.

Cookies
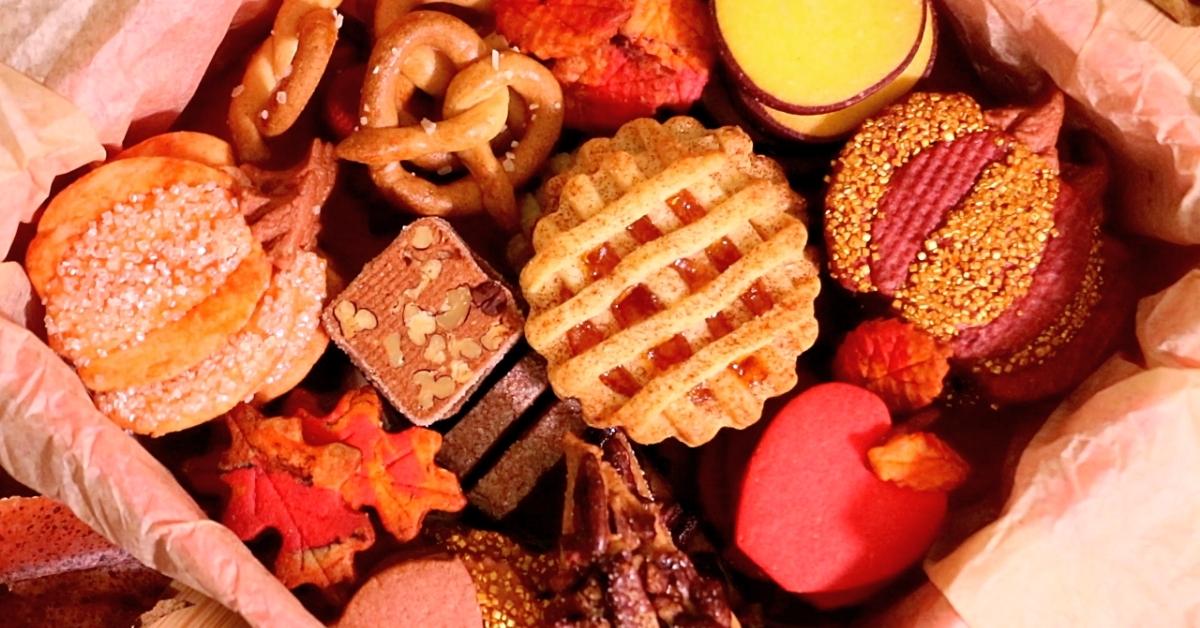
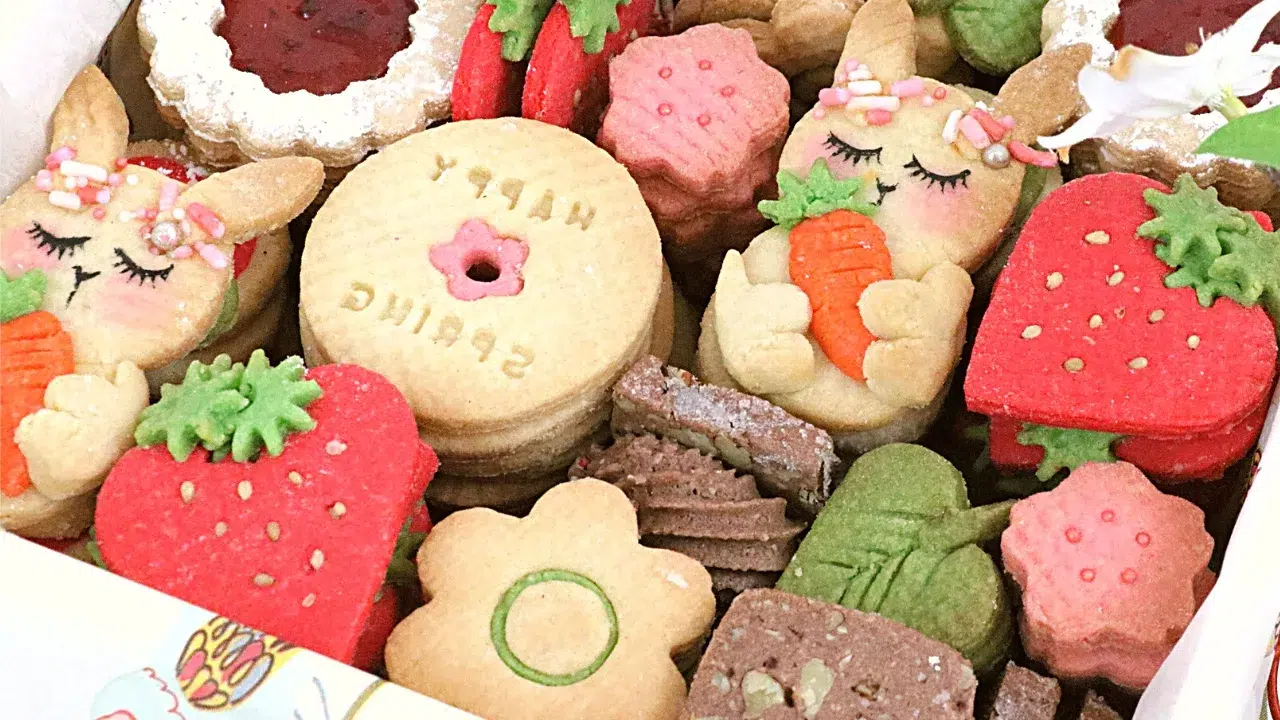
I also like to use this crust to make cut-out cookies and icing cookies! It works great because the shape remains good.
You can also make an assorted cookie box using this dough, such as the spring and the Fall cookie box.
📌 How To Store The Tart Dough
Wrap the dough tightly with plastic wrap, as shown earlier. You can also use ziplock bags:

What is the shelf-life of the tart dough?
You can store it in the refrigerator for 4 - 5 days or in the freezer for up to a few months.
You can also freeze the dough that fits into tart pans and rings and bake it when you need to!

📌 How To Store Homemade Tart Crust
The freshly baked crust tastes the best, so I recommend consuming it right away. But when you need to store them, I recommend trying one of the 2 options below:
Option 1: Use a silica gel.
Store the tart crusts in an airtight container with a silica gel. It'll soak up unnecessary moisture in the air, keeping the crust crispy!

Option 2: Bake them again.
Bake them at 350ºF (175ºC) or lower for 3 - 5 minutes to release some moisture. It'll bring back the crispiness again.

What is the shelf-life of the tart crust?
You can store it at room temperature for 1 - 2 days or in the refrigerator for 4 - 5 days.
Can I freeze the tart crust?
Yes! Store it in an airtight container for about a month. Try the option 1 or 2 above to bring back the crispiness.
📌 Troubleshooting Tips
The tart dough cracks while rolling it out.
This means the butter in the dough is too cold. Pinch the cracked edge, like in the image below, to fix it. Leave the dough at room temperature for a longer time if necessary.


The tart dough is getting too soft to handle.
The butter in the tart dough is getting too soft either because the room is warm or it's taking a long time to roll out the dough. Chill it in the fridge and come back again when it gets firmer!
The tart dough sticks to the working surface.
This means the bread flour is not applied enough or evenly. Dust additional flour every time you turn the dough at 90 degrees.
The tart crust shrunk too much in the oven.
Here are the 3 most common reasons:
- The tart dough was not rested enough before baking (which helps to weaken gluten in flour). Chill it for a longer time!
- The dough did not fit into the corner edge all the way, and the side of the dough slid down in the oven because of that.
- The side of the dough was not entirely attached to the pan, and it slid down. Push with a firmer pressure to ensure it is attached.
The bottom of the crust looks winded.
That is because the docking was not done enough. Make more holes or use a mesh silicone mat. (for tart rings).
The tart crust does not come out of the perforated tart ring.
Here are 3 common causes:
- A thin layer of butter was not applied in a perforated ring.
- The crust was underbaked. Bake for a little bit longer time until it shrinks slightly.
- The side of the dough was pressed too much, and the dough got stuck to the tiny holes.
The side of the tart pan is not fully covered with the dough.
Add a piece of dough on the lower side and push it up. Do not attach it on the top since it can snap more easily after it's baked.


The side of the dough looks messy.
Do not worry! We can still fix it. Push it up with a thumb to make it even.


📌 VIDEO: Watch how to make it!
Watch the video tutorial to learn how to make the tart crust visually and deeply understand each step and technique!
Don't forget to subscribe if you liked it 😉
💬 If you loved this tart recipe, please share your feedback on this post! I always love hearing how you enjoyed it with your friends and family.
Best Tart Crust
Equipment
- Stand mixer with a paddle attachment or food processor
- Dough scraper
- Petty knife
- Rolling Pin
- Tart rings or molds
- Mesh silicon mat or parchment paper
- Fork
Ingredients
Tart crust
- 250 g (2 cups) All-purpose flour
- 105 g (½ + ⅓ cups) Powdered sugar
- 35 g (⅓ cup) Almond flour
- 1/16 teaspoon (2 pinches) Salt
- 127 g (9 Tbsps) Unsalted butter (cold, cut in small cubes)
- 50 g (1 medium egg) Egg
To Roll The Dough
- Some Bread flour Use all-purpose flour if you don't have it.
NOTE: For best results, measure ingredients with a scale. All recipes are designed with weighed ingredients using grams/ounces. Cup measurements (US customary units) are provided for your convenience.
Instructions
Make tart dough.
- Add all-purpose flour, powdered sugar, almond flour, and salt to a stand mixer bowl.250 g All-purpose flour, 105 g Powdered sugar, 35 g Almond flour, 1/16 teaspoon Salt

- Cut cold butter into small cubes and add them to the dry ingredients. Mix it at low-medium speed with a paddle attachment until it looks very sandy. It should look like fine almond flour.127 g Unsalted butter (cold, cut in small cubes)
- Add the beaten egg and mix it at medium-low speed until evenly combined.50 g Egg
- Divide the dough in half and wrap it with plastic wrap. Roll it into a wide rectangle shape (or square). Pinch the edges to ensure it won't start cracking while rolling out the dough.Chill it in the fridge for a few hours before rolling it.


Roll the dough.
- Dust bread flour on the working surface, a rolling pin, and all over the dough to prevent it from sticking to each other.Some Bread flour
- Press it gently with a rolling pin upward from the edge bottom. This process is to ensure the dough is softened enough to roll out.Turn it 90 degrees using a dough scraper and repeat the same process until you feel the dough is soft enough to roll out.
- Roll it out upward from the middle. Roll it out downward from the middle. Turn it 90 degrees. Check if the bottom of the dough is stuck on the working surface using a dough scraper, if it is, dust additional bread flour on it. Also, apply it on a rolling pin and the surface of the dough as needed.Repeat the process and roll it to 2 - 3 mm (0.07 - 0.1 inch). You'll see through the color of a table or dough scraper when it's rolled thinly enough.3 important tips for rolling out tart dough successfully1. Add the same pressures from both hands to get an even thickness.2. Move as quickly as possible to prevent the dough from getting too soft. (Nobody can roll fast at the beginning - You'll get used to it each time you practice!)3. Don't forget to apply more bread flour as needed while rolling it out. The dough sticks to the working surface when the four is not applied enough.


Fit the dough into a tart pan
- Cut the dough with a pie roller or knife. It should be large enough to cover the sides of the pan.
- Dust some bread flour on the pan. The crust can be removed from the pan more easily by doing so.
- Roll it onto a rolling pin and place it on top of the pan. Ensure it is centered.
- Push the edges of the dough and let the dough sink into the pan. Do this quickly, as the edge of the pan can easily cut off the dough.
- Fold the dough in the bottom corner. By ensuring there is no space/gap between the pan and the dough, the side of the dough does not slide down while baking it.
- Add firm pressure on the sides with a thumb (or 2 thumbs). Let the dough stick to the pan all around. Do not push it too hard to prevent it from getting uneven.
- Lean the excess dough outward and cut the excess dough on top. Slice a knife outward to cut it off. Be careful not to hold the bottom of the pan when using a pan with a removable bottom! You can do it on a table when using a large pan.
- Dock the bottom with a fork. It prevents the dough from rising up as it's baked in the oven. Dock well for it to work!
- Watch the video tutorial or read this post to learn how to fit the dough into other types of tart pans and rings.


Bake the crust.
- Chill the dough before baking. The dough slides down a little bit more in the oven when baking it while it is soft. You can also rest the gluten in the flour by doing so, which leads to a more even surface.
- Bake (Preheated) at 350ºF (175ºC) for 10 - 20 mins (or longer, depending on the size) until golden brown. Rotate the baking sheet toward the end if necessary to brown them evenly.
- They are more fragile while they are warm. Let them cool at room temperature before taking them out from the pans or rings.


Video
Notes
How to store the dough:
Wrap tightly and store them in the refrigerator for 4 - 5 days or up to a few months in a freezer. Upon request, the original recipe was adjusted to make the dough with just one egg. Here is the original amounts of ingredients in case you need it!:- All-purpose flour: 350g
- Powdered sugar: 150g
- Almond flour: 50g
- Salt: a few pinch
- Unsalted butter: 180g
- Egg: 70g


Penny Henwood says
Hi Aya, where did you get that wonderful rolling pin from?
Aya Caliva says
Hi! I got it a while ago at a Japanese bakery goods store. They don't sell it worldwide, but I just looked up on Amazon, and now some brands sell similar ones! They were not around until recently. I won't be able to recommend specific ones yet, since I haven't tried their products, but you can search by "Japanese plastic rolling pin". I hope that helps!!
ShelliQue says
I baked the apple hand pies as instructed and swapped this tart recipe in place of crumble topping for my peach cobbler and got RAVVVVVEEE reviews from my family. So versatile and DELICIOUS!!! Thanks, Aya! ☺️❣️
Aya Caliva says
I'm so happy to hear it!! Thank you for sharing☺️