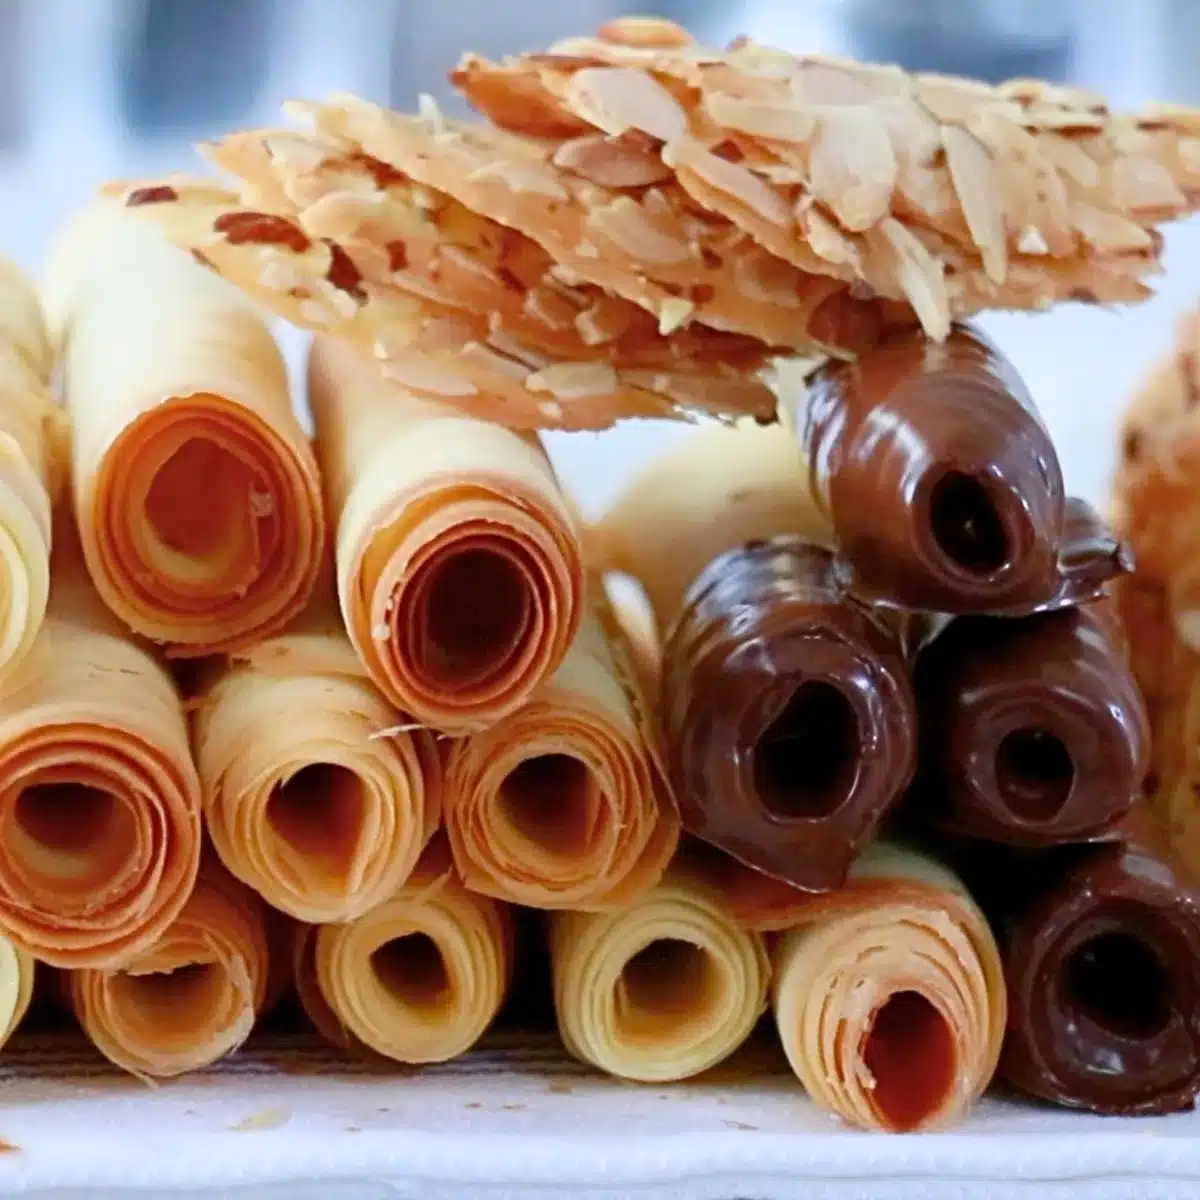
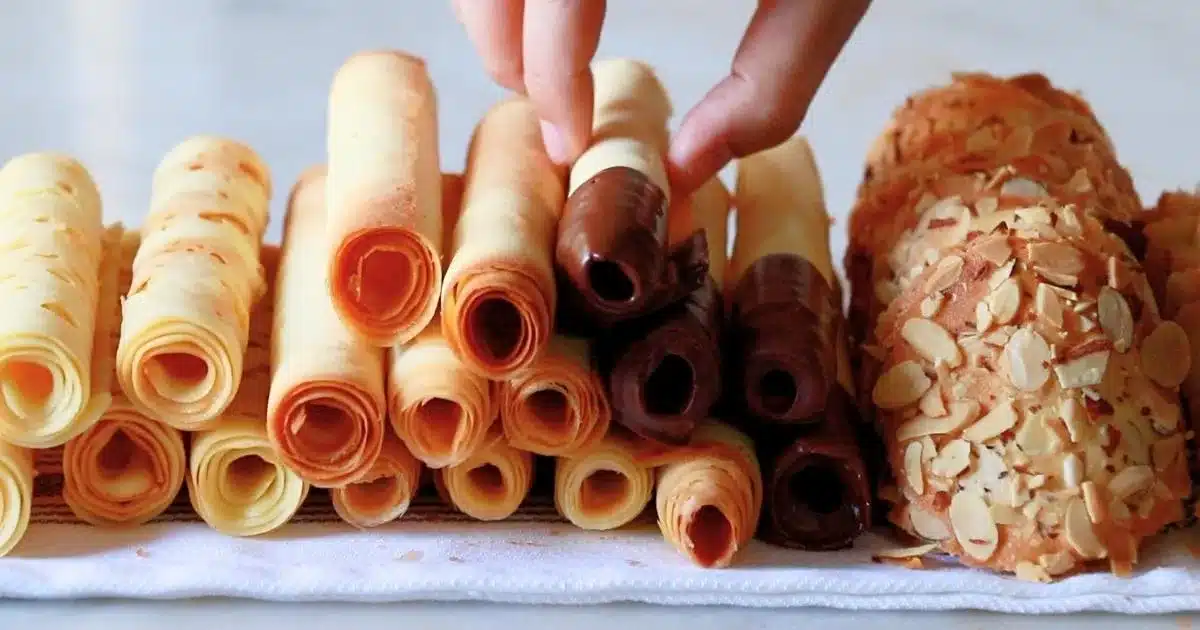
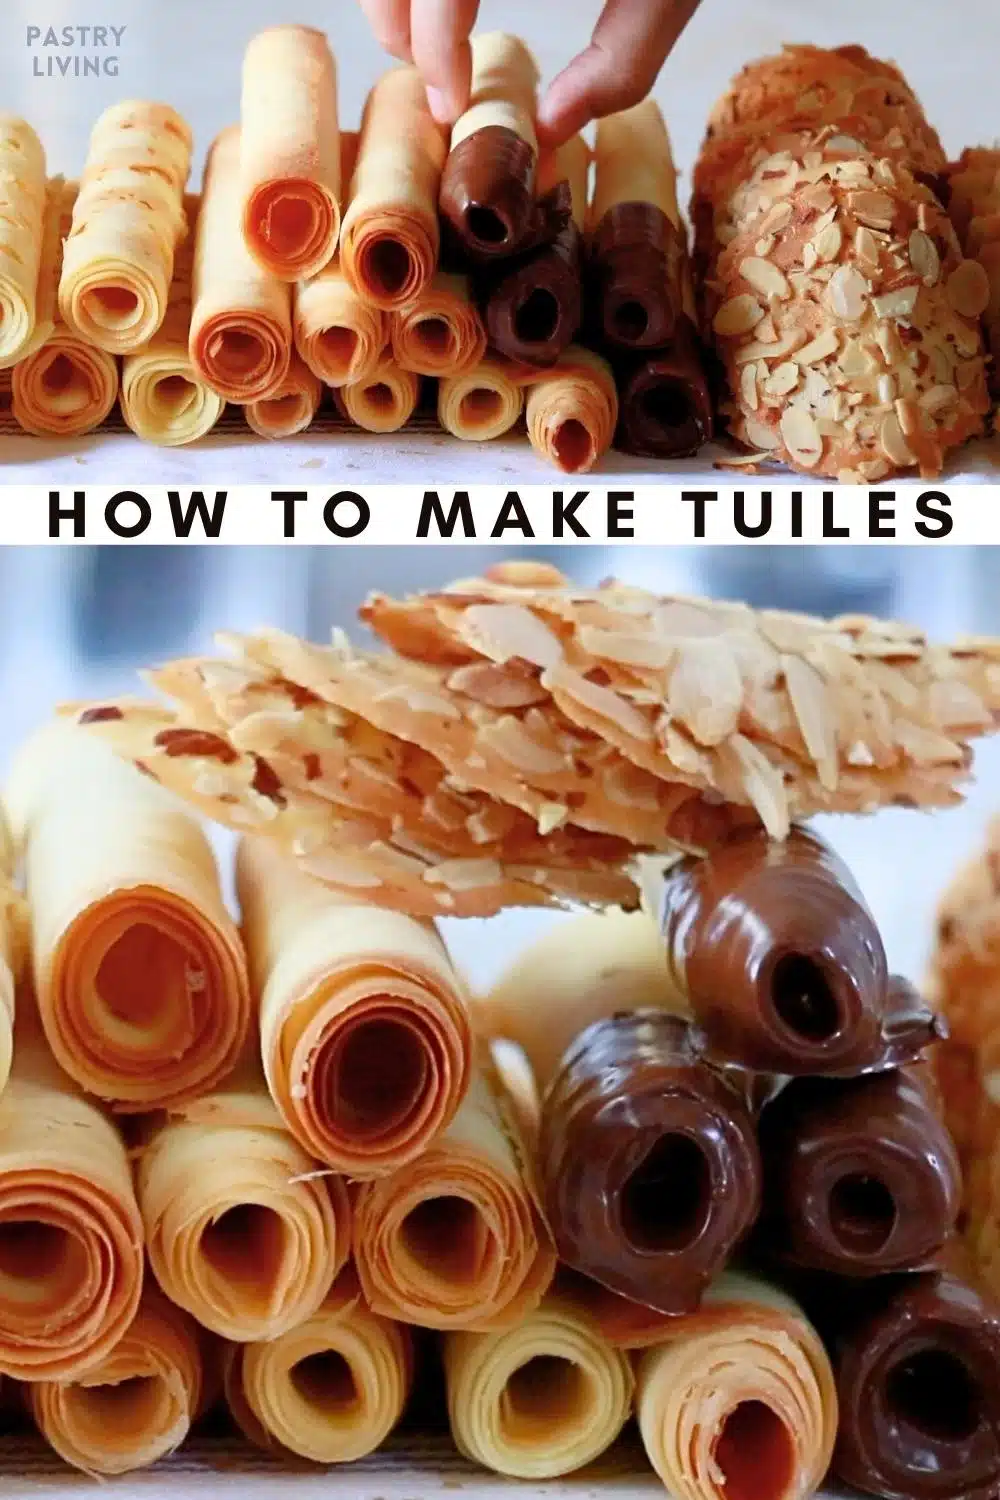
This is the only recipe you'll need to create a variety of tuile cookies in many different shapes & sizes - such as almond tuiles, cigarette cookies, tuile cups, and ice cream cones. It is so toasty & buttery, and the ultra-thin layer feels incredibly lightly crispy - truly the best tuiles I've ever had!
I'm sharing my tips & tricks and troubleshooting tips so you can make them successful at home.
📌 What Are Tuiles?
Tuiles are traditional French wafer cookies made with egg, sugar, butter, and flour as the main ingredients. The batter is spread very thinly, baked, and shaped into a desirable shape before it cools down.
Tuiles is a French word for "tiles" since the classic curved shape resembles the traditional French tiles.

The Best Tuiles
I remember eating cigarette cookies for the first time as a kid and being surprised by how delicious they were. It was a texture I'd never had before - The light crispiness, toasty smell, and sound... I loved everything about it!
Fast forward, I learned how to recreate the tuiles at home, but even better.
Here are some of the reasons I think you'll love them:
- The incredible texture: The buttery & ultra-thin cookies feel so lightly crispy and delicately break in your mouth.
- Simple steps: The cookie batter can be made as fast as 5 minutes!
- So versatile: You can enjoy them in any shape and size. Check out toward the end of the post to read the variation ideas.
- Easier to shape: The tuile cookies are slightly easier to bend while hot due to the addition of almond flour. It also adds an amazing flavor!
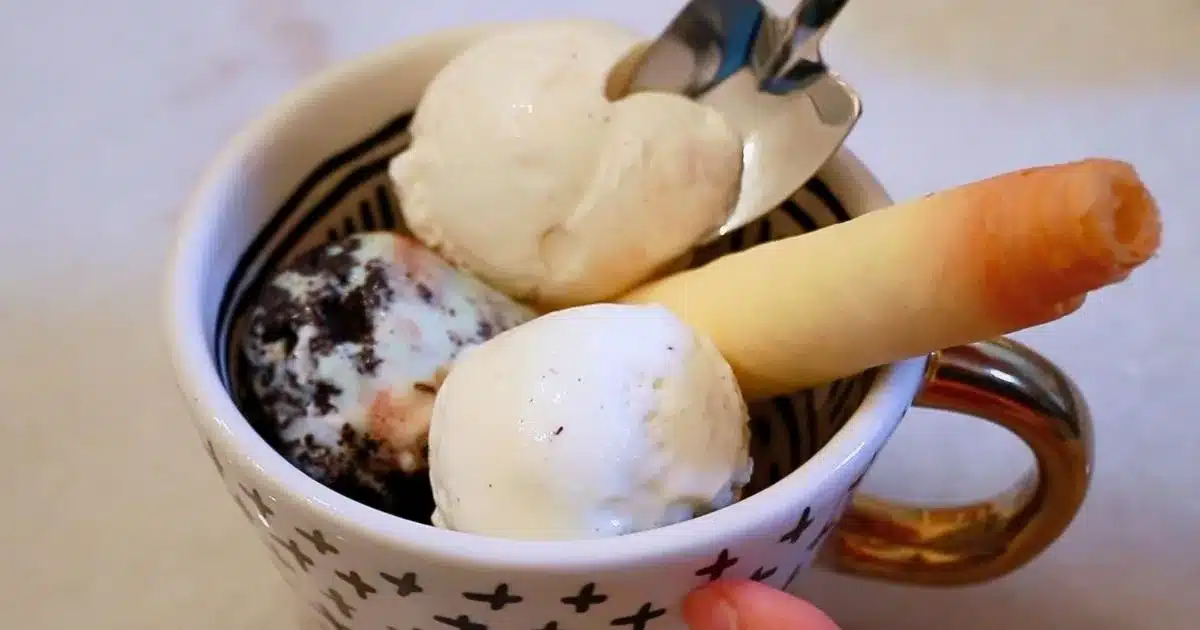
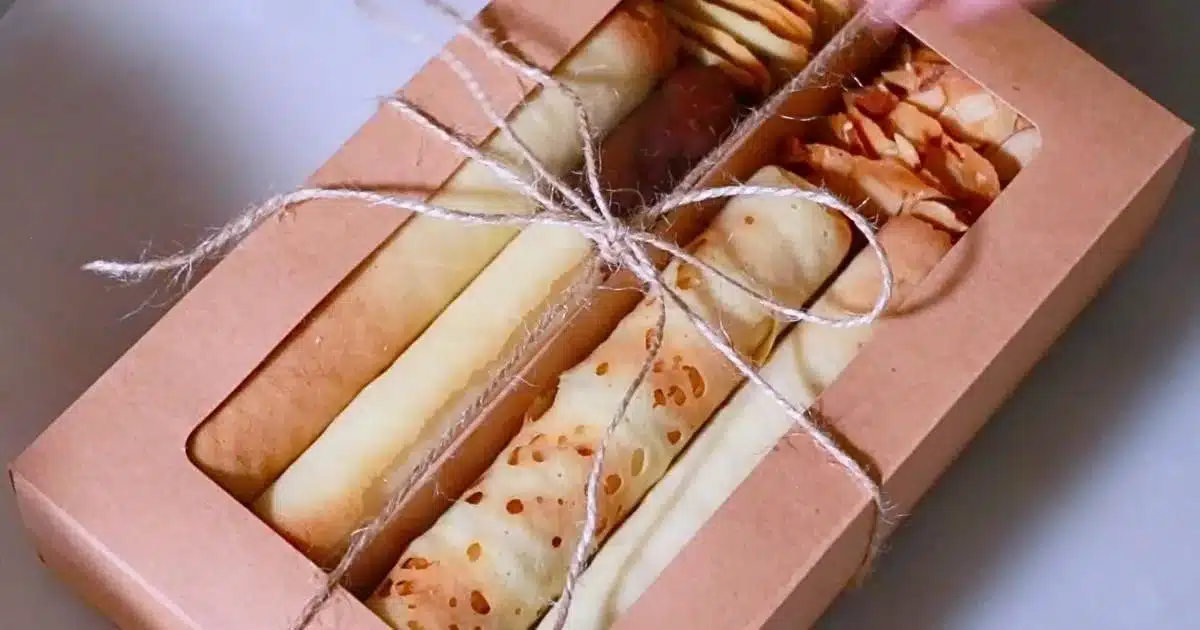
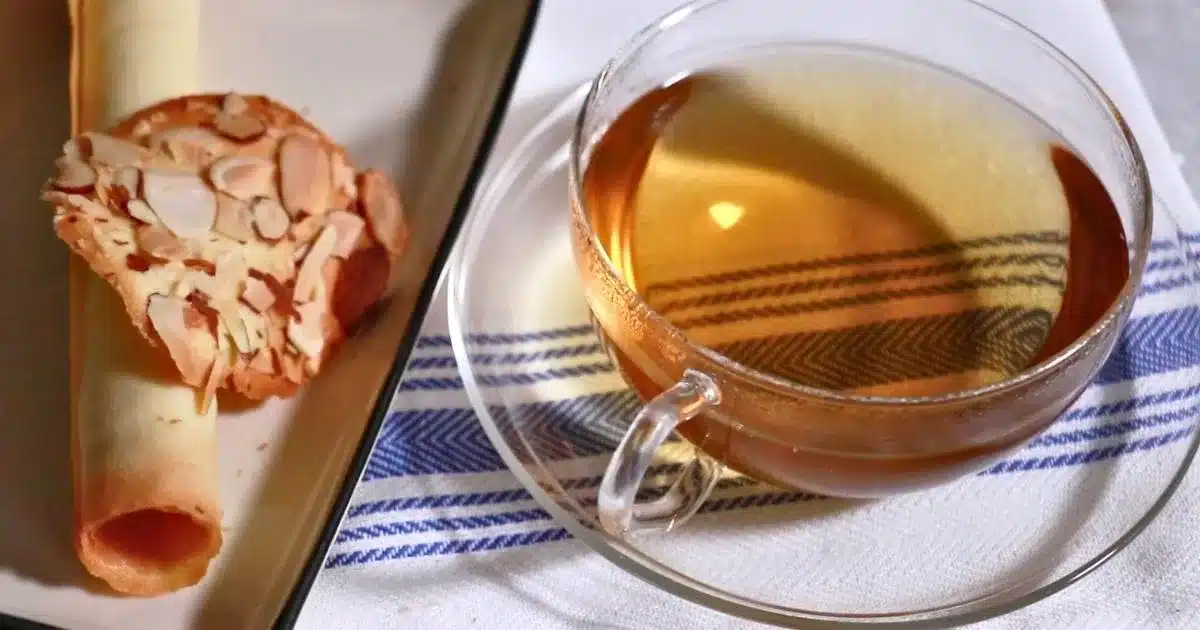
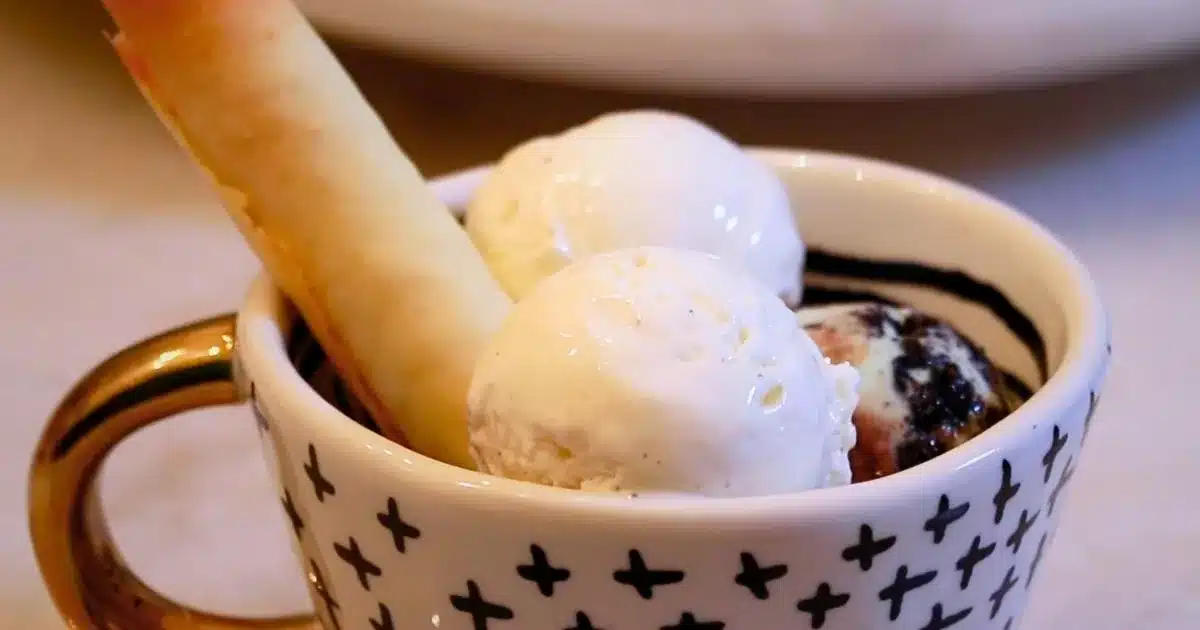
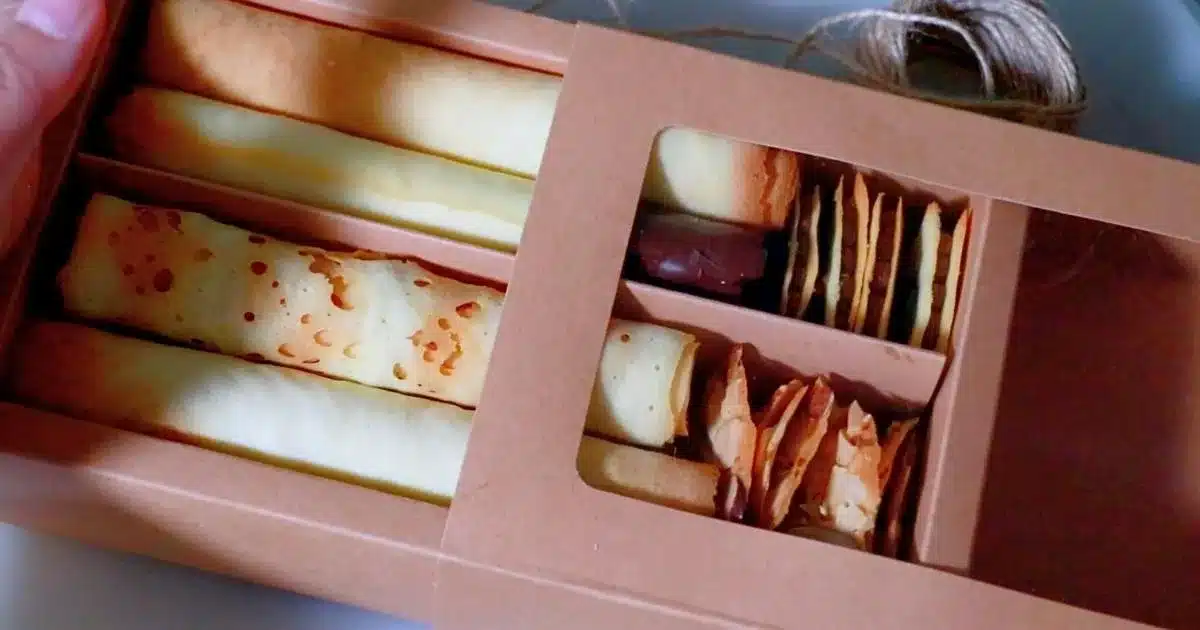
The delicate cookies taste amazing with a cup of tea/coffee or scoops of ice cream. It'll also make a wonderful cookie box that is not like others.
📖 Even though the recipe is pretty simple, the texture can change drastically depending on how you make it. In this post, you’ll learn important tips to spread it, roll it, store it, and everything you need to know to make the best homemade tuiles.
📌 What's In Tuiles?
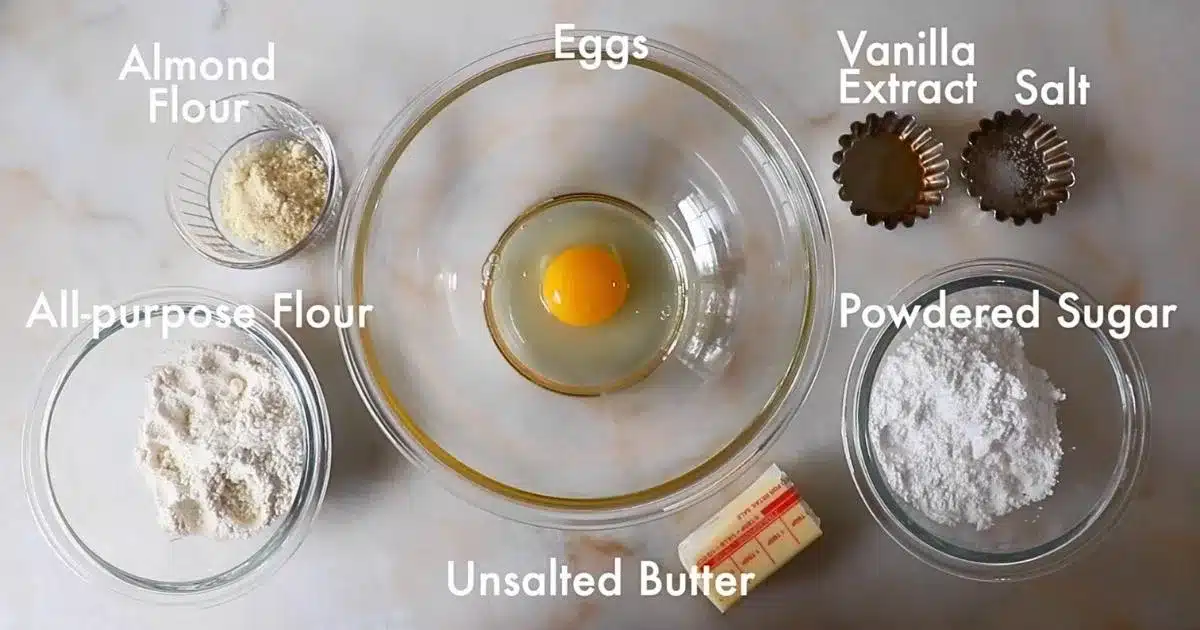
You can make tuiles with 7 simple ingredients you can find at any grocery store.
- Whole egg: Tuiles are often made with only egg whites. Adding egg yolks makes the texture slightly flakier and the flavor richer.
- Vanilla extract: You can omit it or try a different flavor.
- Powdered sugar: The texture gets lighter with powdered sugar than granulated sugar.
- Salt: The cookie tastes much better with a little bit of saltiness!
- Unsalted butter (melted): Butter creates amazing light crispiness.
- Almond flour: Almond flour helps roll cookies a bit easier (due to less gluten in the batter). Alternate it with all-purpose flour if you want to avoid using it.
- All-purpose flour: Use regular all-purpose flour.
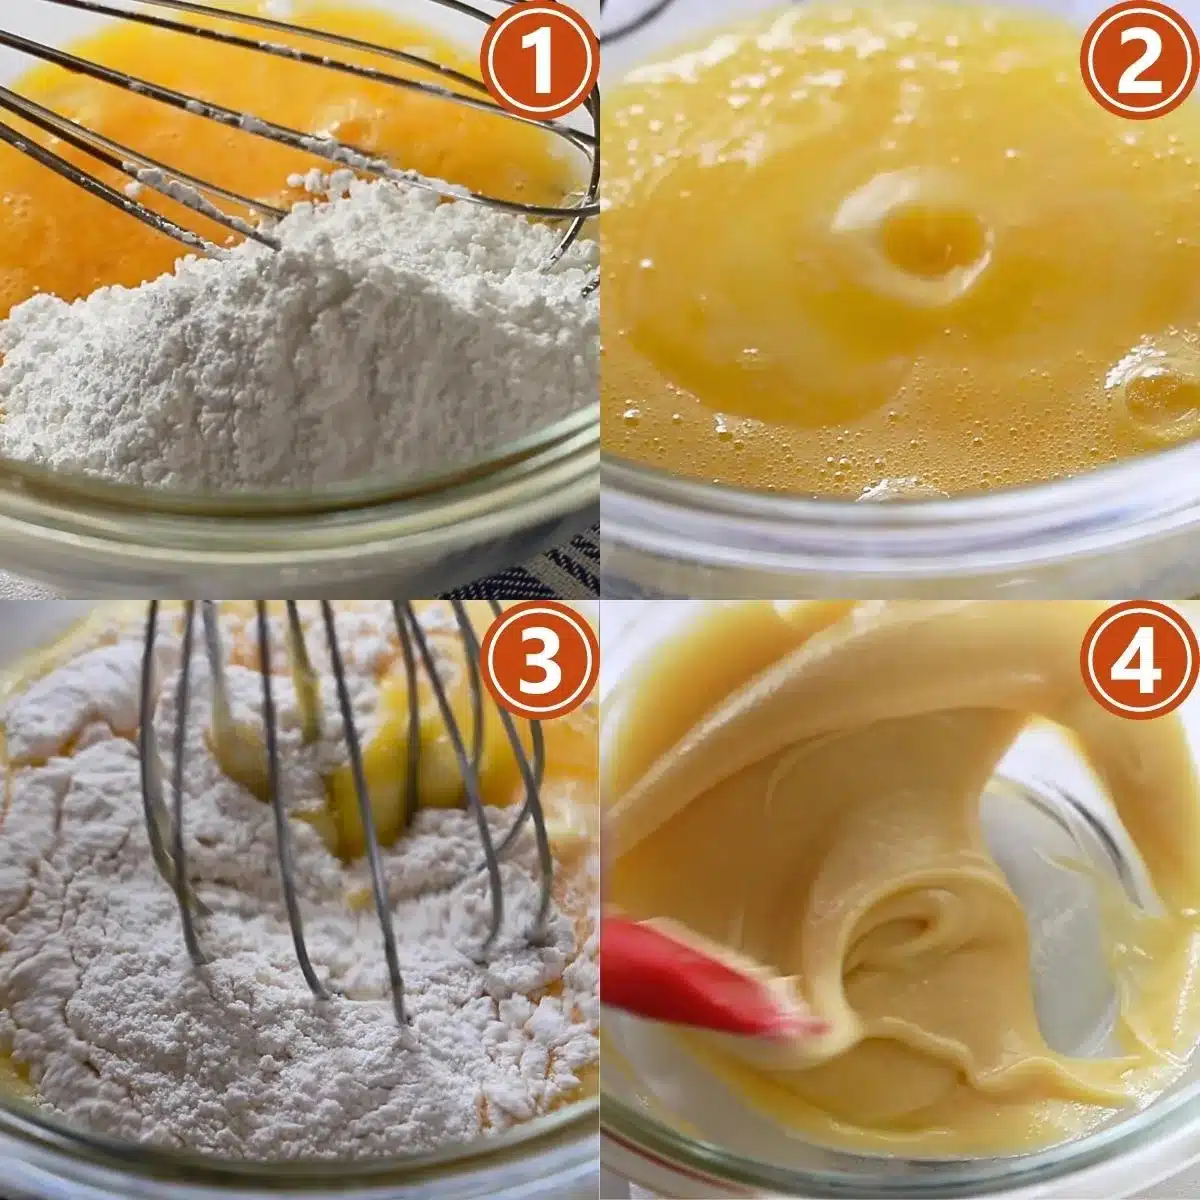
📌 4 Simple Steps To Make Basic Tuile Batter
- Mix whole egg, vanilla, salt, and powdered sugar with a whisk until smooth.
- Add warm melted butter and mix well.
- Add almond flour and all-purpose flour and mix until smooth. Clean the bowl and spatula with a rubber spatula at the end to ensure it's evenly incorporated.
- Chill the batter in the fridge to make it firmer. (1 hour - ) The chilled batter can be spread more evenly.
📌 Almond Tuiles

5 Steps
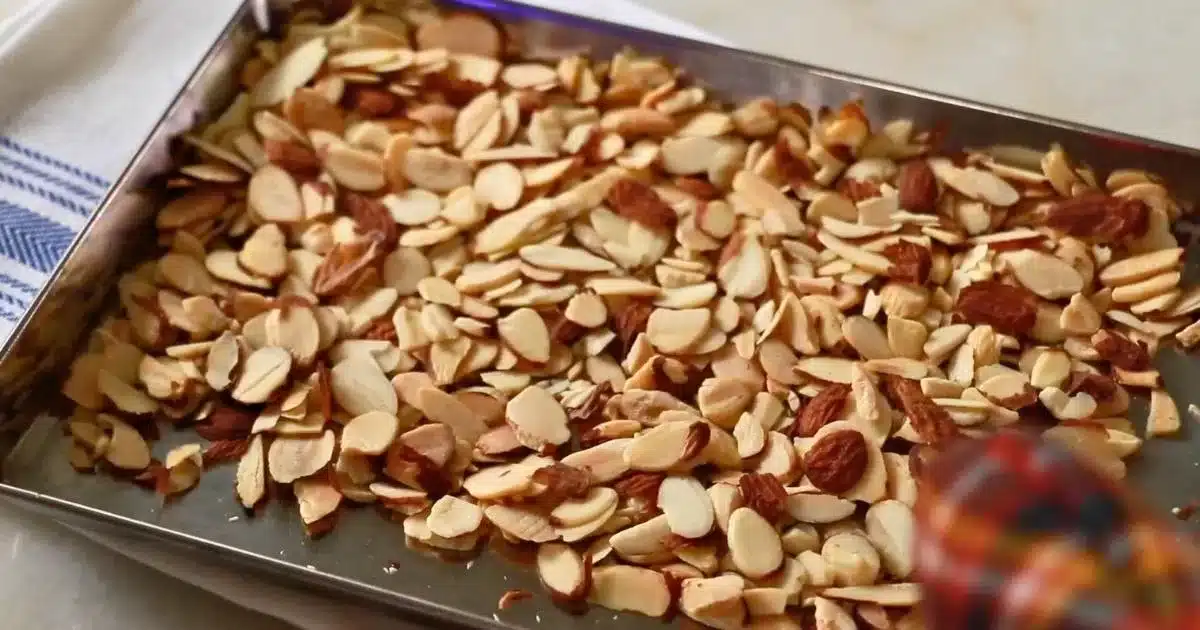
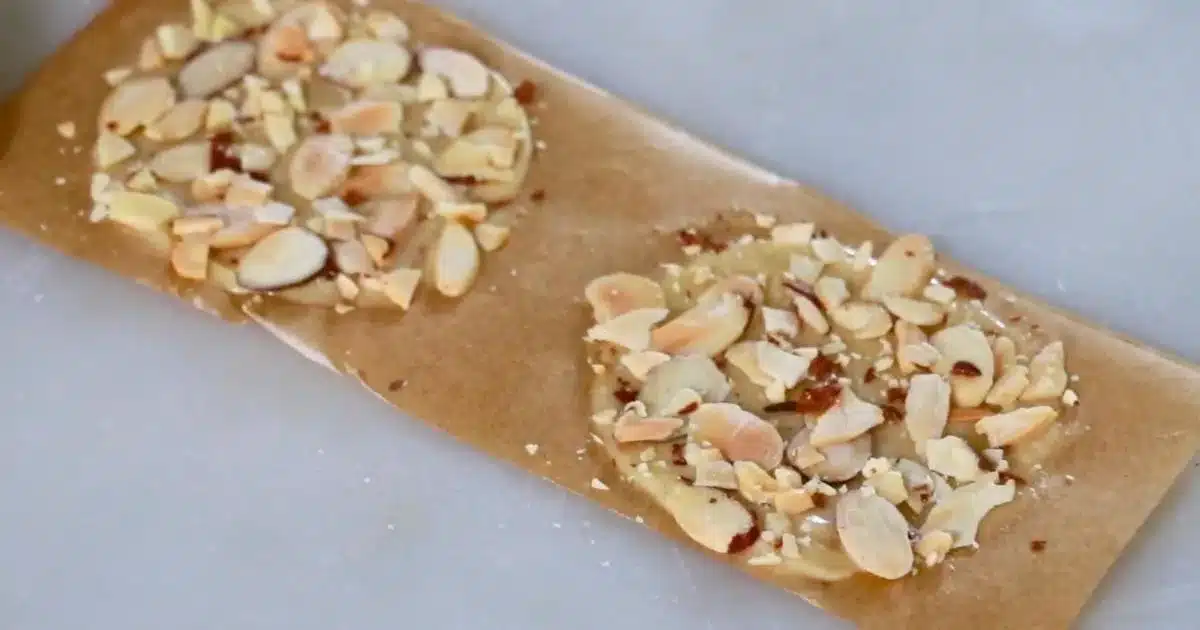
- Toast sliced almonds until they are lightly golden brown: It is important to use toasted almonds to create a crispy texture.
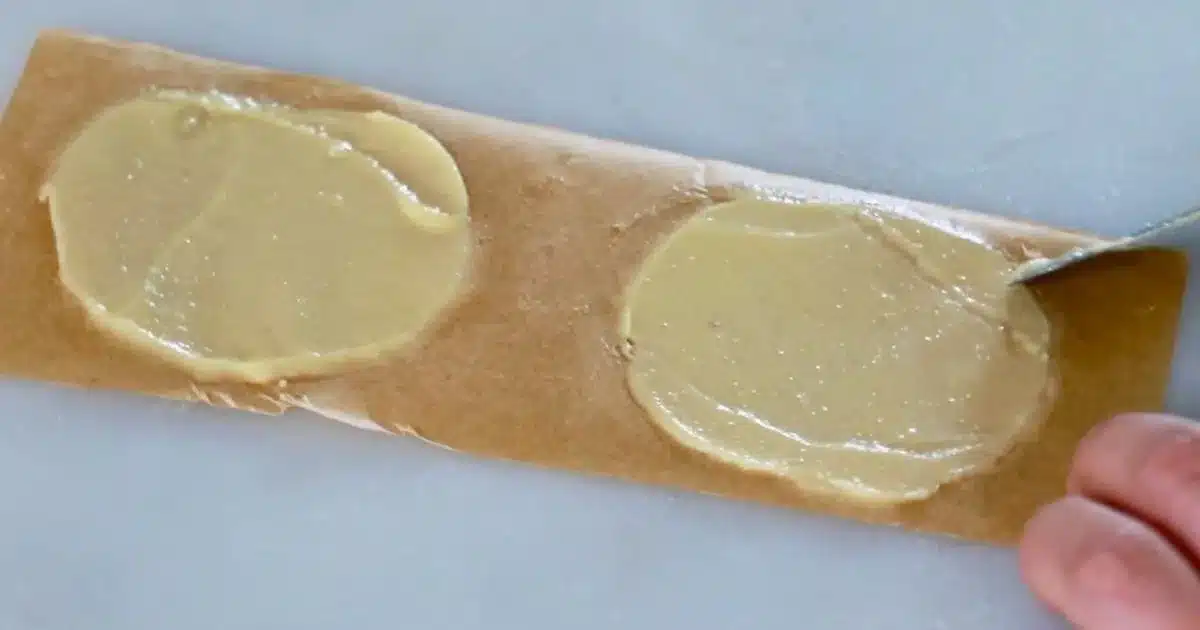
- Spread the chilled tuile batter thinly on parchment paper with a small cake spatula, creating a circle shape: You can create a circle template sheet with parchment paper or trim the edges with a cake spatula after spreading the batter. Don't be afraid to spread it thinly - It creates a better crispiness.
- Attach the toasted almonds all over the surface.
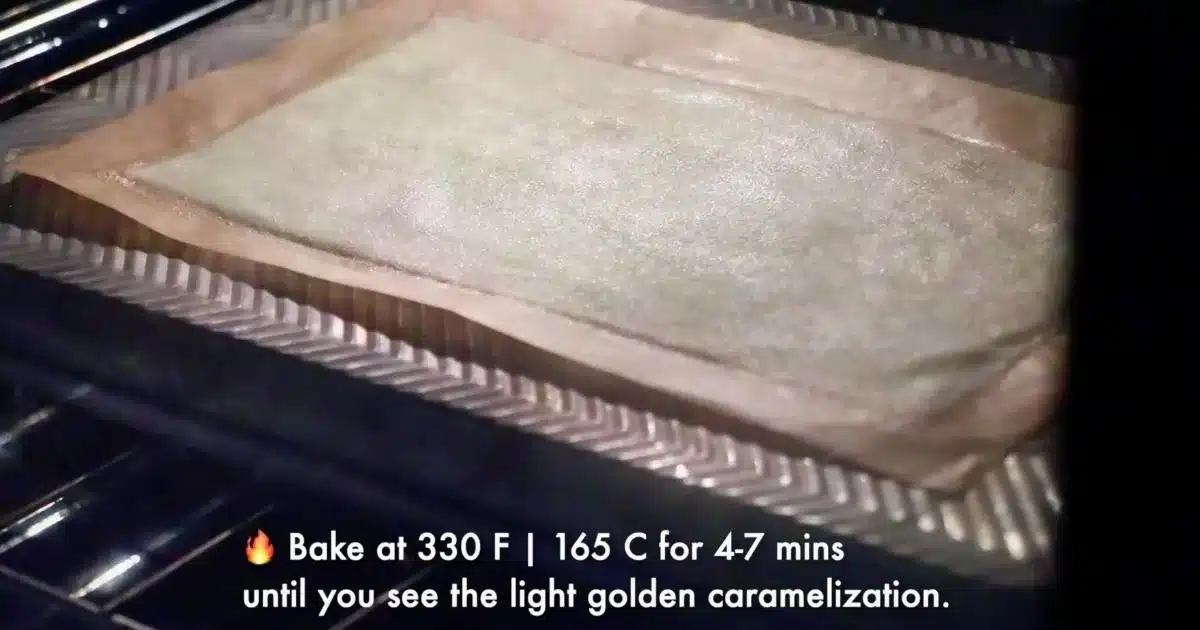
- Place the parchment paper on a baking sheet and bake at 330ºF (165ºC) for 4 - 7 mins until the edges are lightly golden brown. (Do not rely on the time and judge with the look. Adjust the baking time, depending on the size and thickness of the cookies, the oven, etc.)
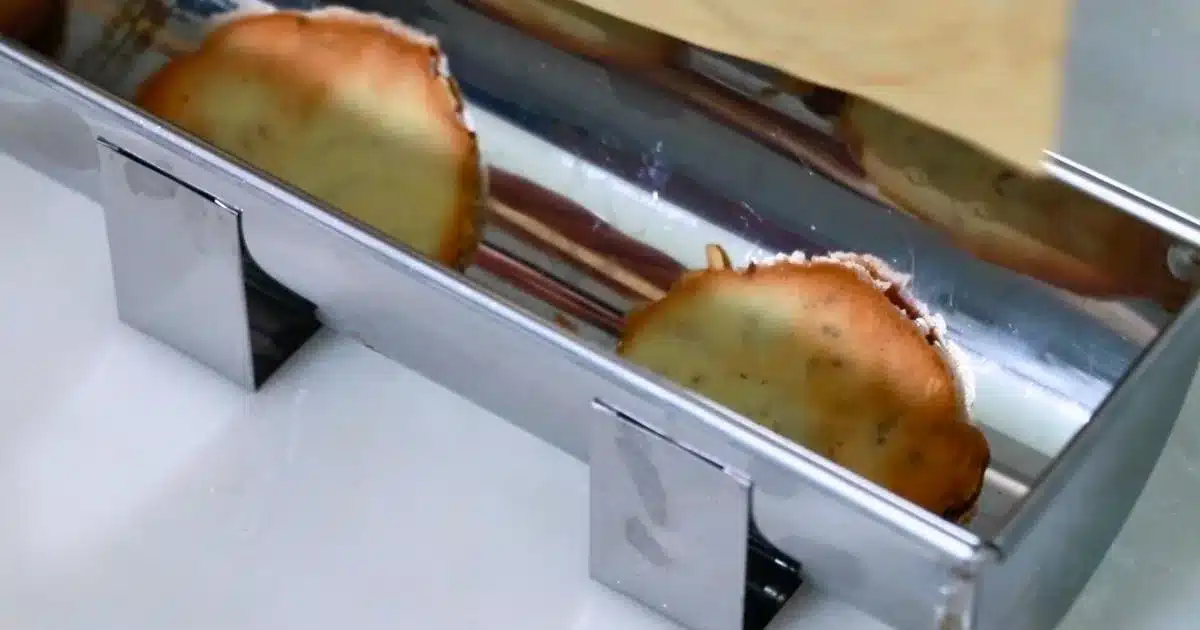
- Curl the hot cookies: If you want to make it curled, do so while it's still hot. Use a rolling pin or anything else curved, such as a wine bottle and curved cake mold. Remove them once cool.
📌 Cigarette Cookies
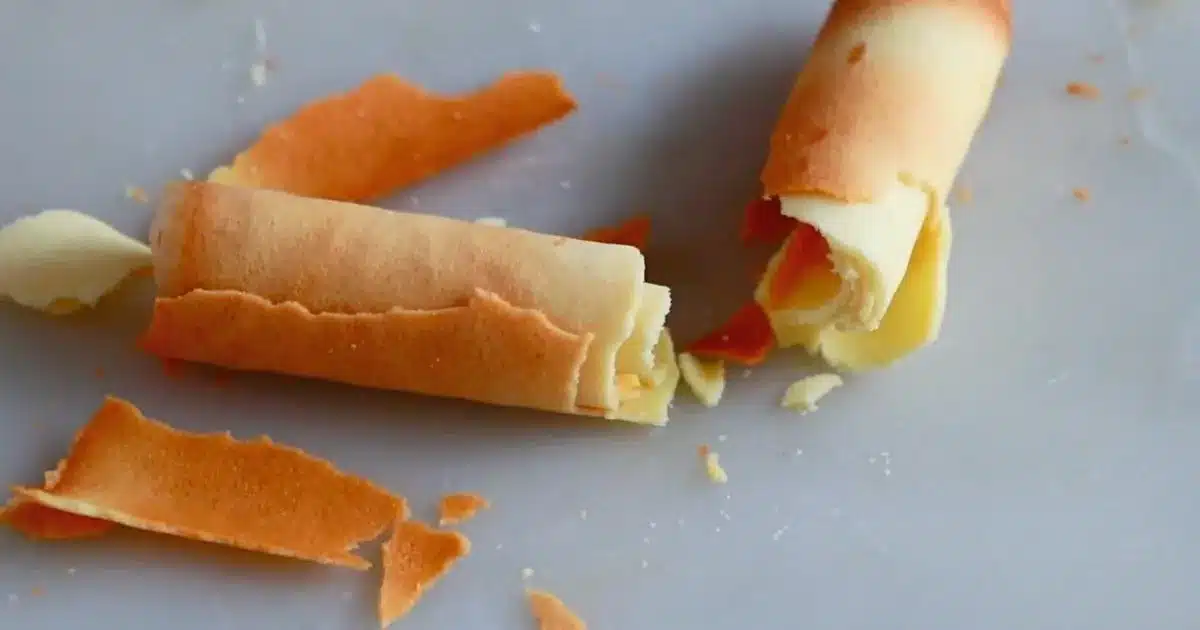
Basic cigarette cookies
3 Steps
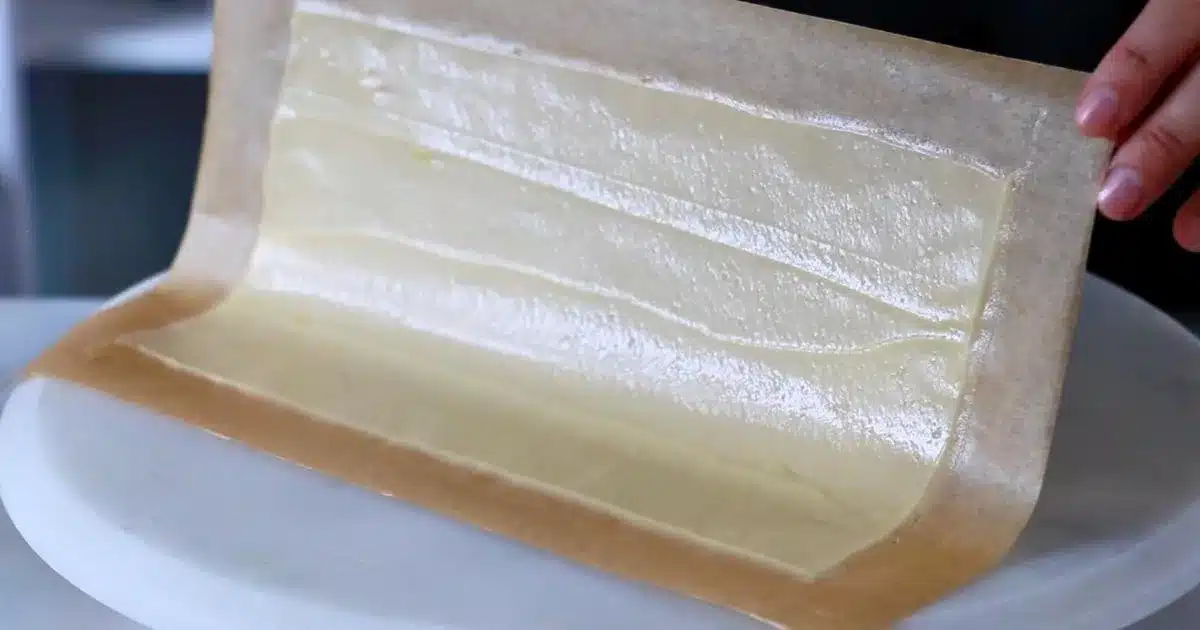
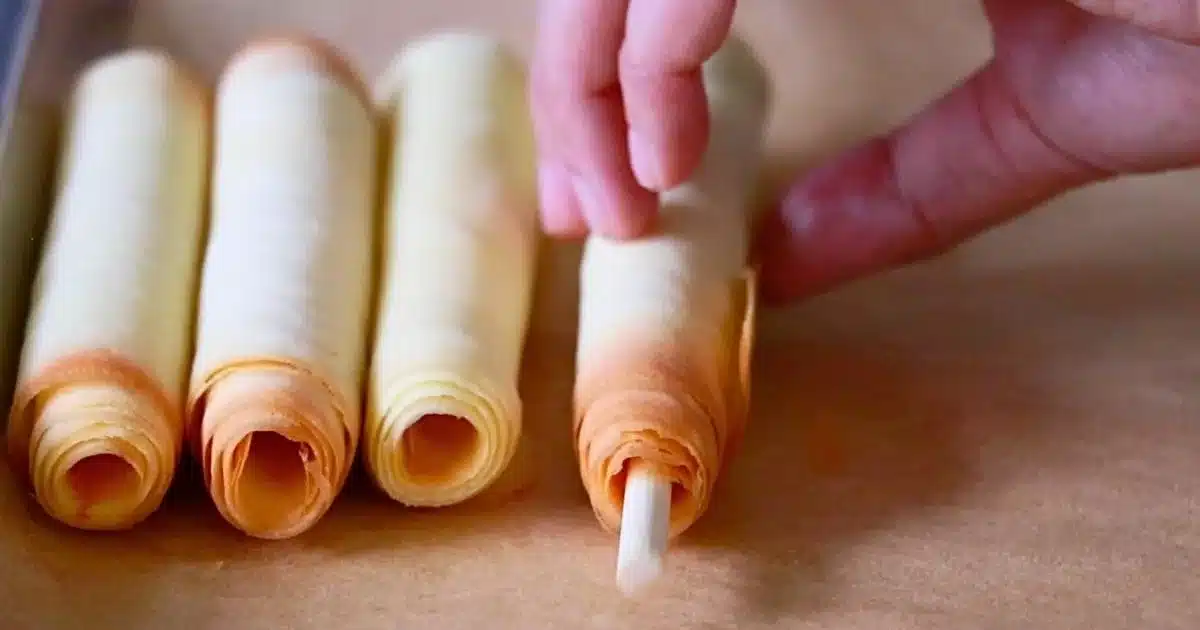
- Spread the chilled tuile batter very thinly into a desirable size and shape on parchment paper using an offset spatula. Scrape off the edges with the spatula after spreading the batter to create sharp edges. One batch is enough to make about 5 - 6 cigarette cookies with a 5 by 10-inch rectangle.
- Place the parchment paper on a baking sheet and bake at 330ºF (165ºC) for 4 - 7 mins until the edges are lightly golden brown. (Do not rely on the time and judge with the look. Adjust the baking time, depending on the size and thickness of the cookies, the oven, etc.)
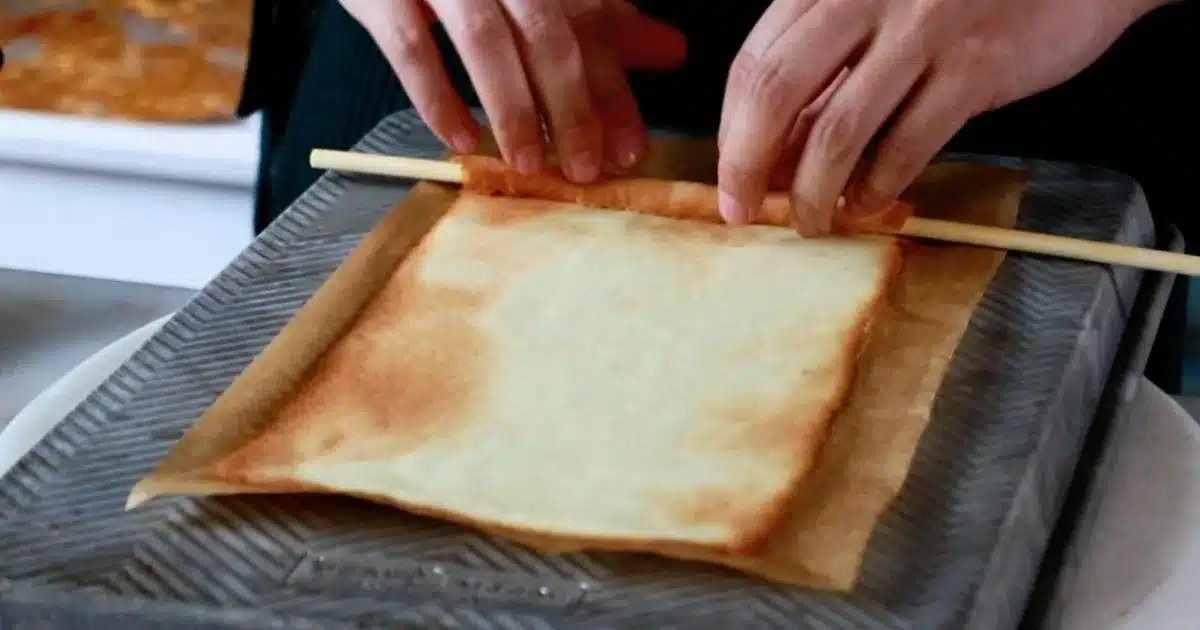
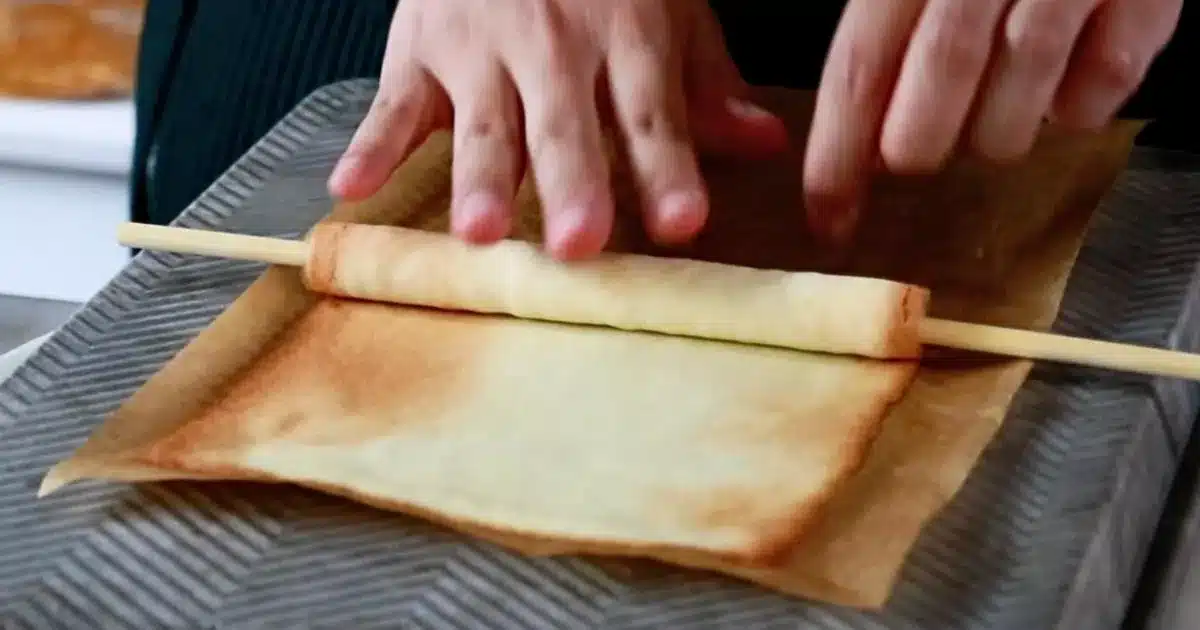
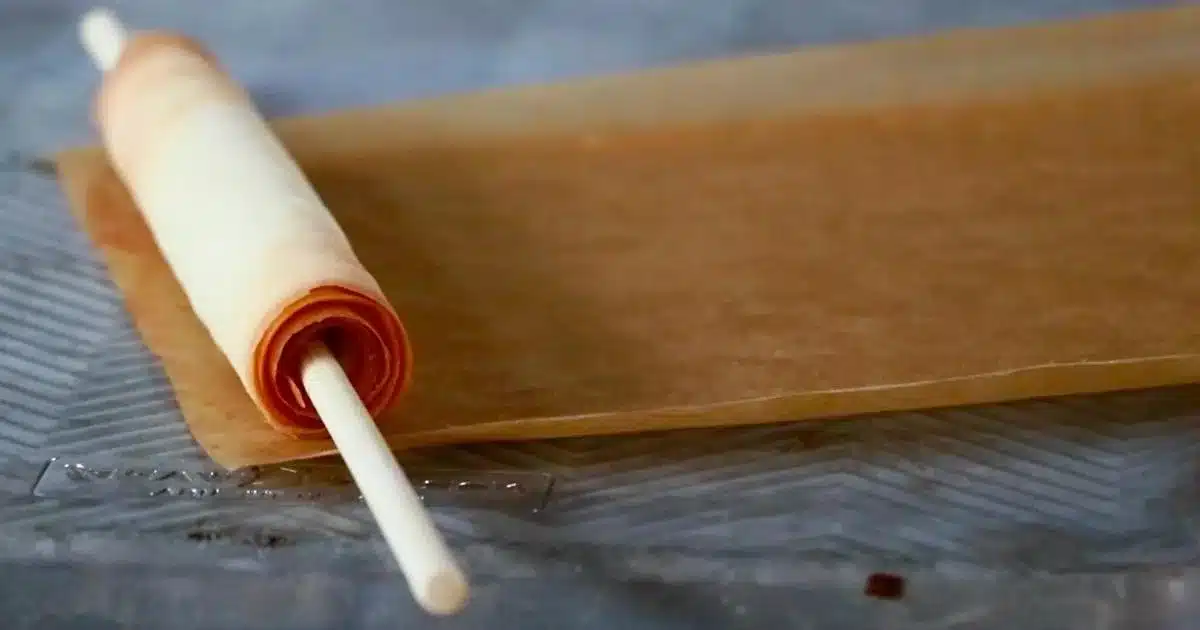
- Roll it while hot: You can roll it more easily by using a pole, such as a wooden dowel rod, or the handle of a wooden spoon. The cookie is soft while very hot, but it'll get crispy quickly as it cools down. That is why it's extremely important to start rolling it when it's just out of the oven. I'm touching the cookie directly because my skin is not so sensitive. BUT! This could be very hot for many people. I advise you to wear gloves to protect your hands so you don't have to burn yourself. Take off the pole once it cools enough.
Lace tuiles
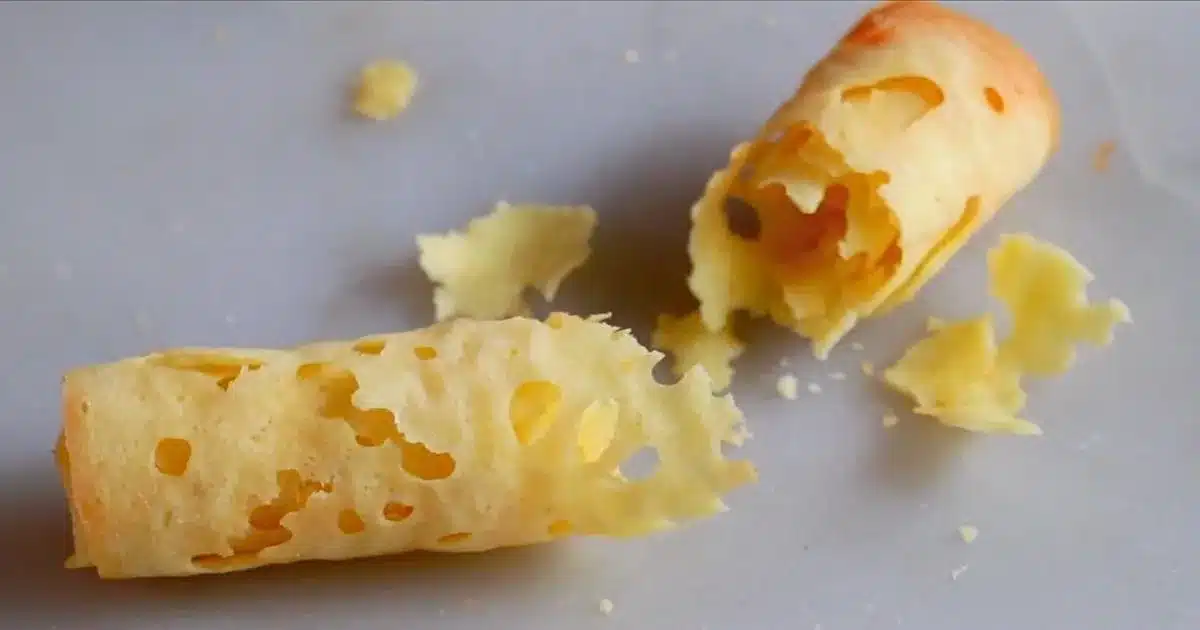
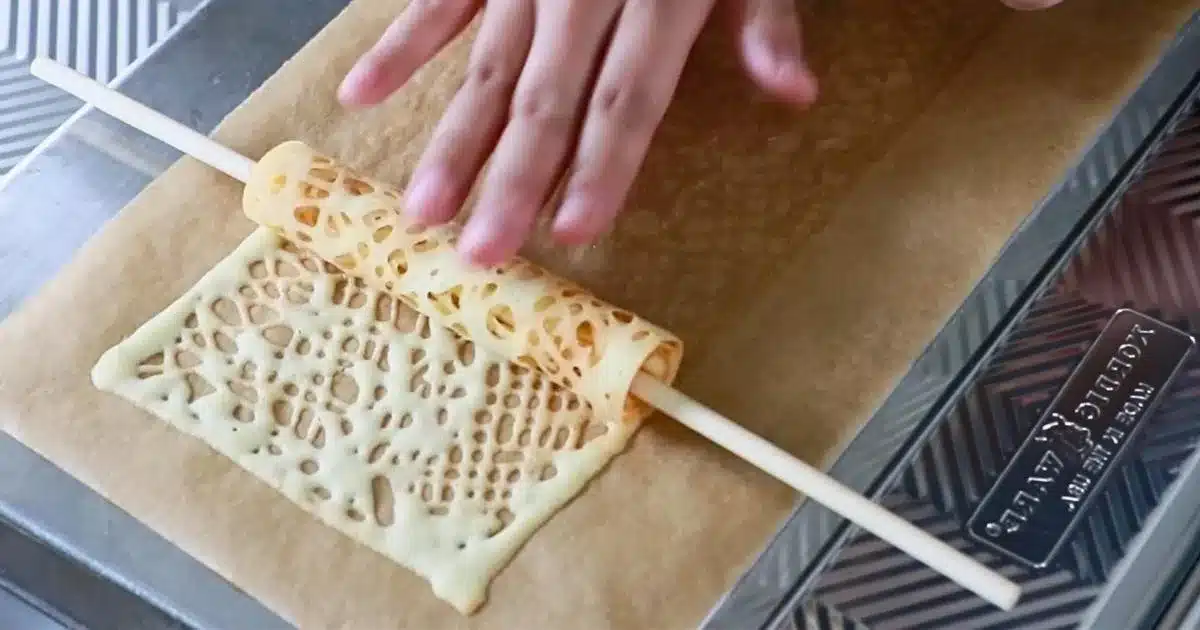
Try lace cigarette cookies if you want to have more fun with the batter!
3 Steps
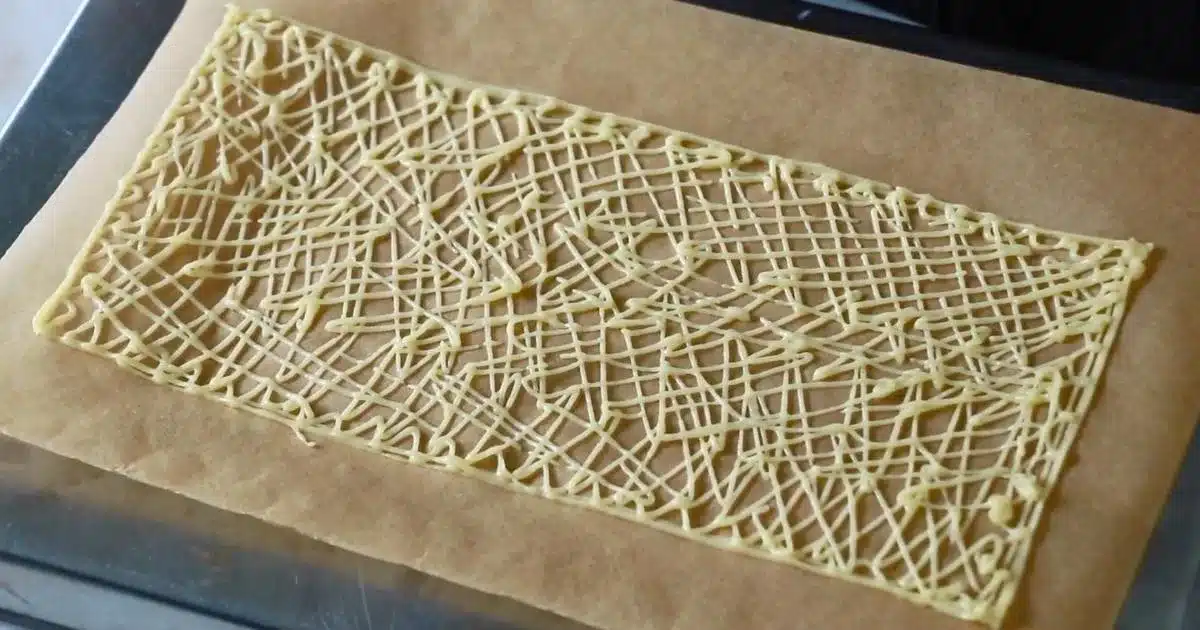
- Randomly pipe the tuile batter into a rectangle shape using a piping bag or ziplock bag. Do not chill the batter when making lace tuiles since the batter does not come out easily when it's chilled! Ensure there are no huge gaps between the lines.
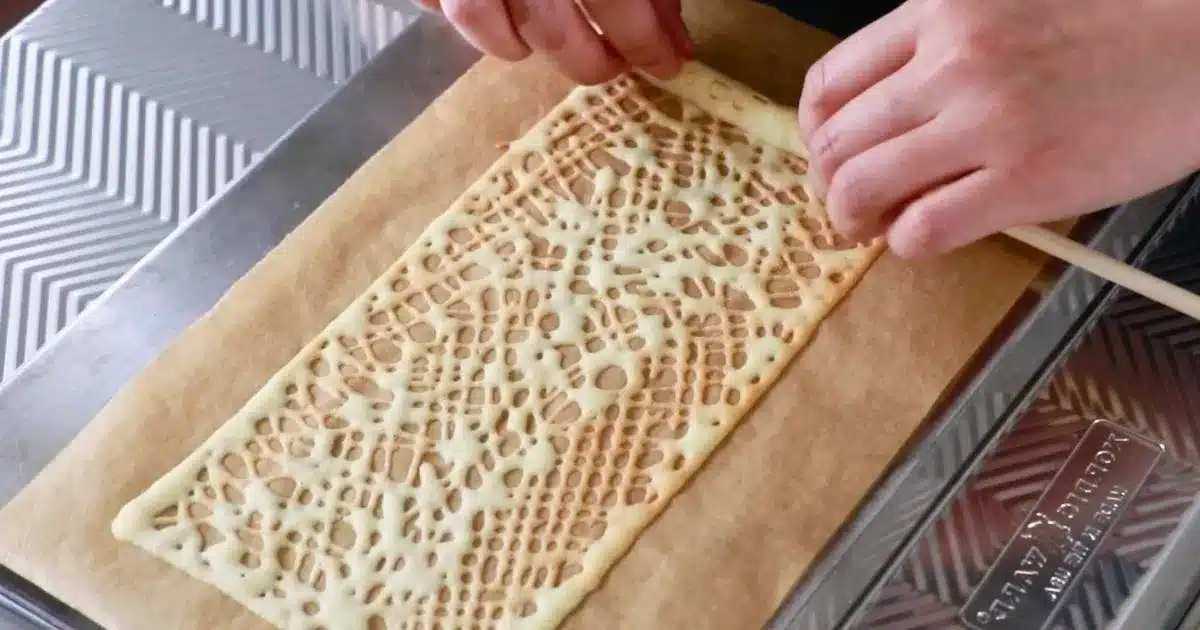
- Bake the same way as the basic cigarette cookies.
- Roll it: Be careful not to add too much pressure when rolling it since it is a lot more fragile than the basic cigarette cookie. Take off the pole once cools.

Chocolate covered tuiles
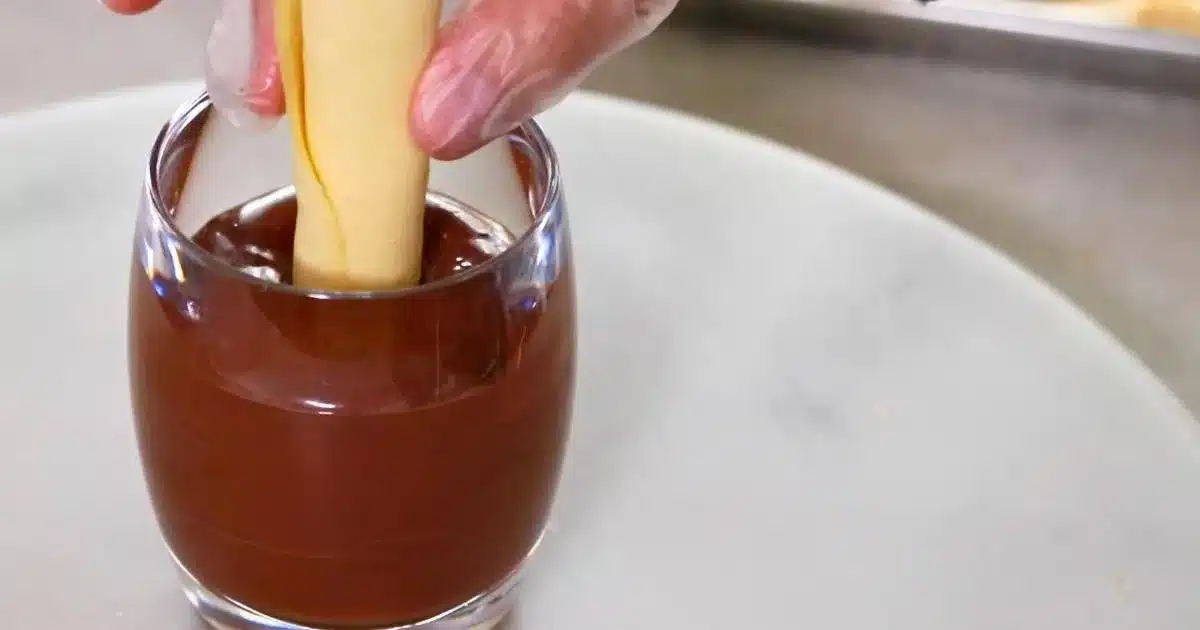
As an option, dip the tuiles in melted chocolate! I LOVE it so much. The thin layer of chocolate goes perfectly with the crispy tuiles.
You can try one of the two ways to prepare the chocolate:
- Melt chocolate chips and add some oil (about 5% of the whole chocolate) to make it looser.
- Temper chocolate: Check out my chocolate truffle tutorial for one of the easiest ways to temper chocolate.
Dip the cookie in the chocolate and toss gently to remove the excess. Set it aside at room temperature or chill them in the fridge until the chocolate sets.

📌 My 5 Biggest Tips For Perfect Tuiles
Here are my 5 tips to make tuiles taste truly exceptional.
1. Spread very thinly.
The most important thing when making tuiles is to spread it VERY thinly, about one millimeter or less. Depending on how thick it is, the texture of tuiles changes drastically. I can not stress that enough, especially for cigarette cookies! I used to worry about spreading it too thin but found it was not necessary. Rolling it thin makes it easier for you to bend and roll it. It cracks much easier while rolling when it's thicker.
2. Start rolling immediately after it's out of the oven.
The cookie is soft while very hot, but it'll get crispy quickly as it cools down. That is why it's extremely important to start rolling it when it's just out of the oven.
You might not be able to roll perfectly on a first try but practice sometimes, and you'll eventually get used to the movement!
3. Roll on top of the hot baking tray.
This helps hugely to keep your cookies hot while you are rolling them. I do not recommend rolling it on top of a kitchen counter or table since it cools down quickly and gets harder before you finish rolling it.
When using a baking sheet with a rim, flip it and place the parchment paper on top of it before baking the tuile, so that you can start rolling it as soon as it's out of the oven. Wear gloves if it feels too hot!
4. Use parchment paper.
With parchment paper, you can peel off the cookie much easier than with a silicone mat when they are super thin. The tuiles got stuck to a mat in the past, depending on the brand or when they are not brand new.
You can reuse the parchment paper many times by wiping off the excess oil on the surface.
5. Do not bake many at once when you want to roll or curve them.
This is a tip, especially for cigarette cookies or when you want to roll them. The thin tuiles cool down quickly, so I recommend baking them one at a time or putting them in the oven with a 1 - 2 minute time lag so that you can keep producing within a shorter time. If the tuile cools down too much to bend, heat it in the oven again, and it'll give back some of the flexibility.
📌 Other Variations For Tuiles
You can arrange the basic tuiles in various ways by shaping them differently or adding different ingredients.
- Tuile basket: Make a cookie plate to assort fresh fruits, mousse, ice cream, etc.
- Ice cream cone or cup: Use them as homemade ice cream cones or cups to excite your kids & family!
- Garnish: Make spirals or unique shapes and use them as a garnish for plated desserts.
- Toppings: Try different toppings, such as coconut, other types of nuts, and sesame seeds.
- Extracts: Try different flavors, such as almond extract.
📌 How To Store Tuiles
Store them in an airtight container in the fridge or at room temperature.
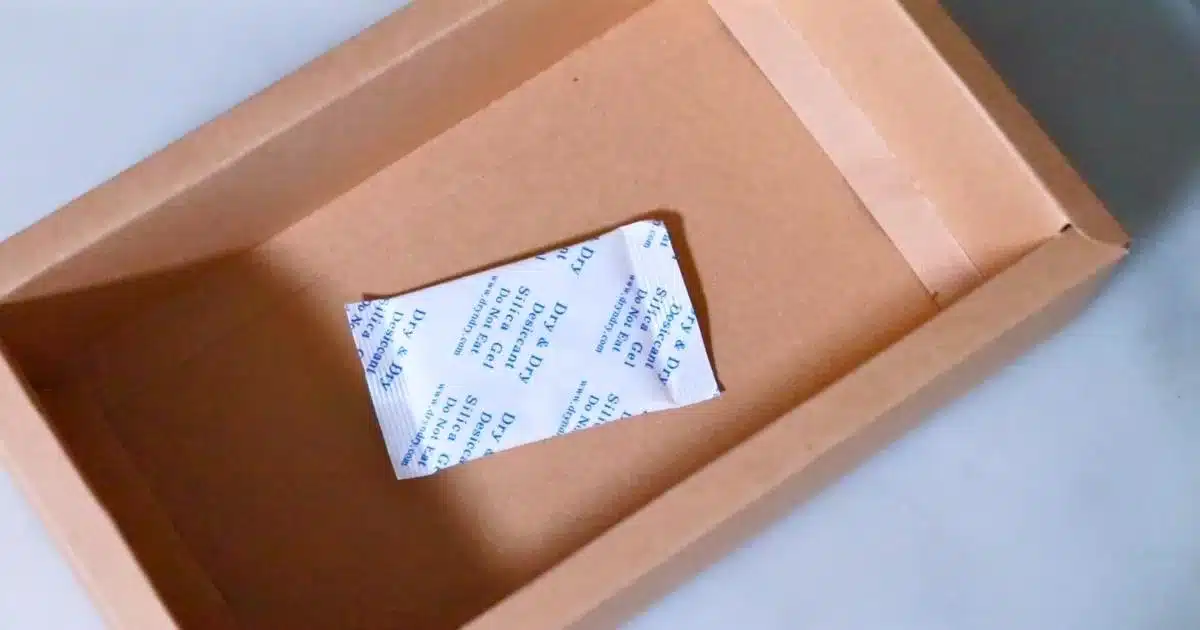
Moisture is their enemy! - Use silica gel.
I recommend eating it right after it's made to enjoy the most crispy texture. It'll slowly lose its crispiness as it sits for hours. To solve the issue, I highly recommend storing them with a silica gel. Put one in a box when gifting the tuiles. Silica gel soaks up all the moisture, keeping the cookies nice and crispy for days.
The cookie will last at least one week (especially with a silica gel) but consume it sooner for the best taste.
📌 Frequently Asked Questions
Why are my tuiles not crispy?
The 2 most common causes:
1. Tuiles were not baked long enough: Bake the cookies until you see the light golden caramelization around the edges.
2. The batter was spread too thick or uneven: Related to cause 1, it'll be harder to bake them enough when the batter is spread thick or uneven.
Spread very thinly and bake until you see the caramelization. It should fix the issue!
Can I cut off almond flour from the recipe?
Yes. Almond flour helps to roll cookies more easily, but you can alternate it with all-purpose flour if you want to avoid using it.
Can I make the tuile batter ahead and use it later?
Yes! Cover the surface with plastic wrap directly so it does not get dried, and store it in the fridge. Use it within 4 - 5 days.
📌 VIDEO: Watch How To Make It!
Watch this video to learn how to make classic tuile visually and better understand each step!
Don't forget to subscribe if you liked it😉
📌 More Cookie Recipes
If you love cookies, also consider trying other delicious cookie recipes!


📌 Printable Recipe
💬 If you loved this recipe, please share your feedback on this post! I always love hearing how you enjoyed it with your friends and family.

Best Tuiles
Equipment
- Bowl
- Whisk
- Spatula
- Small offset spatula
- Parchment paper
- Baking sheet
- Wooden dowel rods or something to roll cookies on
- Silica gel optional - to store it
Ingredients
Tuile batter
- 50 g (1 egg) Egg
- ⅛ teaspoon Vanilla extract
- 50 g (⅓ cup + 1 Tablespoon) Powdered sugar
- A few pinches Salt
- 50 g (3.5 Tablespoons) Unsalted butter (melted)
- 5 g (1 Tablespoon) Almond flour
- 45 g (⅓ cup) All-purpose flour
Decoration (optional)
- Some Toasted sliced almond
- Some Dark chocolate
NOTE: For best results, measure ingredients with a scale. All recipes are designed with weighed ingredients using grams/ounces. Cup measurements (US customary units) are provided for your convenience.
Instructions
Tuile Batter
- Mix whole egg, vanilla, salt, and powdered sugar with a whisk until smooth.50 g Egg, ⅛ teaspoon Vanilla extract, 50 g Powdered sugar, A few pinches Salt
- Add warm melted butter and mix well.50 g Unsalted butter (melted)
- Add almond flour and all-purpose flour and mix until smooth. Clean the bowl and spatula with a rubber spatula at the end to ensure it's evenly incorporated.5 g Almond flour, 45 g All-purpose flour
- Chill the batter in the fridge to make it firmer. (1 hour - ) The chilled batter can be spread more evenly.
Almond Tuiles
- Toast sliced almonds until they are lightly golden brown: It is important to use toasted almonds to create a crispy texture.Some Toasted sliced almond
- Spread the chilled tuile batter thinly on parchment paper with a small cake spatula, creating a circle shape: You can create a circle template sheet with parchment paper or trim the edges with a cake spatula after spreading the batter. Don't be afraid to spread it thinly - It creates a better crispiness.
- Attach the toasted almonds all over the surface.
- Place the parchment paper on a baking sheet and bake at 330ºF (165ºC) for 4 - 7 mins until the edges are lightly golden brown. (Do not rely on the time and judge with the look. Adjust the baking time, depending on the size and thickness of the cookies, the oven, etc.)
- Curl the hot cookies: If you want to make it curled, do so while it's still hot. Use a rolling pin or anything else curved, such as a wine bottle and curved cake mold. Remove them once cool.
Basic Cigarette Cookies
- Spread the chilled tuile batter very thinly into a desirable size and shape on parchment paper using an offset spatula. Scrape off the edges with the spatula after spreading the batter to create sharp edges. One batch is enough to make about 5 - 6 cigarette cookies with a 5 by 10-inch rectangle.
- Place the parchment paper on a baking sheet and bake at 330ºF (165ºC) for 4 - 7 mins until the edges are lightly golden brown. (Do not rely on the time and judge with the look. Adjust the baking time, depending on the size and thickness of the cookies, the oven, etc.)
- Roll it while hot: You can roll it more easily by using a pole, such as a wooden dowel rod, or the handle of a wooden spoon. The cookie is soft while very hot, but it'll get crispy quickly as it cools down. That is why it's extremely important to start rolling it when it's just out of the oven. I'm touching the cookie directly because my skin is not so sensitive. BUT! This could be very hot for many people. I advise you to wear gloves to protect your hands so you don't have to burn yourself. Take off the pole once it cools enough.
Lace Cigarette Cookies
- Randomly pipe the tuile batter into a rectangle shape using a piping bag or ziplock bag. Do not chill the batter when making lace tuiles since the batter does not come out easily when it's chilled! Ensure there are no huge gaps between the lines.
- Bake the same way as the basic cigarette cookies.
- Roll it: Be careful not to add too much pressure when rolling it since it is a lot more fragile than the basic cigarette cookie. Take off the pole once cools.
Chocolate Covered Tuiles
- You can try one of the two ways to prepare the chocolate:1. Melt chocolate chips and add some oil (about 5% of the whole chocolate) to make it looser.2. Temper chocolate: Check out my chocolate truffle tutorial for one of the easiest ways to temper chocolate.Dip the cookie in the chocolate and toss gently to remove the excess. Set it aside at room temperature or chill them in the fridge until the chocolate sets.
Video

Notes
My 5 Biggest Tips For Perfect Tuiles
Here are my 5 tips to make tuiles taste truly exceptional.1. Spread very thinly.
The most important thing when making tuiles is to spread it VERY thinly, about one millimeter or less. Depending on how thick it is, the texture of tuiles changes drastically. I can not stress that enough, especially for cigarette cookies! I used to worry about spreading it too thin but found it was not necessary. Rolling it thin makes it easier for you to bend and roll it. It cracks much easier while rolling when it's thicker.2. Start rolling immediately after it's out of the oven.
The cookie is soft while very hot, but it'll get crispy quickly as it cools down. That is why it's extremely important to start rolling it when it's just out of the oven. You might not be able to roll perfectly on a first try but practice sometimes, and you'll eventually get used to the movement!3. Roll on top of the hot baking tray.
This helps hugely to keep your cookies hot while you are rolling them. I do not recommend rolling it on top of a kitchen counter or table since it cools down quickly and gets harder before you finish rolling it. When using a baking sheet with a rim, flip it and place the parchment paper on top of it before baking the tuile so that you can start rolling it as soon as it's out of the oven. Wear gloves if it feels too hot!4. Use parchment paper.
With parchment paper, you can peel off the cookie much easier than with a silicone mat when they are super thin. The tuiles got stuck to a mat in the past, depending on the brand or when they are not brand new. You can reuse the parchment paper many times by wiping off the excess oil on the surface.5. Do not bake many at once when you want to roll or curve them.
This is a tip, especially for cigarette cookies or when you want to roll them. The thin tuiles cool down quickly, so I recommend baking them one at a time or putting them in the oven with a 1 - 2 minute time lag so that you can keep producing within a shorter time. If the tuile cools down too much to bend, heat it in the oven again, and it'll give back some of the flexibility.How to store it:
Store them in an airtight container in the fridge or at room temperature. I recommend eating it right after it's made to enjoy the most crispy texture. It'll slowly lose its crispiness as it sits for hours. To solve the issue, I highly recommend storing them with a silica gel. Put one in a box when gifting the tuiles. Silica gel soaks up all the moisture, keeping the cookies nice and crispy for days. The cookie will last at least one week (especially with a silica gel) but consume it sooner for the best taste.Nutrition
📌 Pin It!
Pin this tuiles recipe and many other delicious recipes on my Pinterest page!


Kara says
These cookies turned out fabulously. I even made them gluten free using King Arthur Flour’s measure for measure flour.
ayacaliva says
Thank you!! I haven't tried with gluten flour, so it is really good to know! Thank you for sharing your experience.
BRENDA CEBALLOS says
I love the recipe
ayacaliva says
Thank you!