
Learn the essential tips for making the perfect vanilla madeleines at home! The fancy look might intimidate you, but they are surprisingly so easy to make! The madeleine batter can be made quickly in 10 minutes with just one bowl. Make it ahead to bake them whenever you need!


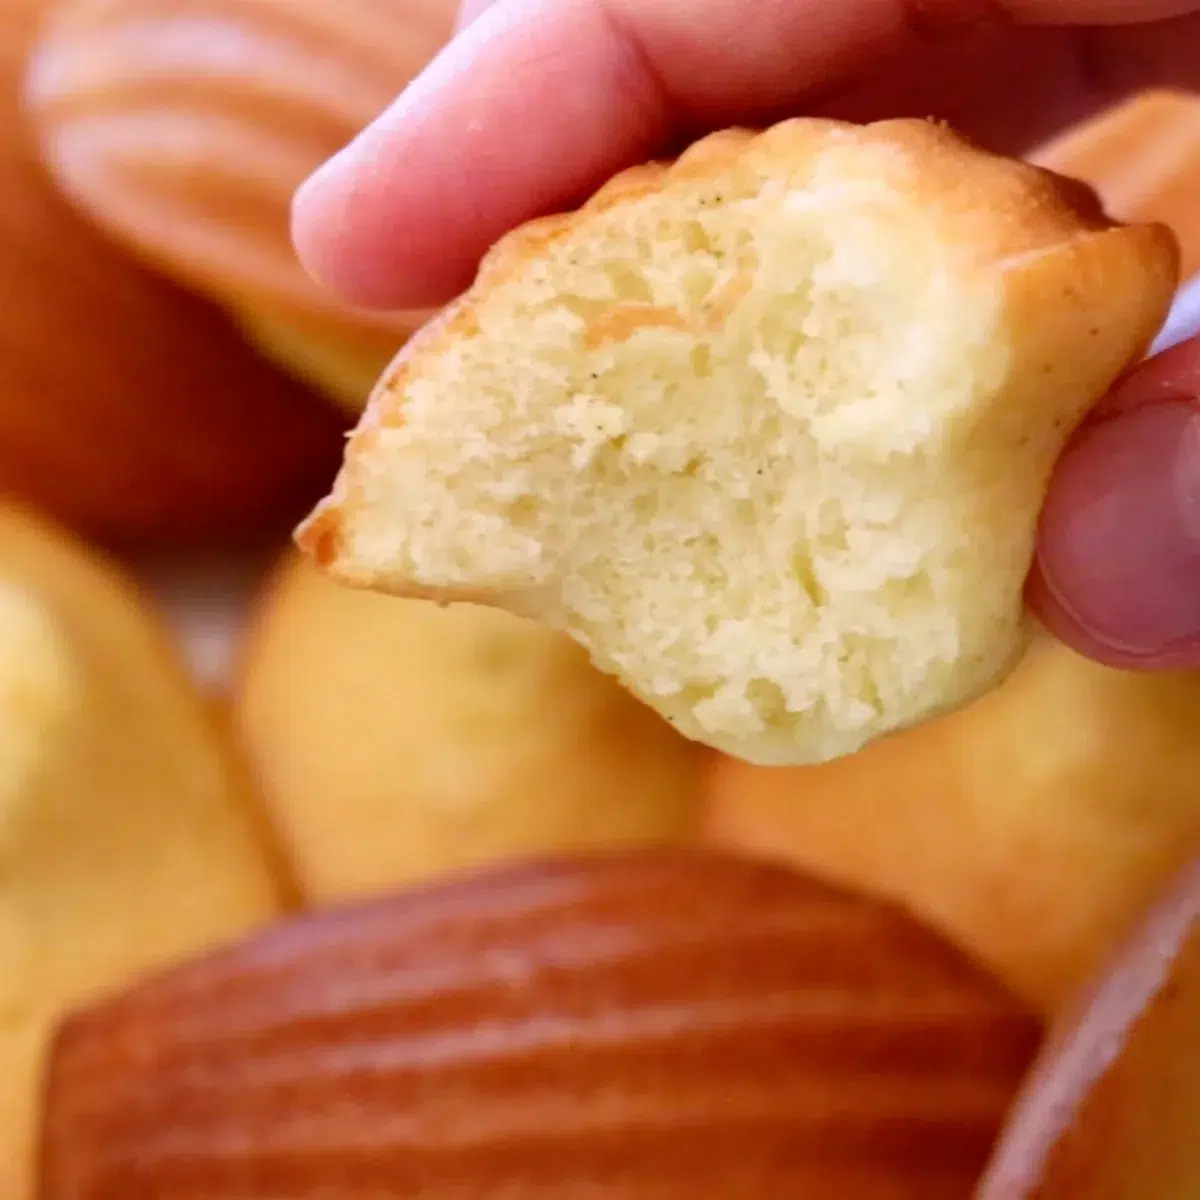
I was not that into madeleines until I made them for the first time at a French pastry school. The freshly baked madeleines are so soft yet have a good bounciness and are lightly crispy outside.
And the smell of madeleines...!! The amazing vanilla and buttery smell slowly spreads from the oven to the entire room as the cakes rise in the oven. Rei and Chocola always notice that and gather around the kitchen😊
I make them from time to time to share with my family and gift to someone because they are super easy, fancy, and easy to transport. Not so many desserts cover all the 3!! As a lemon dessert lover, I also love Lemon Madeleines - It's made from fresh lemon - lemon zest, and lemon juice. One of my favorite desserts.
Although classic Madeleine is extremely easy to make, we'll definitely need to know the crucial tips to get the best result - to get the soft and moist texture with an evenly caramelized surface which gives it a nice crispiness. Today, I am sharing all the secret tips for making the perfect madeleines I got through a decade after many trials & errors.
Go through all the tips in the post to get to know it deeper and be a master of madeleines.
Let's get started! 💪🏻

📌 What Are Madeleines?
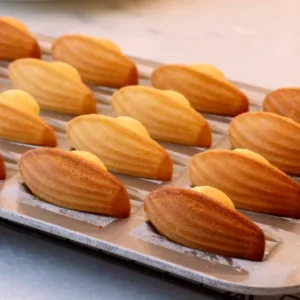
The classic madeleines are traditional small French butter cakes, baked in a special pan to create shell-shaped cakes.
It is soft and buttery inside yet lightly crispy and toasty on the surface. The shell shape and cute belly hump on the other side is a signature shape that has been loved by people worldwide for centuries.
The origins of the Madeleine are said to date back to the 18th century in Commercy and Liverdun, two communes of the Lorraine region of France.

Are Madeleines cookies or cakes?
Although they are sometimes called "madeleine cookies" due to the small bite-size look, they are technically small butter cakes that are designed to stay soft and moist inside. The ingredients are very similar to pound cakes, or other types of butter cakes, but they are just larger normally. Whether or not they want to call them cakes or cookies may also depend on the culture or region they grew up in.
📌 Ingredients For Madeleines
The essential ingredients to make madeleines are sugar, egg, flour, baking powder, and butter. And we are adding salt, vanilla, lemon zest, honey, milk, and oil to them to make the cakes taste exceptional! Check below to see the roles and tips:
Madeleine batter
- Granulated sugar: Use white sugar, such as granulated sugar and caster sugar.
- Salt: It gives more depth in flavor.
- Vanilla beans: I highly recommend using vanilla beans to get the best aroma and flavor. You can find a variety of kinds online - the quality is often better, and the price is cheaper than the ones at local grocery stores. I like Madagascar vanilla beans, which have an exotic, sweet smell. If you can not get vanilla beans, vanilla paste or vanilla extract are other options!
- Lemon zest: It adds a refreshing flavor that goes so well with vanilla. Do not zest the lemon too deep - The white part below the yellow skin is very bitter!
- Whole eggs: It helps to create a fluffy texture with the help of baking powder.
- Honey: Honey helps to keep madeleines moist. It also caramelizes the surface more.
- Milk: The liquid helps to make madeleines more moist. Use whole milk for a richer flavor.
- Oil: Oil helps to create a lighter texture when the cake is at room temperature. You can also create slightly bigger humps on top of madeleines with the addition.
- Cake flour: The texture gets fluffier with cake flour. Use all-purpose flour instead if you can’t get it. Cake flour is lumpier than all-purpose flour - I recommend sifting it always.
- Baking Powder: Baking powder is needed to let the cake rise more in the oven since we do not whip the eggs for madeleines.
- Unsalted butter: Butter adds rich flavor and moist texture. Use browned butter for a deeper taste!

For a madeleine pan
- Soft butter: A little bit of butter is needed to grease the pan.
- All-purpose flour: Dusting flour on top of the butter makes it easier to take out the cakes from the pan. It also creates more even caramelization on the surface. I recommend using all-purpose flour or bread flour since they are less lumpy and spread more evenly than cake flour. (The crust gets slightly crunchier with bread flour.)
📌 Tools For Madeleines
We do not need a lot of tools to make classic madeleines! Here are the 5 basic tools:
- Bowl
- Whisk
- Spatula
- Non-stick Madeleine pan: I recommend not compromising the quality since it can affect how beautifully the surfaces get caramelized. This is my favorite madeleine pan, and I've been using it for years.
- Pastry brush: Use it to grease butter over a pan.
Can I bake madeleines without a madeleine pan?
Yes, It is possible. Be sure to use a non-stick pan. Try not to bake them in much larger pans since it takes a lot longer to bake them, and the texture gets heavier with more weight. Always adjust the baking time accordingly.
📌 Step-by-Step Instructions to Make Madeleines
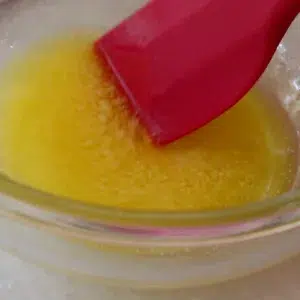
- Start by melting butter so that it is completely melted by the time you want to use it. I also like to sift flour (cake flour and baking powder) ahead.
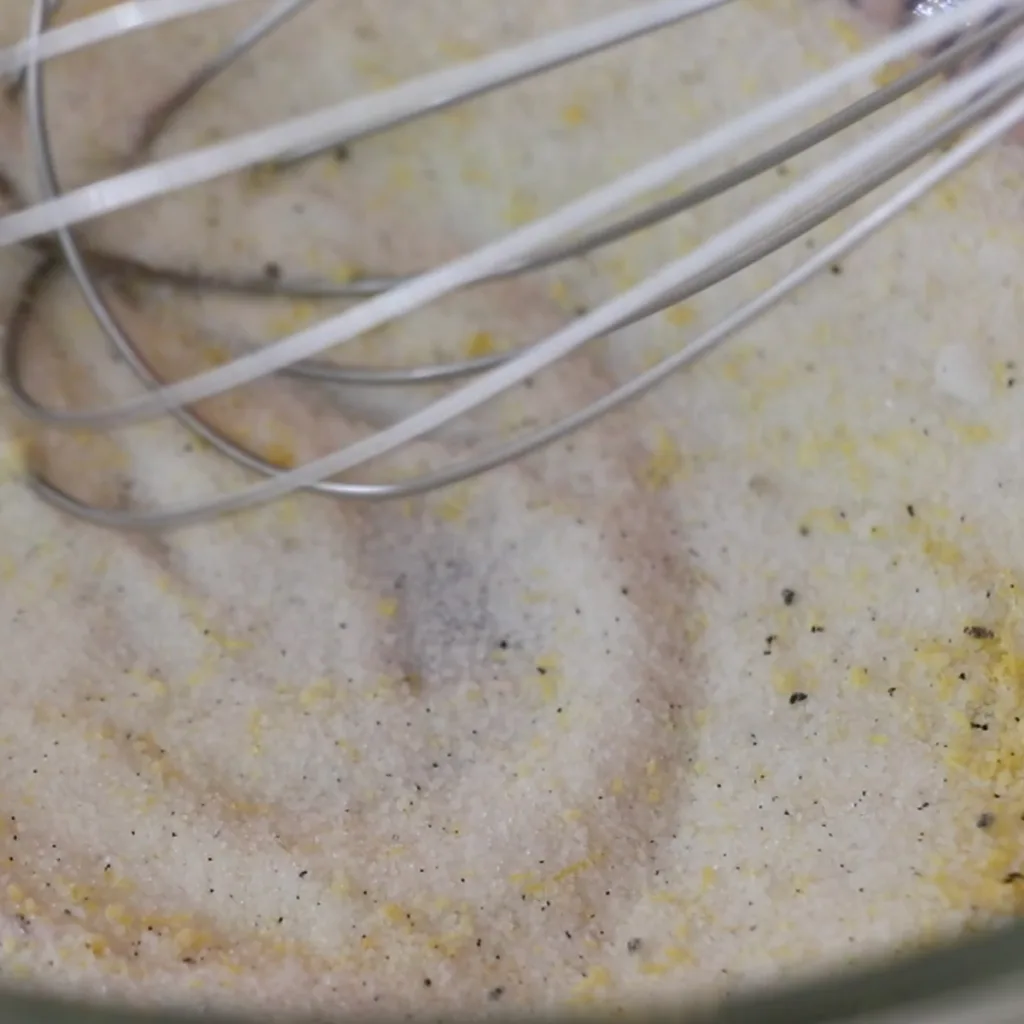
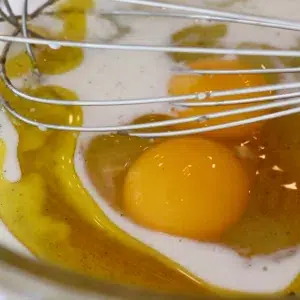
- Mix sugar, salt, vanilla beans, and lemon zest in a large bowl.


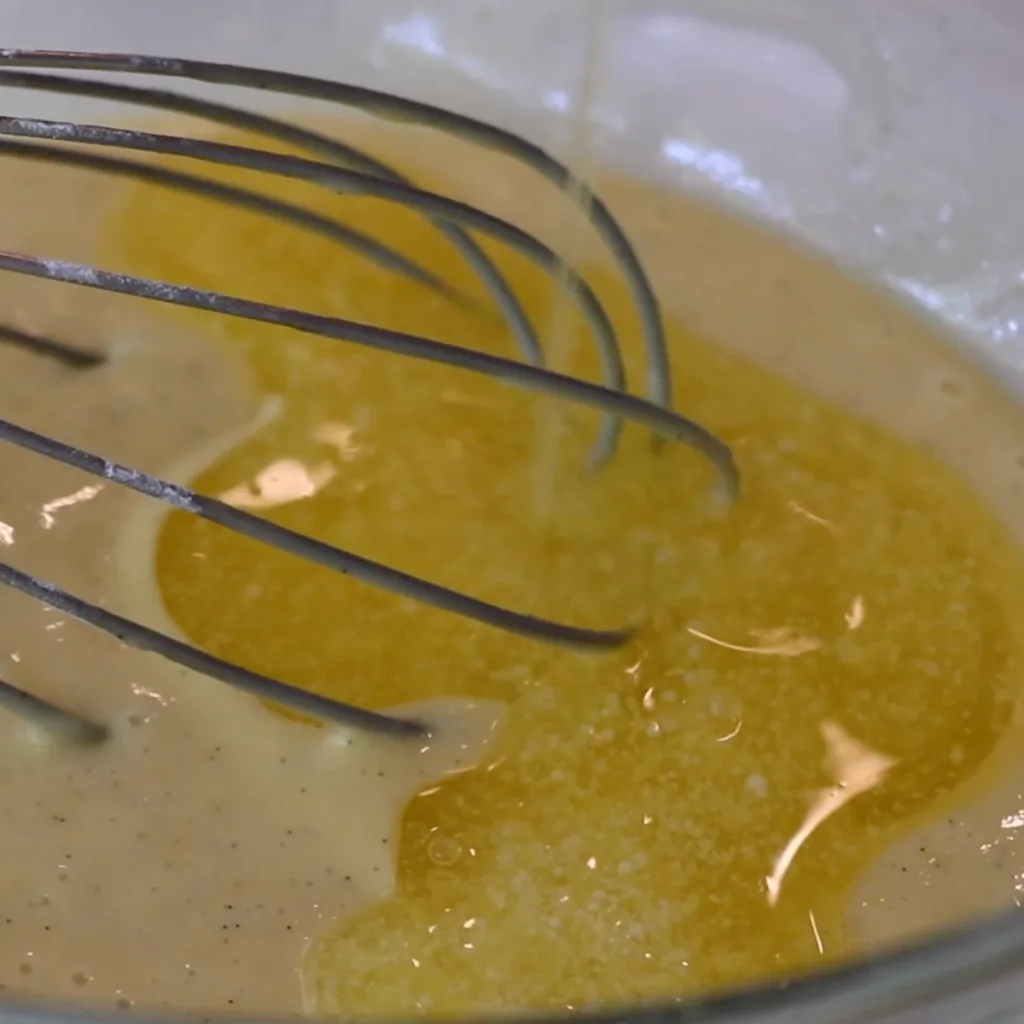
- Add eggs, honey, milk, and oil and mix well. There is no need to beat eggs - Mix well until everything is incorporated evenly.
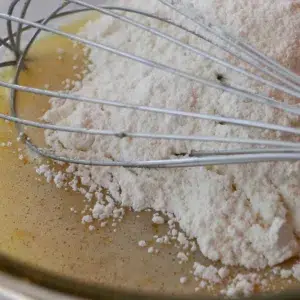
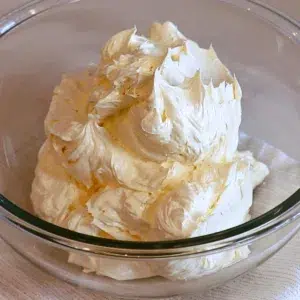
- Add sifted flour mixture and mix until smooth. Start mixing slowly so the flour will not scatter everywhere and gradually speed up. Continue mixing until you don't see any lumps of flour.


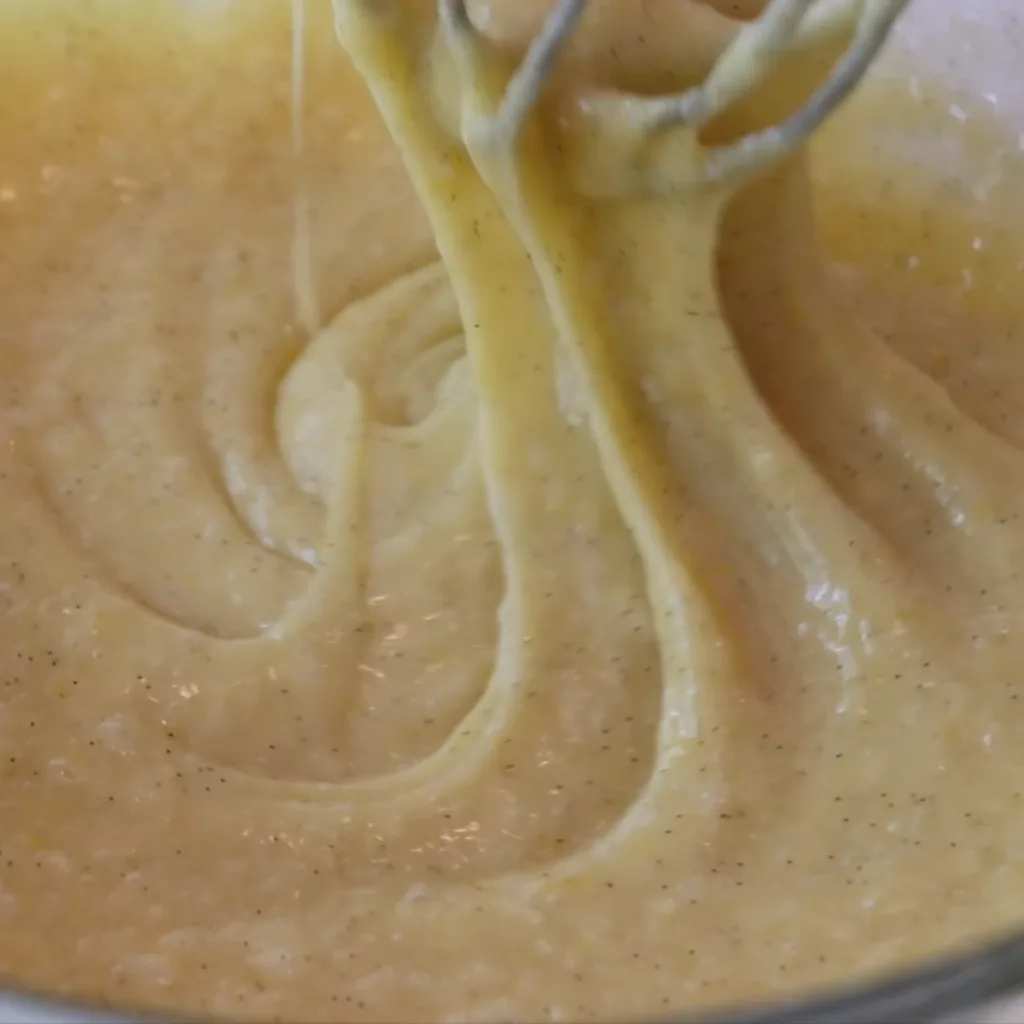
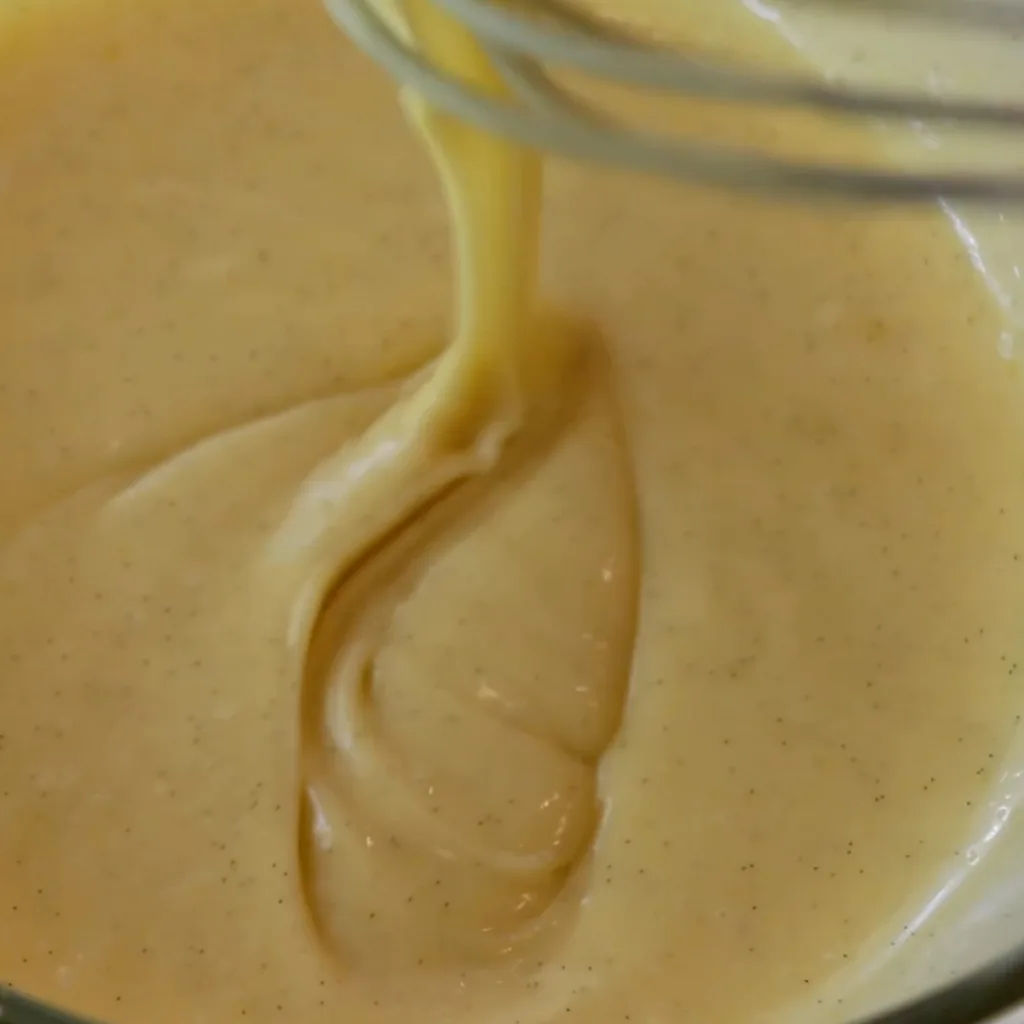
- Add warm melted butter and mix. Clean a bowl with a spatula at the end to ensure everything is blended evenly.
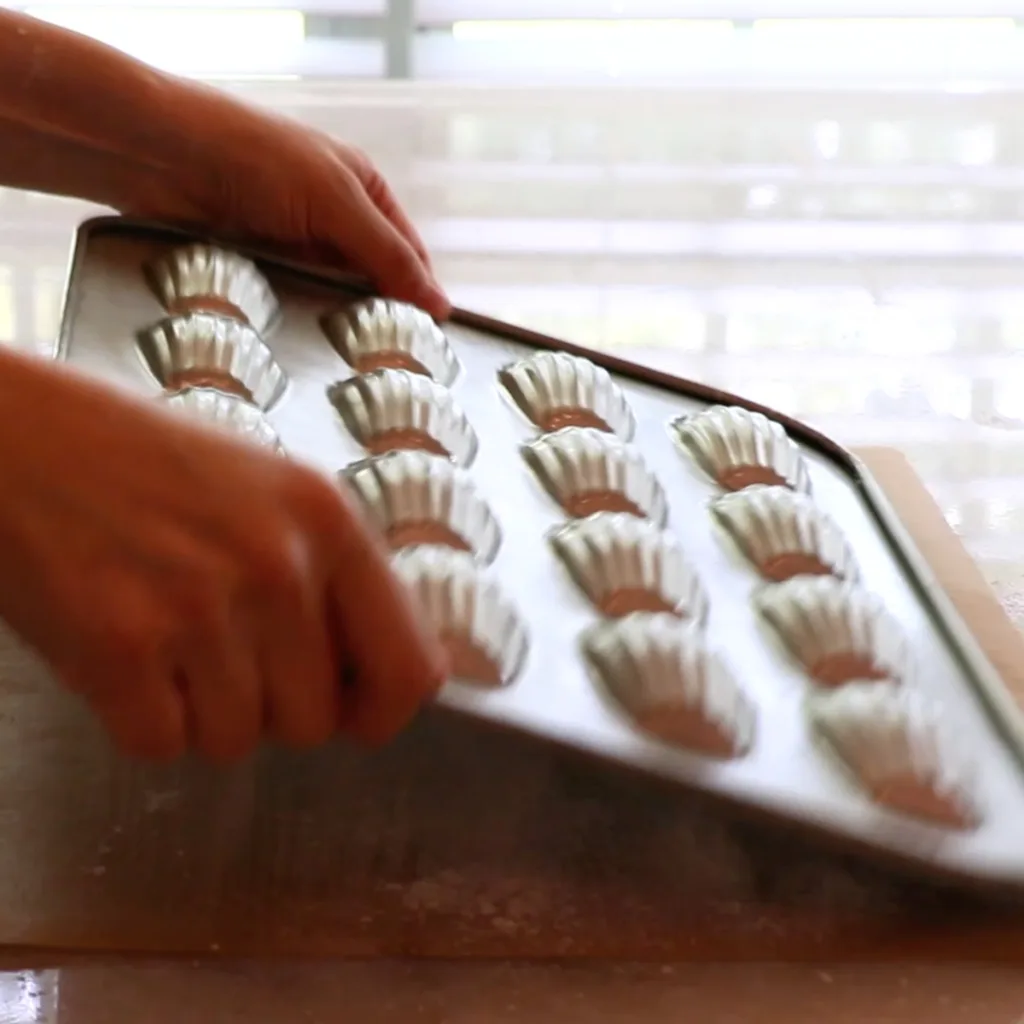
- Let it rest in the fridge for a few hours (at least one hour). Meanwhile, Grease the pan with a thin layer of soft butter, dust all-purpose flour on top, ensure all the surface is covered with flour, flip the pan, and toss it on the counter to remove the excess flour. Chill the pan in the fridge until right before use. Preheat the oven to 395ºF (201ºC).


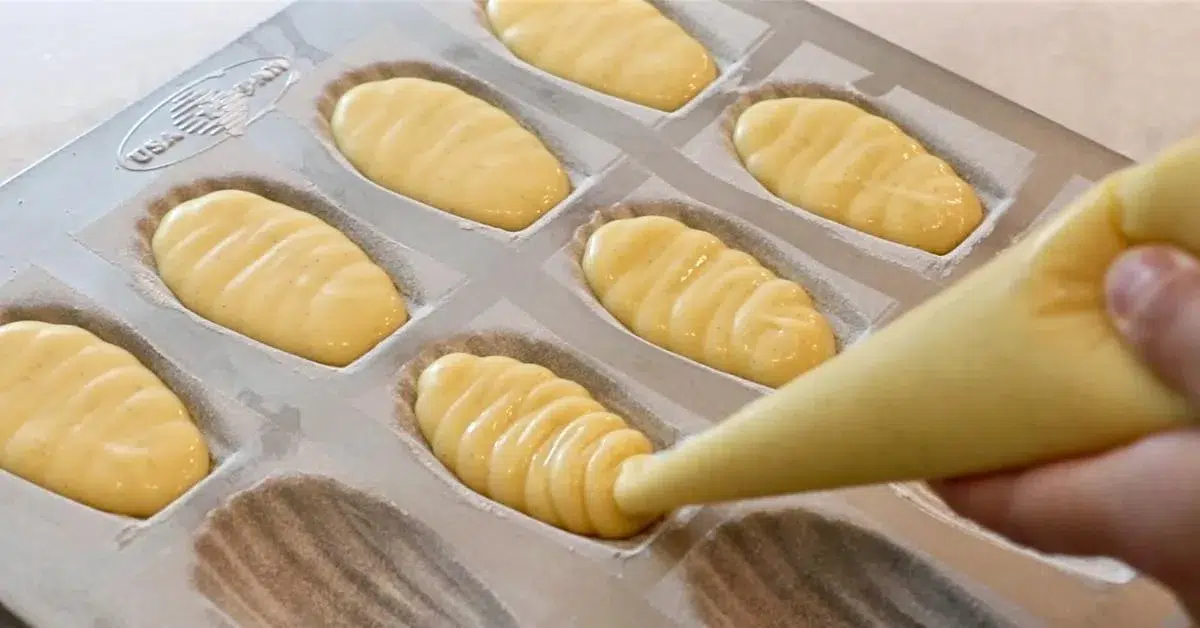
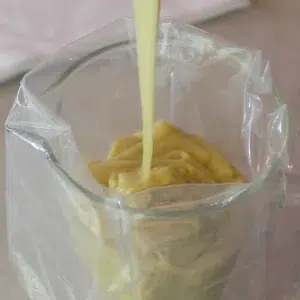
- Fill the batter up to about 85% of the capacity of the shell. Use a piping bag to do it easily.


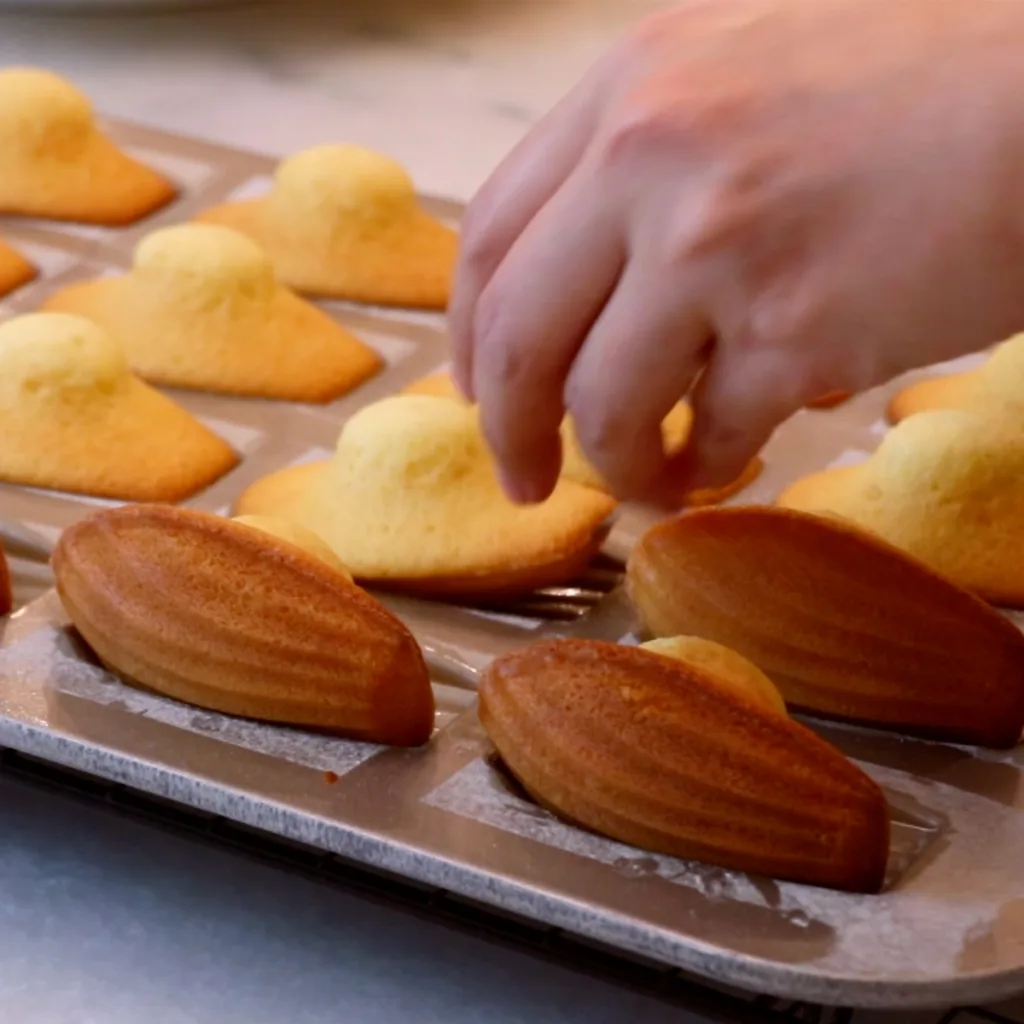
- Turn the oven temperature down to 365ºF (185ºC) and bake them for 9 - 10 minutes until the bumps bounce back very gently when touching them. Remove the cakes from the pan right after they are baked. Touch them gently since they are very soft while hot.


...And that's it! Enjoy!☕️ It's best to eat them when they are just made.
📌 The Success Tips
- Butter: It's essential to use warm, melted butter to prevent it from hardening as you mix in the cake batter since butter turns into a solid as it cools down. It should feel very warm when you touch it. (104 - 122ºF | 40 - 50ºC)
- Madeleine Batter: By chilling the madeleine batter, the glutens in the flour get rested more and weakened, which helps the cake to rise more in the oven. The cold batter also creates bigger perfect bumps on top of Madeleines in the oven due to the temperature gap. Also, the batter gets slightly firmer after it's chilled due to the butter inside, but it is still soft enough to pipe.
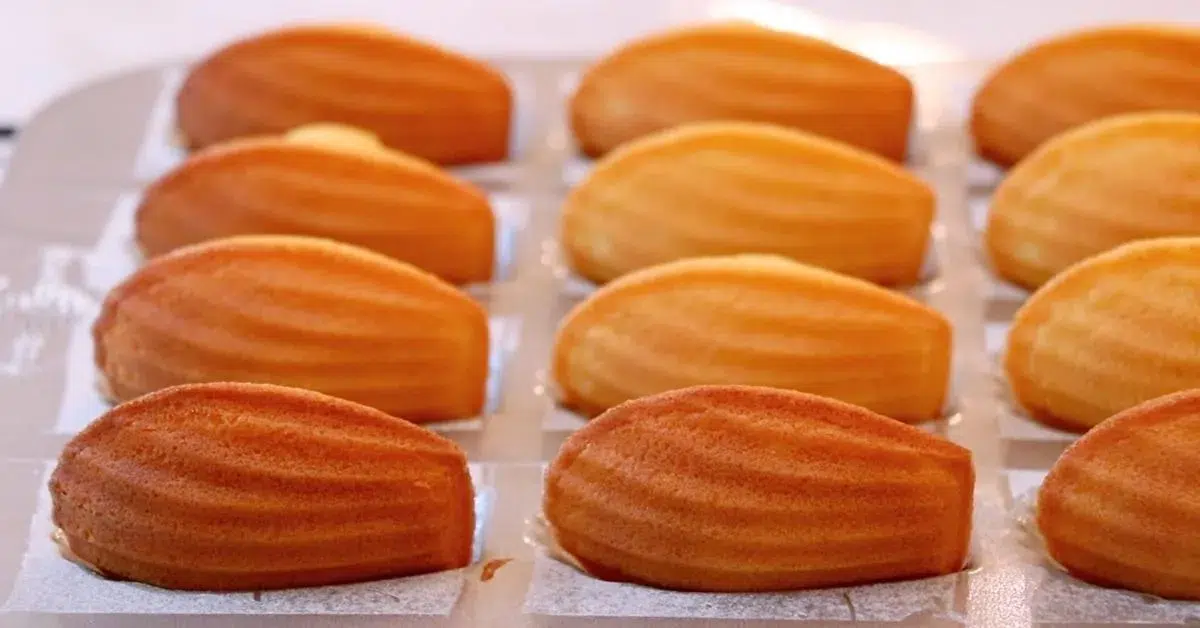
- Madeleine Pan: By chilling the prepared pan until right before use, the coated butter gets hard and sets nicely, which creates more even, beautiful caramelization on the surface of the madeleines.
- How to pipe: Use a pastry bag to divide the batter easily and equally. (Not a must, though!) Pipe right after the pan is taken out from the fridge and bake them right away before the greased butter gets soft. The madeleine humps get smaller when it's not filled enough, and the cake spreads widely when it's filled too much.
- Baking: One batch of the recipe makes about 16 Madeleines. * It may vary slightly depending on the capacity of the madeleine pan you use. Be careful not to overbake them to prevent them from getting dry. It is so exciting to watch them rise in the oven! The most exciting part of making madeleines.
How do I know if the madeleines are baked enough?
To check if it's done, touch the bump gently: It shouldn't be wet and bounces back very gently. Wear mittens and avoid touching them directly if you are sensitive to heat!
📌 Uses For Madeleine
Enjoy delicious homemade madeleines on many occasions, such as:
- Afternoon tea snack: The little cakes are a perfect match with a cup of tea or coffee.
- Morning treat: There is something about having freshly baked delicious madeleines in the morning. - It makes an excellent start for the day😋 You can also dust confectioners’ sugar on the surface to dress them up a little bit!
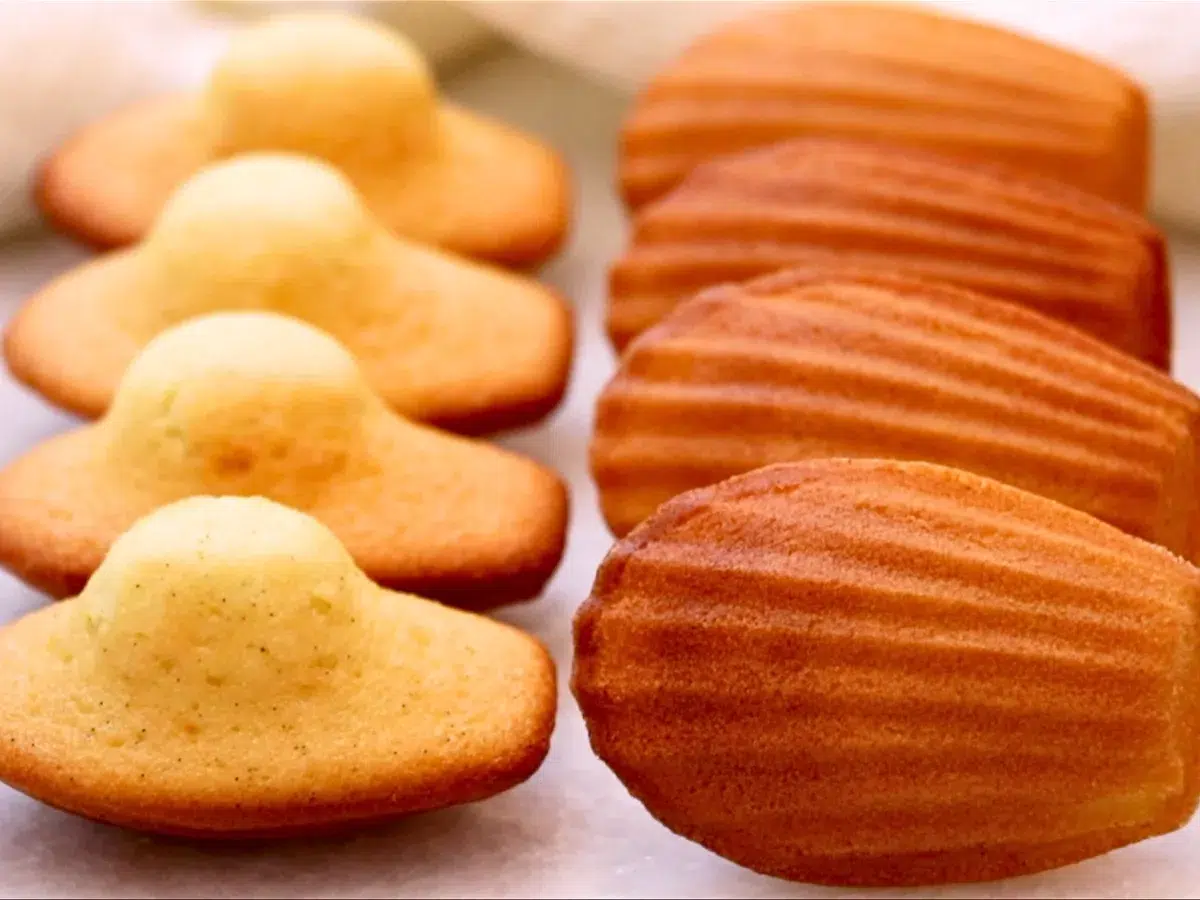
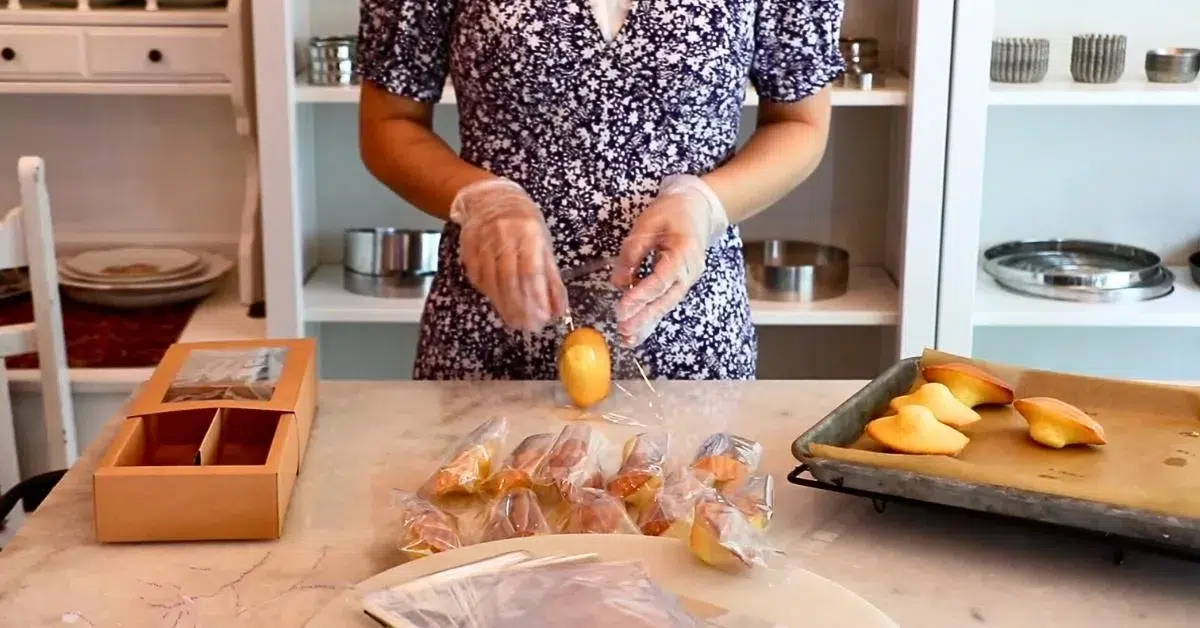
- A gift: Gift them to someone special. They'll be surprised to find out you made them! This time, I also baked lemon madeleines and made assorted boxes. You can also coat the surface with dark chocolate to add more variations!


📌 How To Store Madeleines
When you are not eating them right away, wrap them with plastic wrap or bag each of them in small plastic gift bags. (Put them in an airtight container or ziplock for double protection!)


What is the shelf life of madeleines?
Store them at room temperature or in the fridge, whichever you like:
- At room temperature: for up to a few days (in a shaded, cooling place).
- In the fridge: for up to 5 days
Madeleines could get dried quickly, mainly because they are so small. I recommend eating them right away for the best taste!
Can I make the madeleine batter ahead?
Yes! The great thing about this Madeleine recipe is that you can make the batter ahead and use it later whenever you need it! You can make it up to 1 - 2 days ahead. For example, I baked only 8 madeleines in the morning and saved the rest for the next day. Or make the batter the night before, and bake them quickly in the morning to share the warm madeleines with your family!
📌 Troubleshooting Tips
Why does the color of madeleines look uneven?
The common causes and solutions
- The madeleine pan was not chilled enough in the fridge before baking. - Chill it completely until right before use. You can even freeze it!
- The butter and flour were not coated evenly on the surface. - Ensure they are evenly coated!
- The pan was left longer at room temperature while/after piping the batter. - Try piping it quickly and immediately put it in the oven to create more even caramelization.

Why are my madeleines dried?
Madeleines can be over-baked easily since they are small. Check if they are done once the bubbling calms down on the top. The top should bounce back very gently when touching it.
Why didn't my madeleines rise much in the oven?
The common causes and solutions
- The batter was not rested enough in the fridge before baking them.
- The quantities of ingredients were off. (I recommend using weight measurement to be most precise.)
- The oven: Ovens play a considerable role. For example, a small toaster oven might not do a great job as a convection oven. Find the best temperature and setting for your oven!
📌 VIDEO: Watch How To Make It!
Watch this video to learn how to make the madeleines visually and have a deeper understanding of each step.
Don't forget to subscribe if you liked it 😉
📌 More Classic French Desserts
If you liked the delicious madeleine, also try other Classic French desserts!
📌 Printable Recipe
💬 If you loved this vanilla madeleine recipe, please share your feedback on this post! I always love hearing how you enjoyed it with your friends and family.

Madeleines
Equipment
- Bowl
- Sieve
- Whisk
- Spatula
- Brush to grease butter and coat icing
- Pastry bag optional
Ingredients
Madeleines
- 2.6 oz Granulated sugar ⅜ US cup
- ⅛ teaspoon Salt
- ½ pod Vanilla beans (or vanilla extract: ½ tsp)
- ½ medium lemon Lemon zest
- 3.7 oz Whole eggs about 2 eggs
- 1 oz Honey 1.5 Tbsp
- 0.5 oz Milk 1 Tbsp
- 0.5 oz Oil 1 Tbsp
- 3.5 oz Cake flour (Or all-purpose flour) *The texture gets fluffier and the cake rises better with cake flour. ¾ US cup + 1 Tbsp
- 0.12 oz Baking Powder ¾ tsp
- 3 oz Unsalted butter (melted) 6 Tbsp
For a pan
- Some Butter(soft)
- Some All-purpose flour
Instructions
- Start by melting butter so that it is completely melted by the time you want to use it. I also like to sift flour (cake flour and baking powder) ahead.

- Mix sugar, salt, vanilla beans, and lemon zest in a large bowl.2.6 oz Granulated sugar, ⅛ teaspoon Salt, ½ pod Vanilla beans (or vanilla extract: ½ tsp), ½ medium lemon Lemon zest
- Add eggs, honey, milk, and oil and mix well. There is no need to beat eggs - Mix well until everything is incorporated evenly.3.7 oz Whole eggs, 1 oz Honey, 0.5 oz Milk, 0.5 oz Oil
- Add sifted flour mixture and mix until smooth. Start mixing slowly so the flour will not scatter everywhere and gradually speed up. Continue mixing until you don't see any lumps of flour.3.5 oz Cake flour (Or all-purpose flour) *The texture gets fluffier and the cake rises better with cake flour., 0.12 oz Baking Powder
- Add warm melted butter and mix. Clean a bowl with a spatula at the end to ensure everything is blended evenly.3 oz Unsalted butter (melted)
- Let it rest in the fridge for a few hours (at least one hour). Meanwhile, Grease the pan with a thin layer of soft butter, dust all-purpose flour on top, ensure all the surface is covered with flour, flip the pan, and toss it on the counter to remove the excess flour. Chill the pan in the fridge until right before use. Preheat the oven to 395ºF (201ºC).Some Butter(soft), Some All-purpose flour
- Fill the batter up to about 85% of the capacity of the shell. Use a piping bag to do it easily.
- Turn the oven temperature down to 365ºF (185ºC) and bake them for 9 - 10 minutes until the bumps bounce back very gently when touching them. Remove the cakes from the pan right after they are baked. Touch them gently since they are very soft while hot.


Video
Notes
The Success Tips
- Butter: It's essential to use warm, melted butter to prevent it from hardening as you mix in the cake batter since butter turns into a solid as it cools down. It should feel very warm when you touch it. (104 - 122ºF | 40 - 50ºC)
- Madeleine Batter: By chilling the madeleine batter, the glutens in the flour get rested more and weakened, which helps the cake to rise more in the oven. The cold batter also creates bigger perfect bumps on top of Madeleines in the oven due to the temperature gap. Also, the batter gets slightly firmer after it's chilled due to the butter inside, but it is still soft enough to pipe.
- Madeleine Pan: By chilling the prepared pan until right before use, the coated butter gets hard and sets nicely, which creates more even, beautiful caramelization on the surface of the madeleines.
- How to pipe: Use a pastry bag to divide the batter easily and equally. (Not a must, though!) Pipe right after the pan is taken out from the fridge and bake them right away before the greased butter gets soft. The madeleine humps get smaller when it's not filled enough, and the cake spreads widely when it's filled too much.
- Baking: One batch of the recipe makes about 16 Madeleines. * It may vary slightly depending on the capacity of the madeleine pan you use. Be careful not to overbake them to prevent them from getting dry. It is so exciting to watch them rise in the oven! The most exciting part of making madeleines.
How to store it:
Store them at room temperature or in the fridge, whichever you like:- At room temperature: for up to a few days (in a shaded, cooling place).
- In the fridge: for up to 5 days
Nutrition
📌 Pin It!
Pin it if you love this vanilla madeleines recipe, and find so many other recipes on my Pinterest page!


Aneta K. says
Hi Aya. Can I use brown cane sugar for this recipe?raw, not soft sugar
Thank you
ayacaliva says
I haven't tried it with brown cane sugar before but I would think it should! They should be some slight difference though.
I might not recommend regular sticky brown sugar since the cake texture may get a little heavier and the batter might spreads more widely in the oven. I bet it's still delicious though!
Aneta Kowal says
I love that recipe. I've made from double proportion but the egg count is not right from 1 and 2 batch- on grams shows the same amount. Maybe it's possible to fit it?🤔
Anyway, I've made vanilla ones. Just before baking I divided dough in half: half I left vanilla and to other half I've added quarter glass of proper halva🥰 Scent in the kitchen is amazing
Crusty outside and fluffy inside.
Next time when I will decide to make MADELAINE'S with halva I'll reduce amount of sugar.
Taste is amazing 😍
Thank you Aya.
ayacaliva says
Hi, thank you for the feedback! i'm so glad you liked it. The smell of the freshly baked madeleines are the best😊
Thank you for pointing out about the cup measurements. I see that.. that part can be shown only with one batch in the system. Hmm... I hope to come out with a different solution sometime soon!
Edna says
This recipe worked out perfectly! I made the batter/dough a day ahead. I was able to make 12 cookies. I used the weight measurements. The cookies have fabulous humps. I said I was making them for our neighbors but then I proceeded to eat half the batch! I guess I will have to make more 🙂
ayacaliva says
😆 Haha I love it!! Thank you for sharing your experience!