
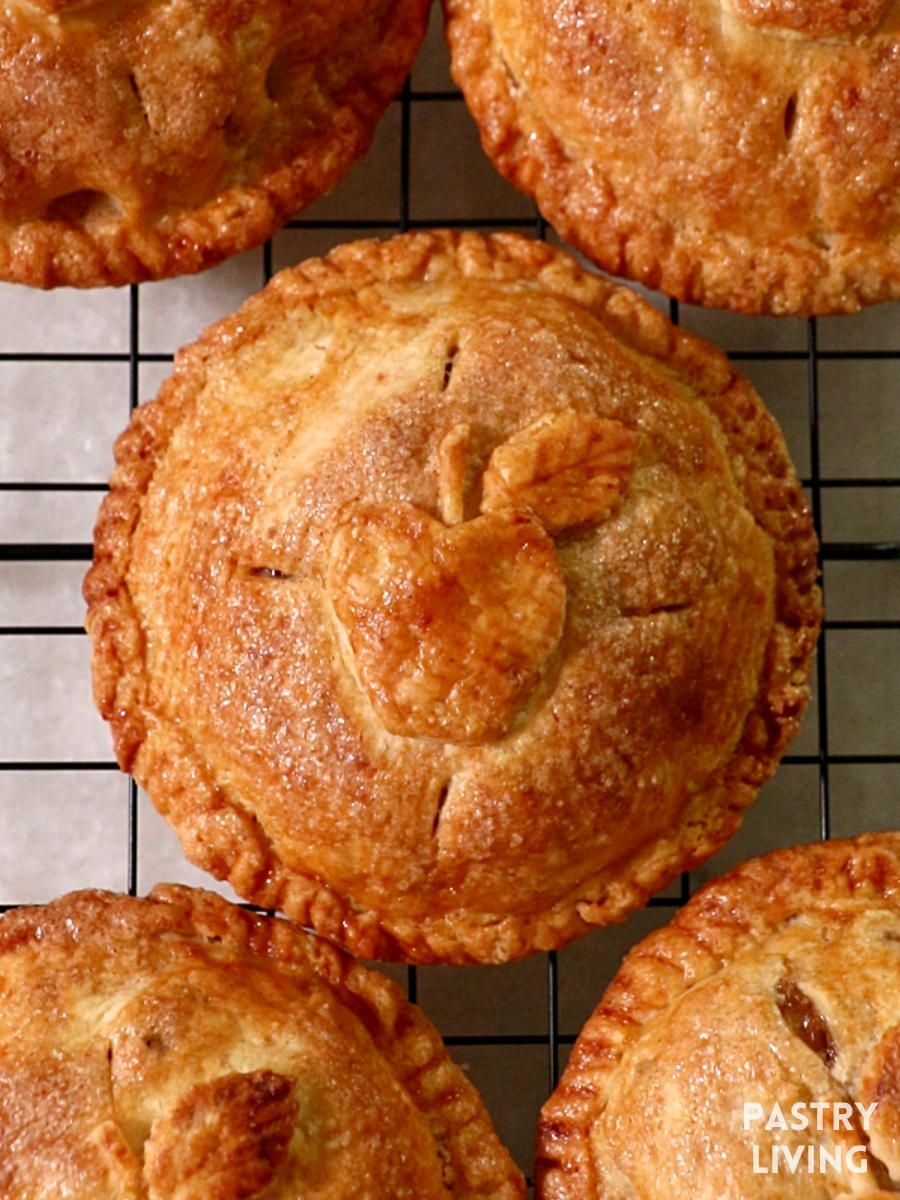
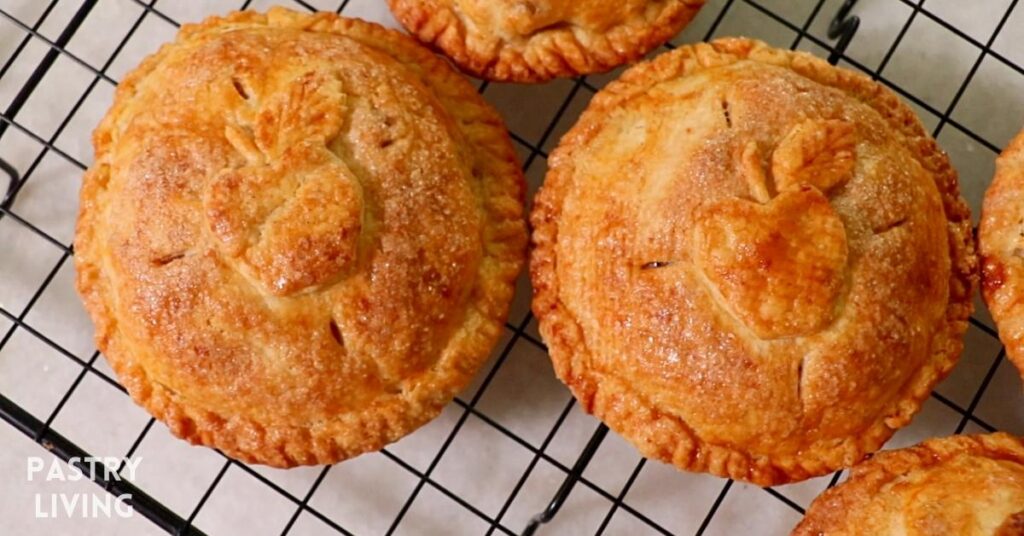
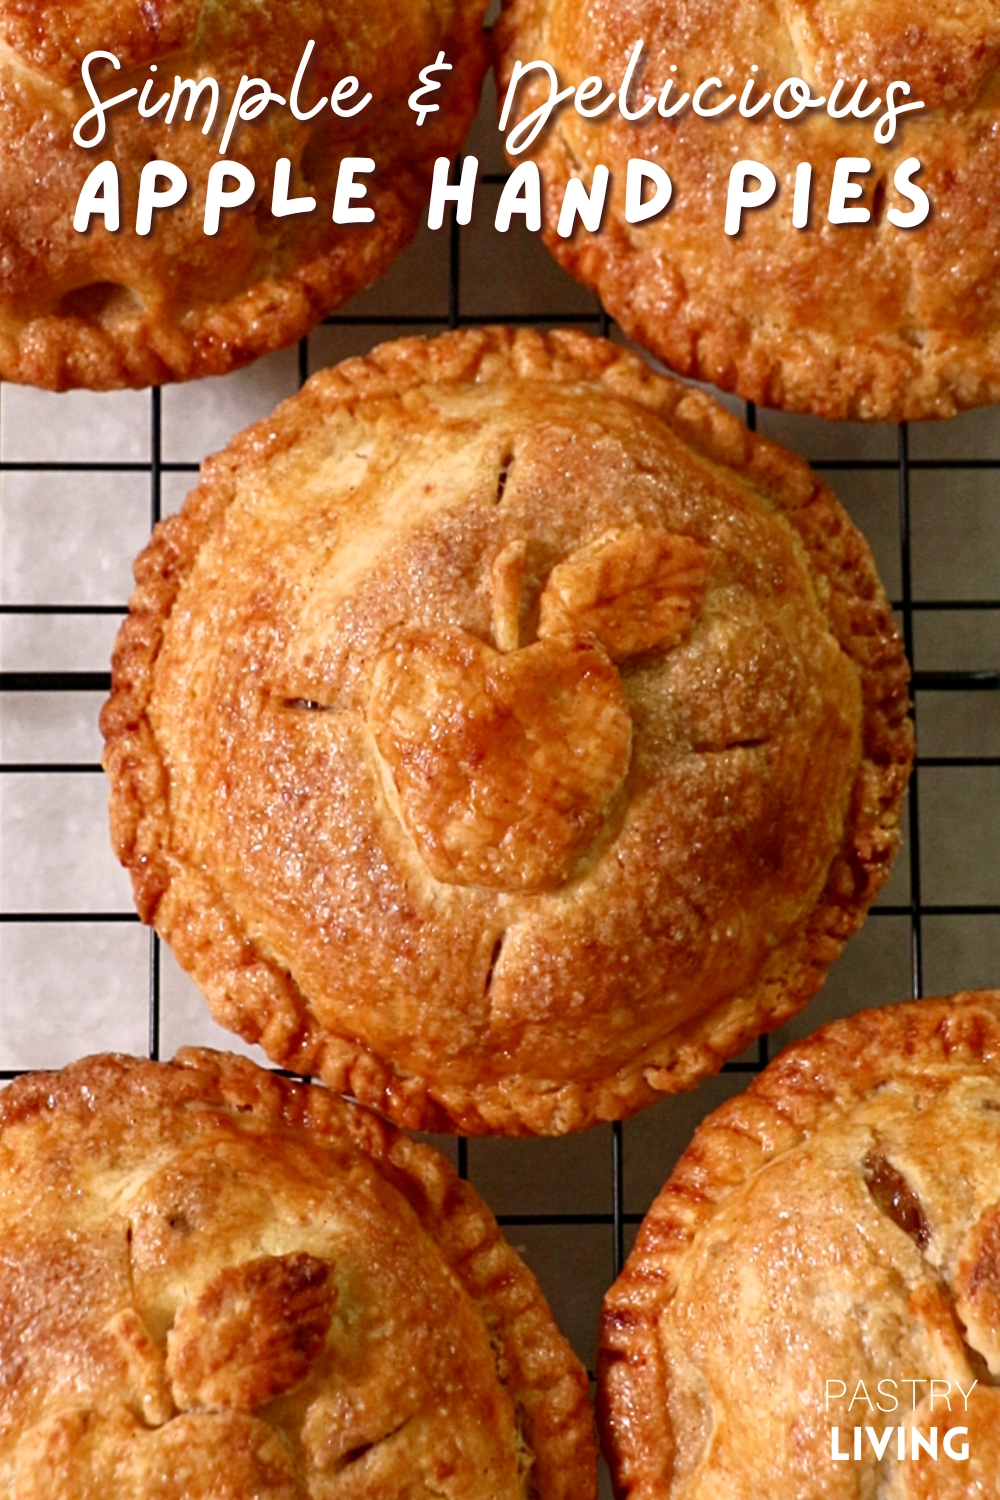
Today, I am sharing how to make simple yet delicious apple hand pies.
You do not need to pre-cook the apple with this recipe - which is perfect when you do not want to spend too much time making special pies!
I love this apple hand pies because:
- It's easy to make - no need to pre-cook apples.
- The crust feels incredibly flaky and delicately breaks in a mouth.
- It looks very festive and charming - Share them with your family and friends and have a heart-warming time together!
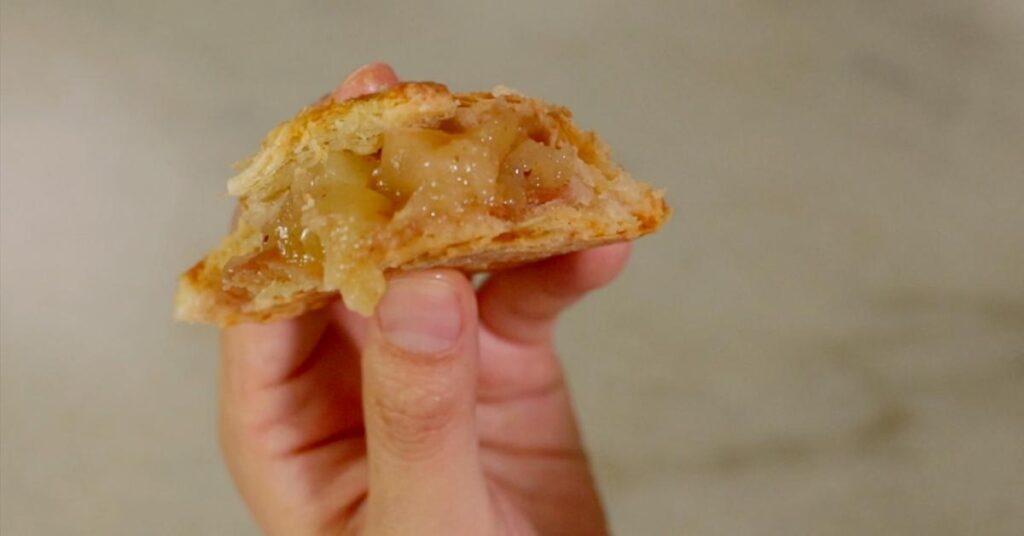
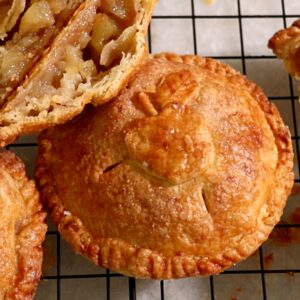
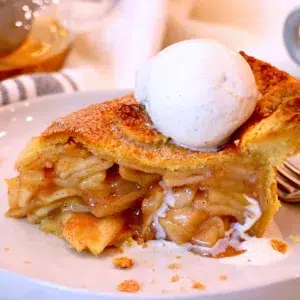
🍎 Apple pie is my favorite pie - The melty apple filling and the flaky pie crust feel pure joy inside my mouth. With apple hand pies, you can enjoy the flaky pie crust in every bite and you never have to deal with a soggy crust!

In this post, you'll learn crucial baking tips like:
- Key steps to roll pie dough like a pro
- Tips to assemble them neatly and make pretty-looking hand pies!
- How to bake them to maximize the best taste.
📌 What's In Apple Hand Pies?
Pie Dough
- All-purpose flour
- Use regular all-purpose flour.
- Chilling it in the fridge in advance also helps to keep butter cold.
- Granulated sugar
- It is not a must, but a small amount is added today for a slight sweetness.
- Salt
- I used regular table salt.
- Unsalted butter
- Use very cold butter to prevent it from getting soft as you mix.
- Icy water
- The cold water helps to keep the butter cold.
- Oil
- I used olive oil today, but you can use any other regular oils.
Filling
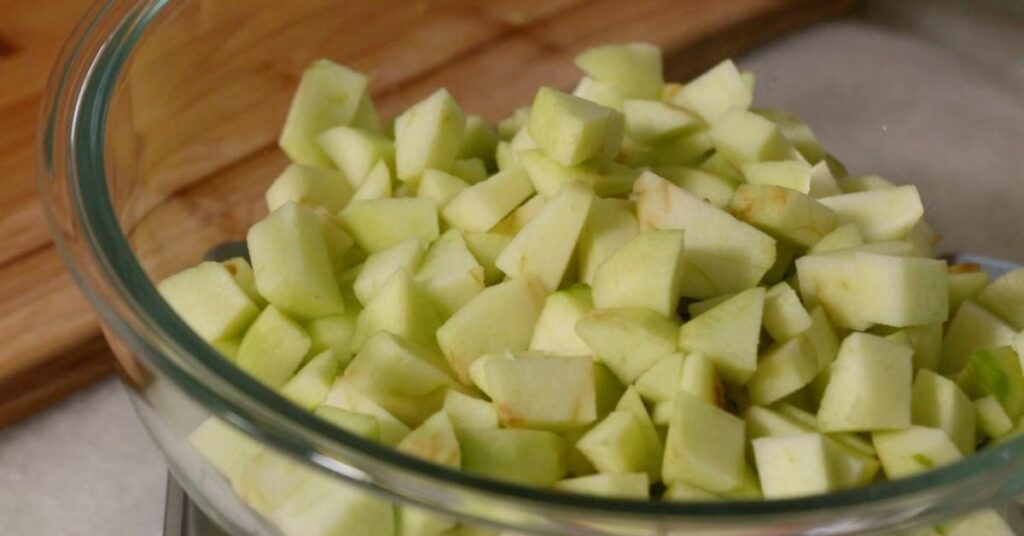
- Apple (peeled, cored, and cut)
- I recommend mixing 2 - 3 Granny Smith apples & 1 - 2 golden delicious apples (or other apples that are sweeter, less tart, and break down more with heat.) to create a not-too-mushy yet melty texture with well-balanced tartness and sweetness.
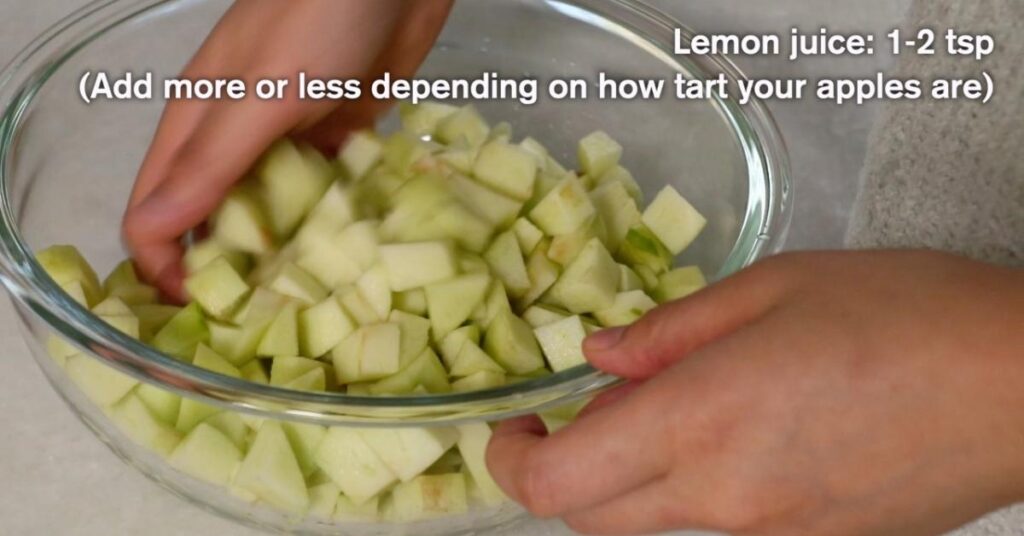
- Lemon juice
- Add more or less depending on how tart your apples are.
- Granulated sugar
- You can also use brown sugar instead.
- Salt
- It adds depth in flavor.
- All-purpose flour
- It helps to thicken the filling.
- Corn starch
- Cornstarch also thickens the filling. You can use only all-purpose flour or cornstarch. All-purpose flour gives a slightly chunkier texture while cornstarch gives a gel texture like a jam.
- Cinnamon
- It's the magic spice for apple pies - The sweet and warm aroma goes perfectly with cooked apples.
- Nutmeg (optional)
- It's often added to pies for the warm and spicy aroma.
- Lemon zest (optional)
- It adds a refreshing flavor.
Assembling
- Butter (cut into small pieces)
- It adds a rich flavor.
- Egg white
- Use only egg white as the egg wash to prevent the surface from getting too dark in the oven.
- Cinnamon sugar
- It's made by simply mixing granulated sugar and cinnamon.
📌 How To Make Apple Hand Pies
5 Processes
- Make pie dough.
- Make apple filling.
- Roll the pie dough.
- Assemble all of them.
- Bake!
📝 Tips With Images
Now, let me share detailed tips on each step that is crucial for making apple hand pies successfully.
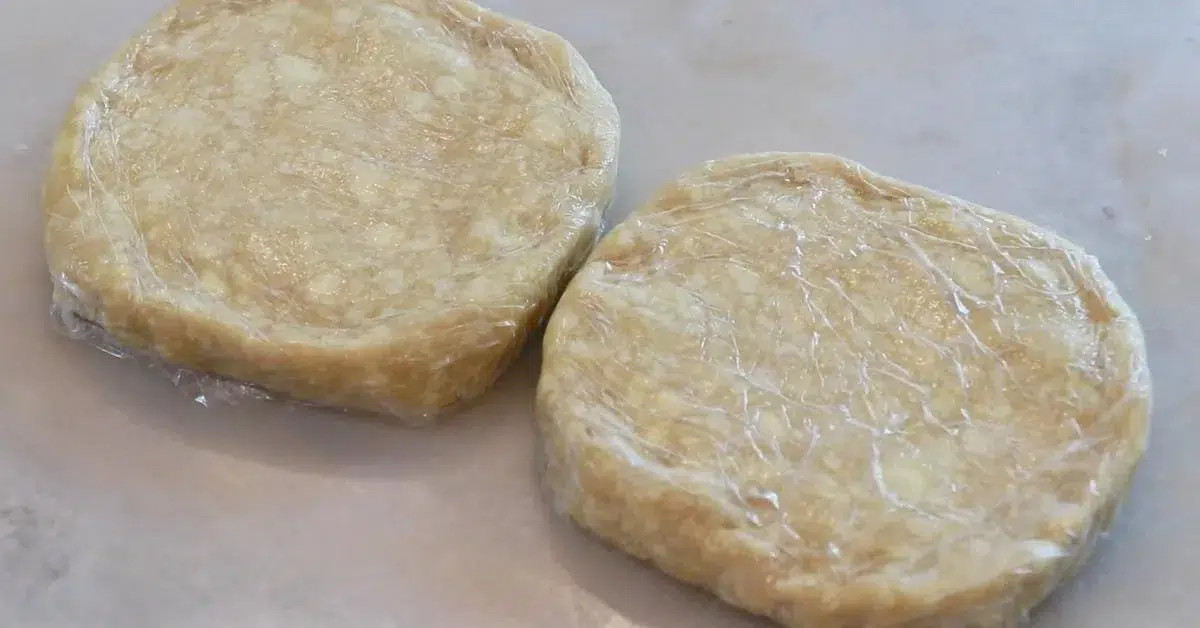
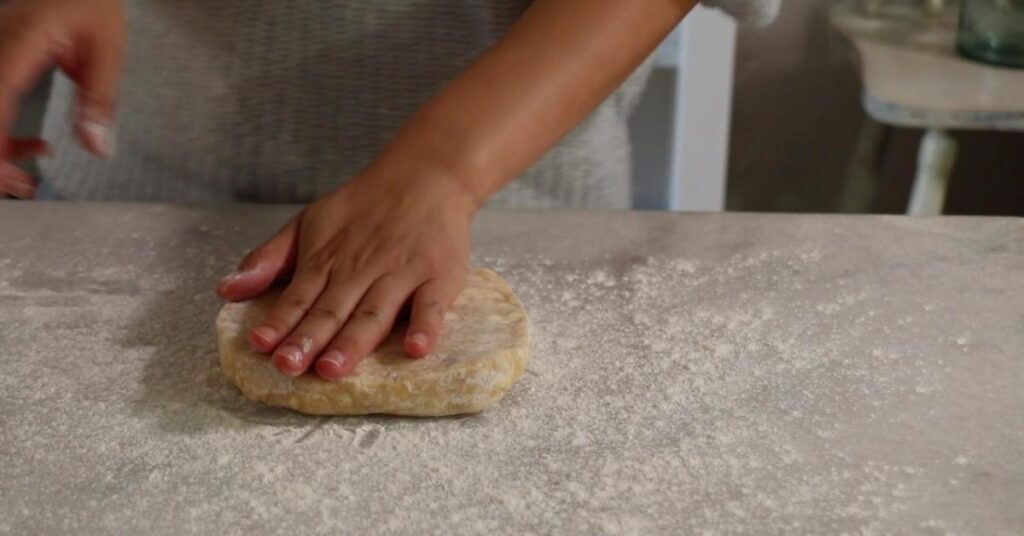
Pie dough
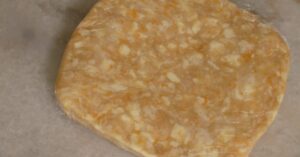
Make one batch of my pie dough. Follow the same steps and tips in the post.
- Chill in the fridge for at least one hour or more than a few hours, ideally.
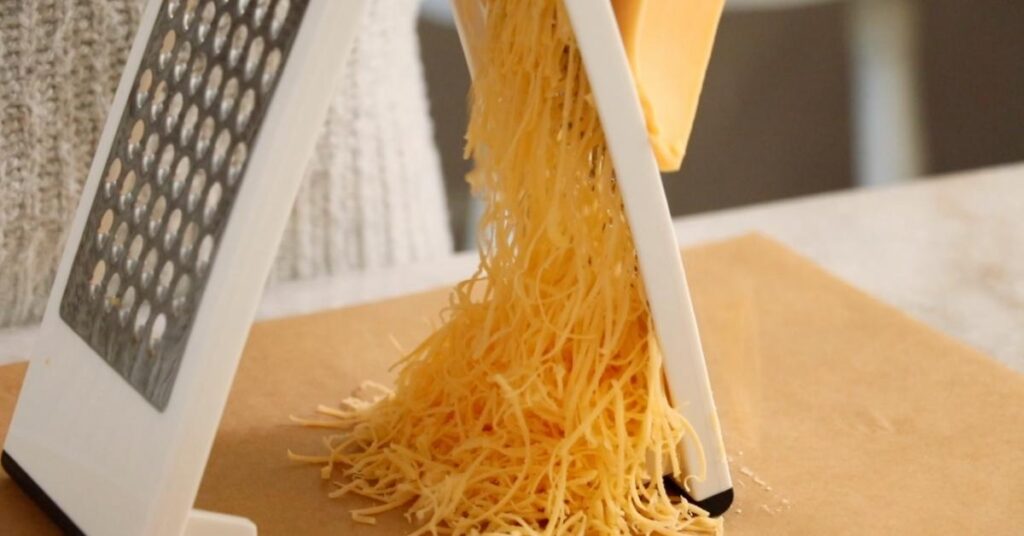
- As an option, mix in shredded cheddar cheese.
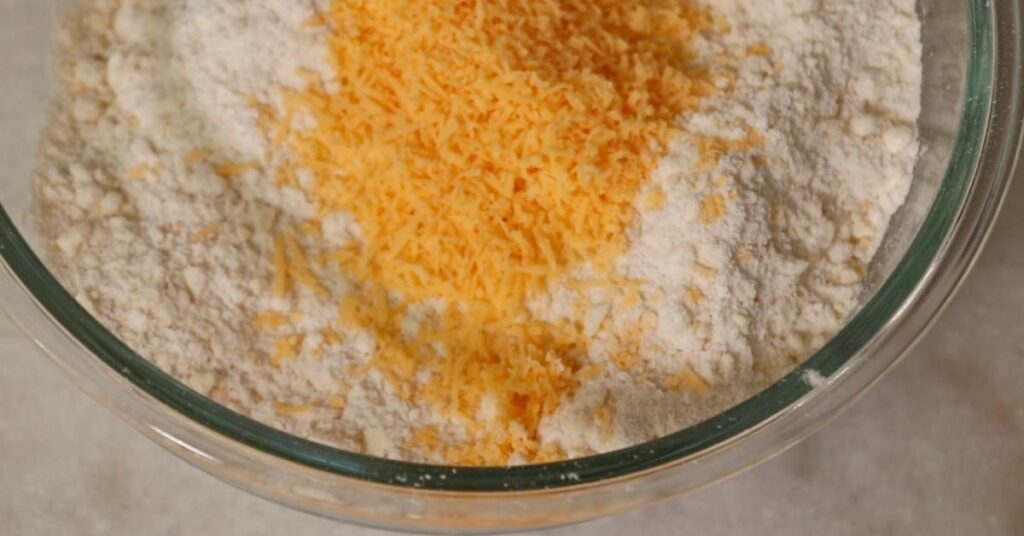
When you add cheddar cheese:
Shred it finely and freeze it. Once it's frozen, break it down by hand to make the flakes:
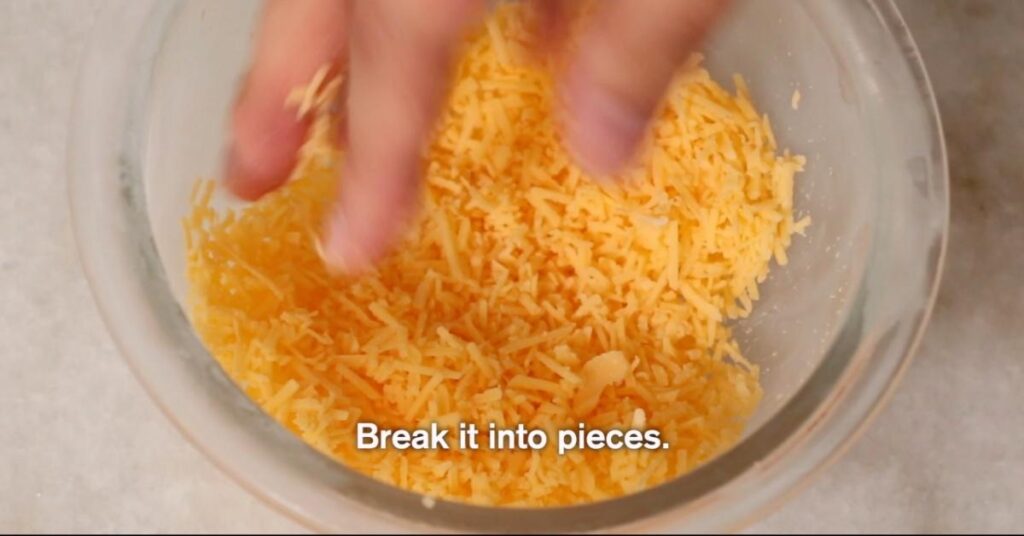
Add it to the flour and butter and mix before adding water:
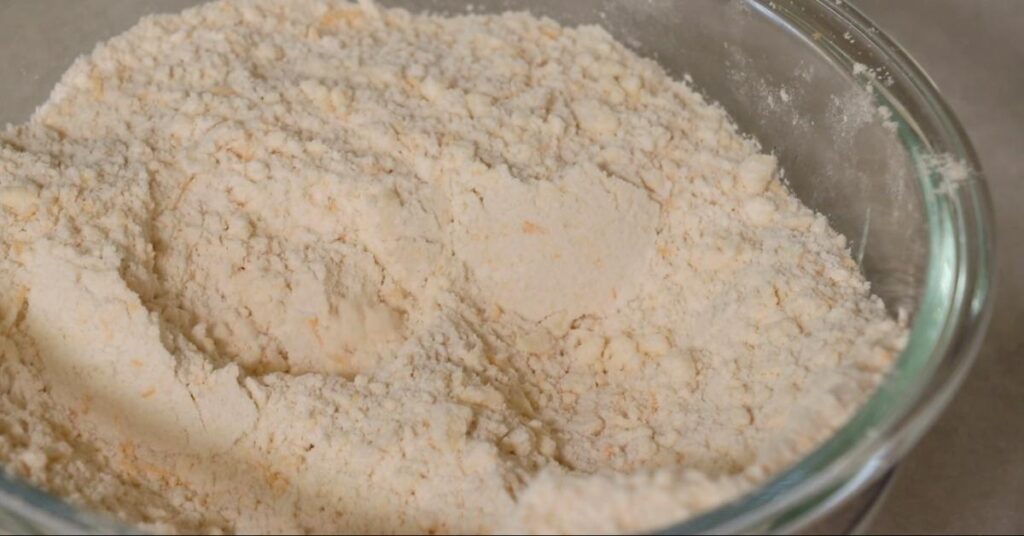
Do everything else the same as my original recipe!
Apple Filling
- Cut apples into small pieces and toss with lemon juice. Set it aside.
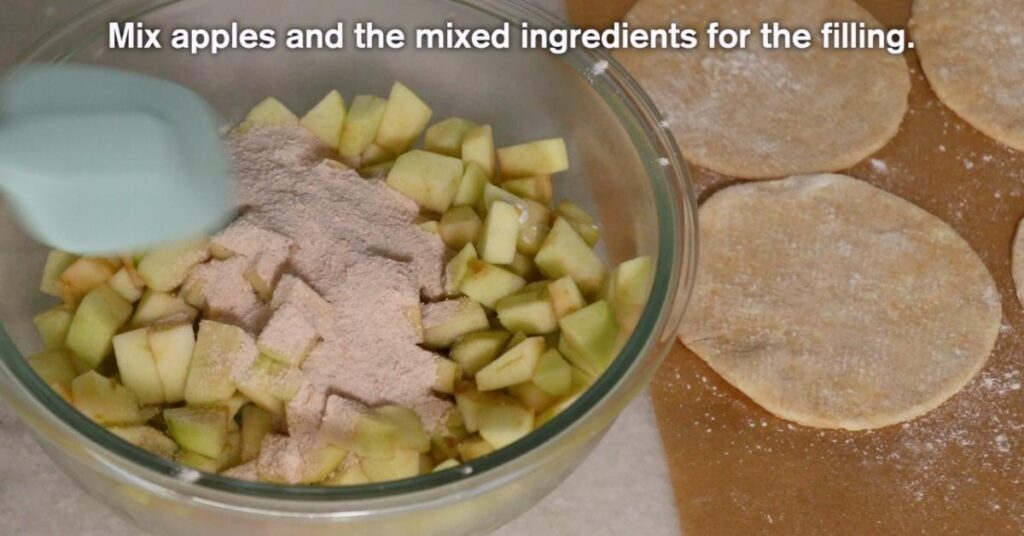
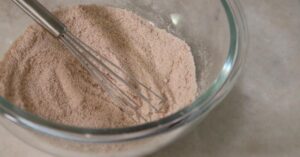
- Mix all dried ingredients for the apple filling and set it aside. (Do not mix with apples yet.)

Do not mix it with apples yet!
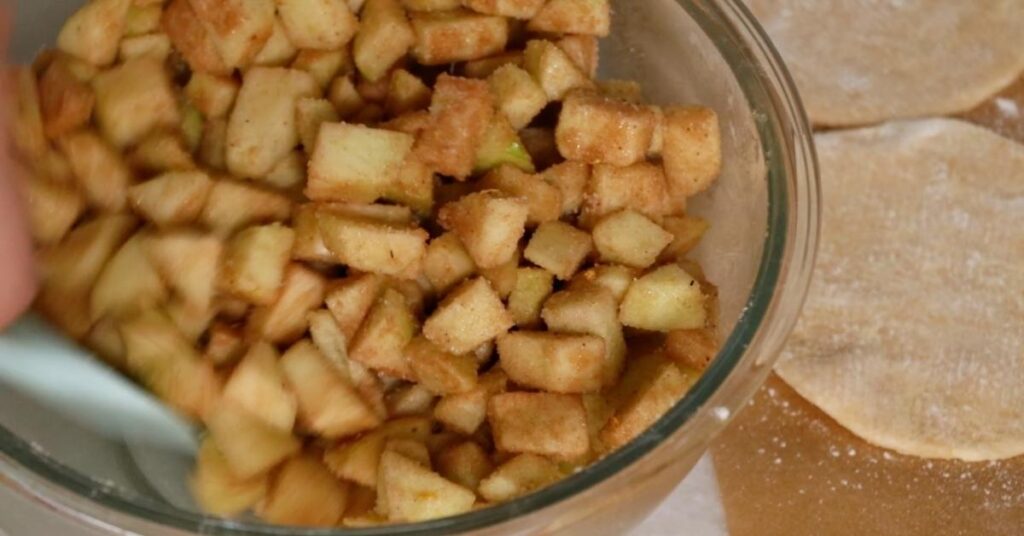
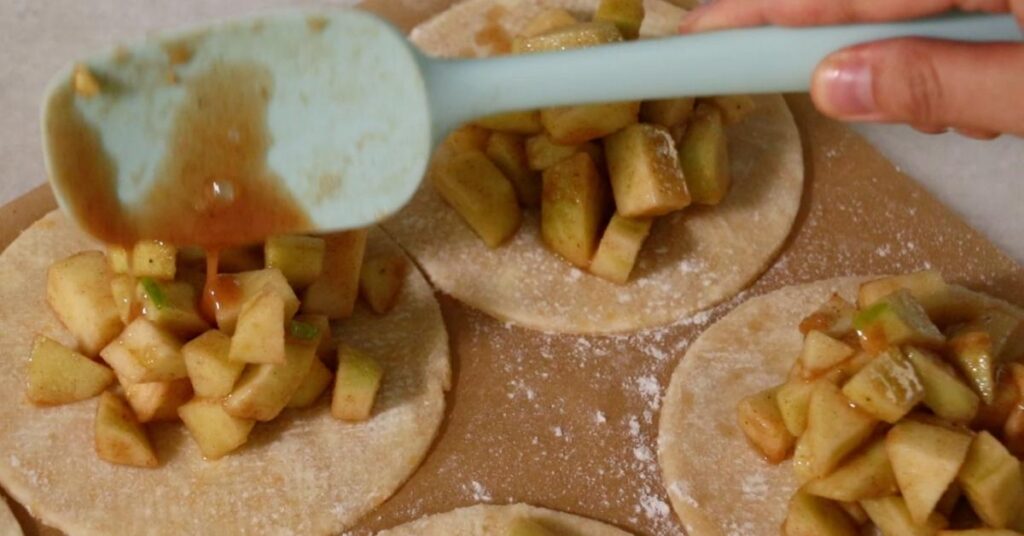
Once you mix the apple and dried ingredients, a lot of juice starts to come out from the apples quickly because of the sugar. I do not want to discard the juice for its flavor and sweetness.
It'll be a kind of a pain to add the juice and seal the filling neatly without making a mess. Mix the apple and dried ingredients right before using them.
Set up all the pie dough and check everything is ready to assemble before you mix them!
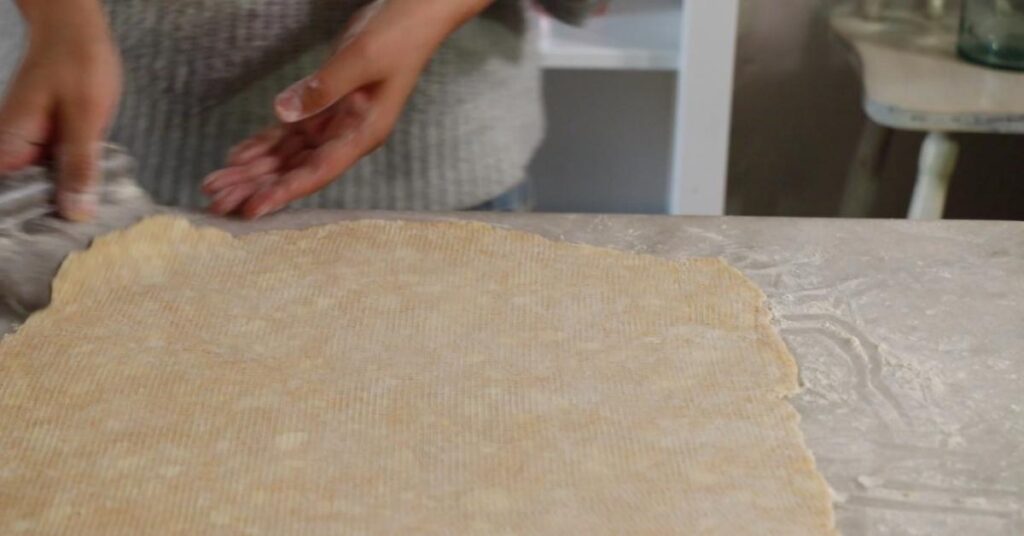
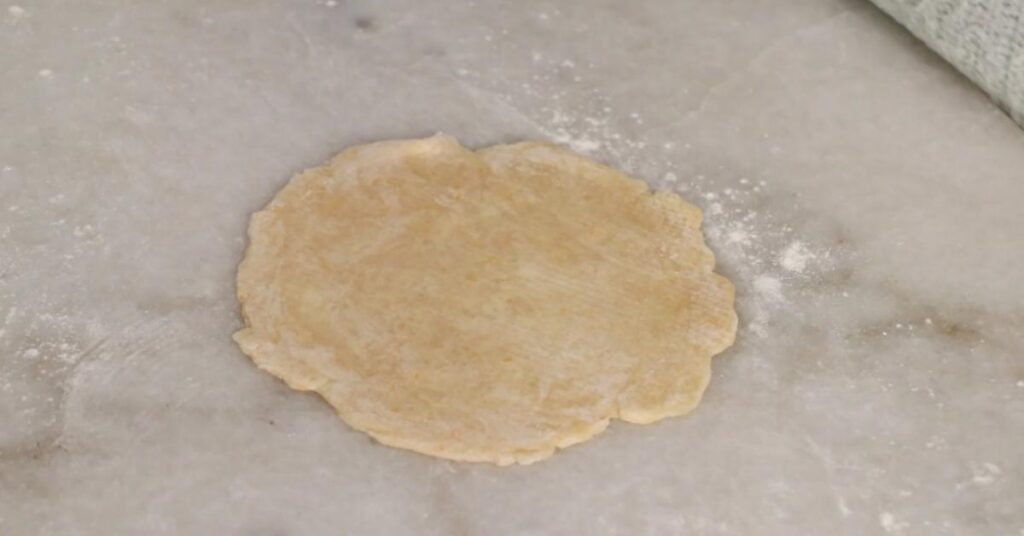
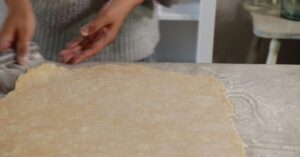
Roll the pie dough
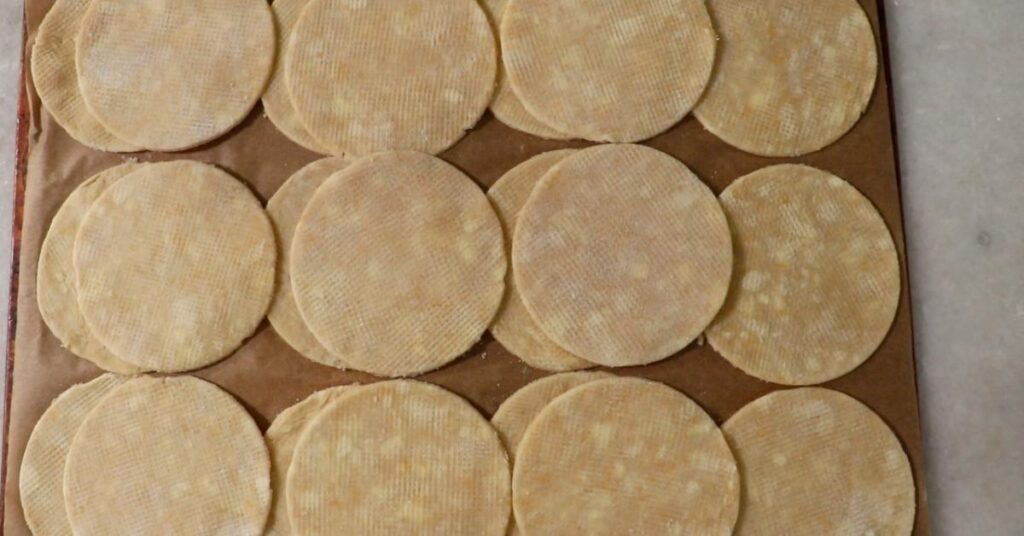
- Roll the pie dough very thin, about 1.5 - 2 mm | 0.05 - 0.07".
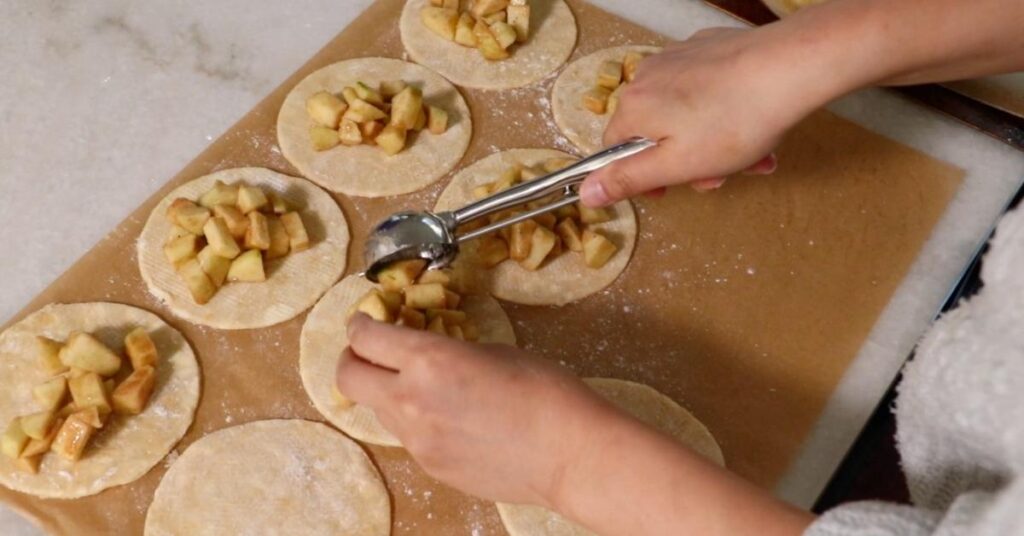
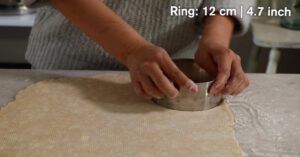
- Cut its circle with a 12 cm | 4.7-inch cookie cutter or cake ring. You'll get about 20 - 22 circles which are enough to make 10 - 11 hand pies. Chill them in the fridge if they are getting too soft to assemble.
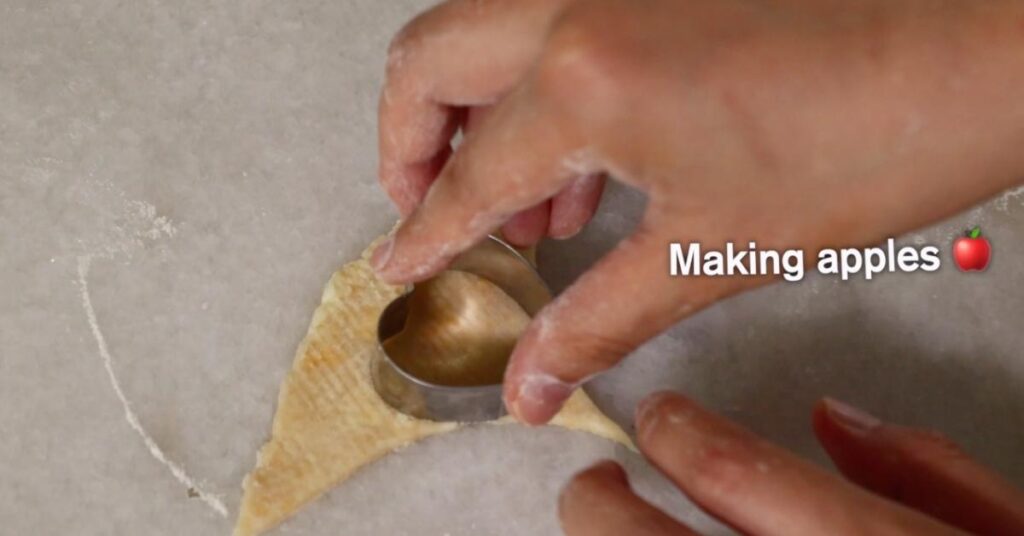
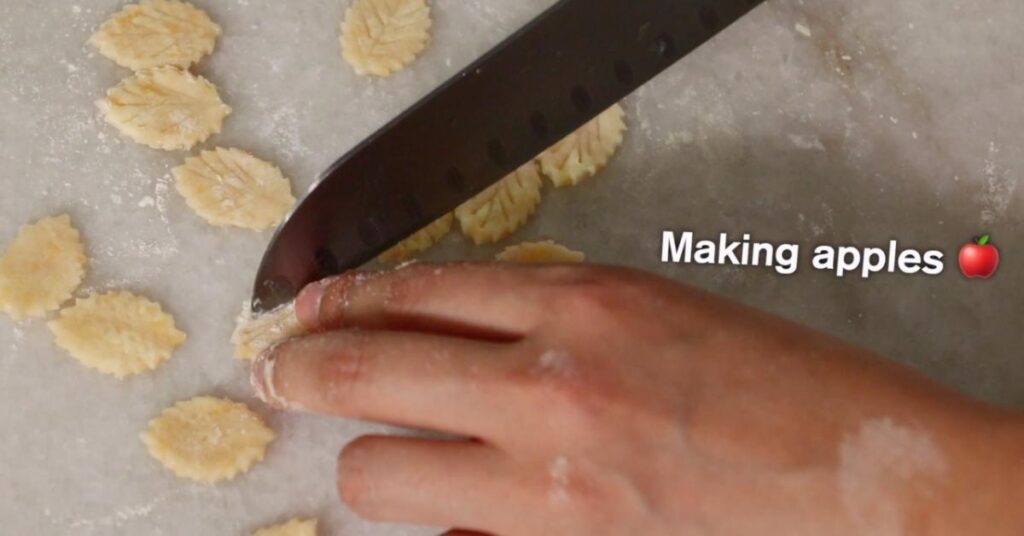
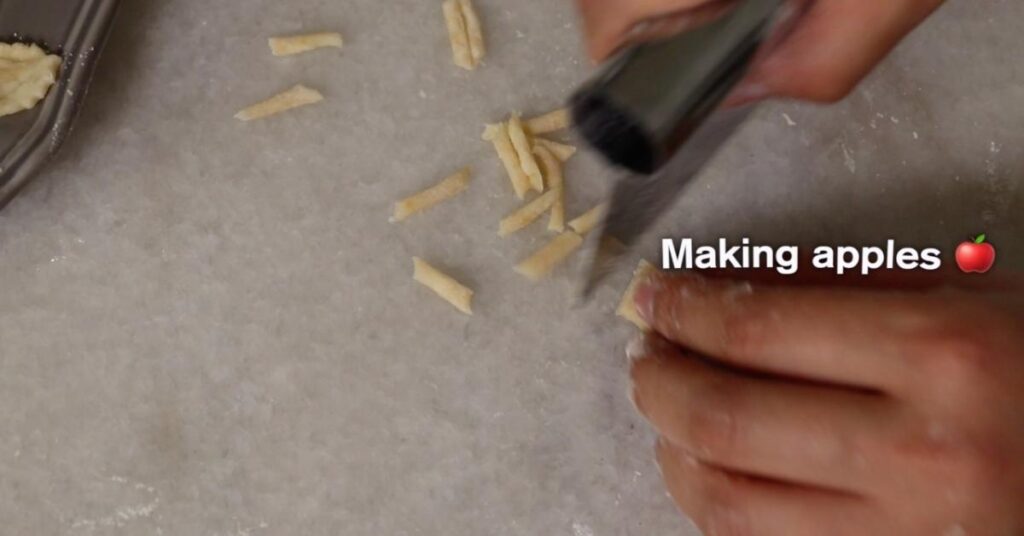
- Cut out pieces for the mini apple decoration, one for each pie. (optional)
Bread flour
I like to use bread flour to dust on the working surface because:
- It spreads more evenly on the working surface than other flour, such as cake and all-purpose flour.
- It also does not stick to the dough as much as other flours.
If you do not have bread flour at the moment, no problem; you can use all-purpose flour instead. It won't make a significant difference.
Visit the pie dough post for more detailed tips for rolling pie dough.

Today, I used a 12cm | 4.7" ring.
💬 If you don't have it, you can also use a cookie cutter, tartlet pan, or even bowl and plate to cut the circles.
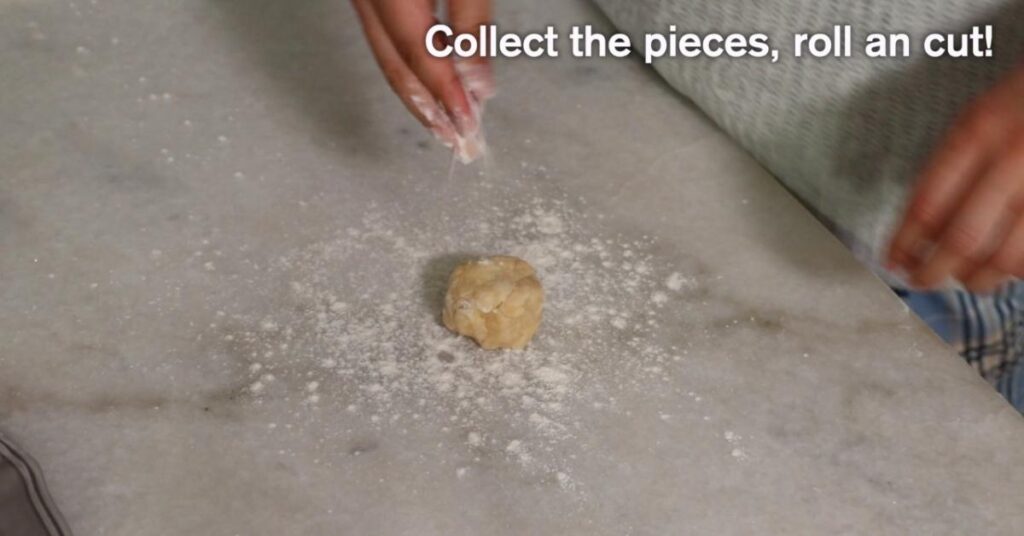
Attach the extra dough together to cut out more circles.
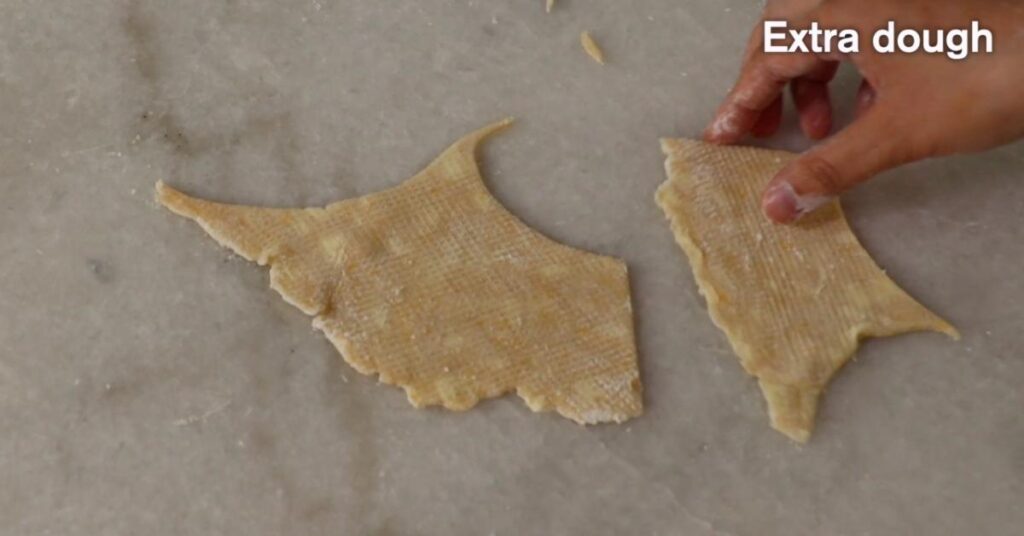
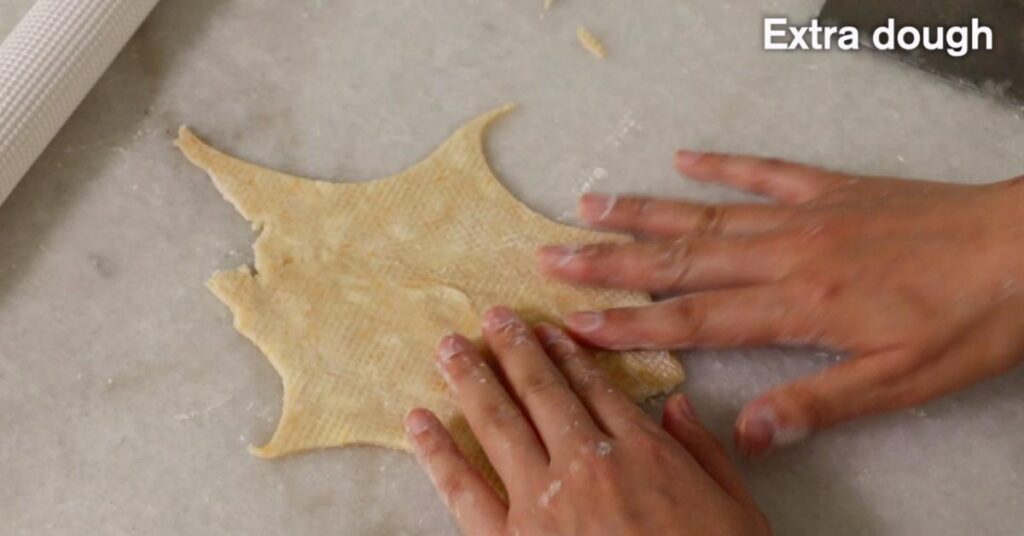
💬 Use them at the bottom and save prettier ones for the top!
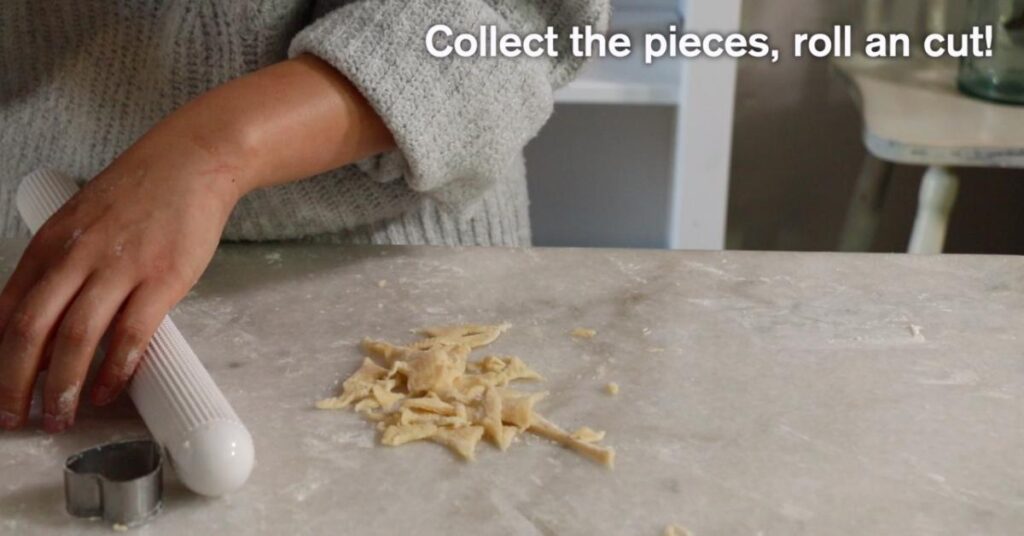
Collect all the pieces and roll them out again:
Mini apples as decorations (optional):
In total, you should be able to get 20 - 22 circles, which is enough to make 10 - 12 hand pies.
👩🏻🍳 If the dough feels too soft to assemble, chill it in the fridge again and come back.
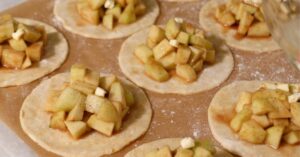
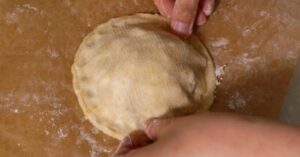
Assemble them.
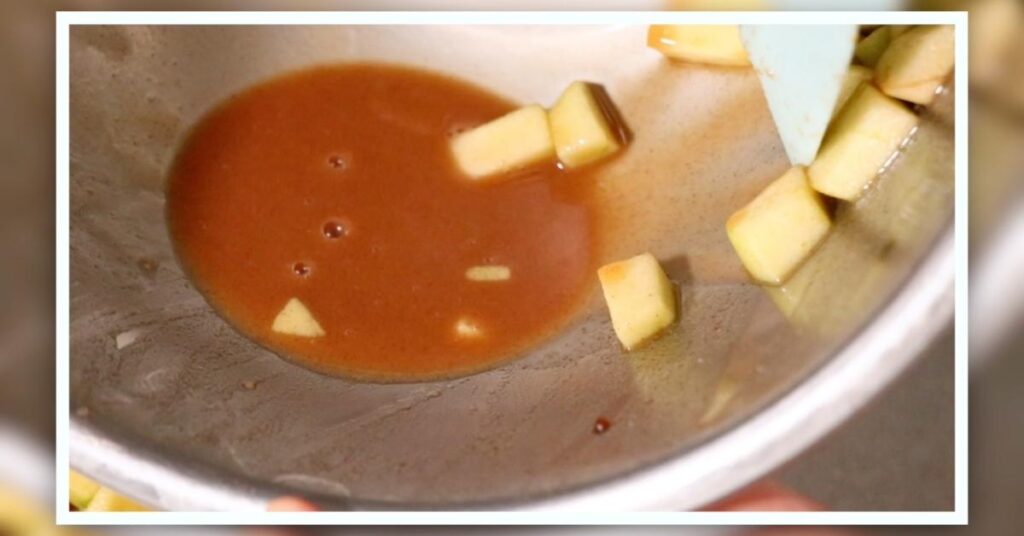
- Mix the apples and the dried ingredients for the filling. Divide it on the center of the circles evenly. Scrape off any juice left in a bowl and add it on top.
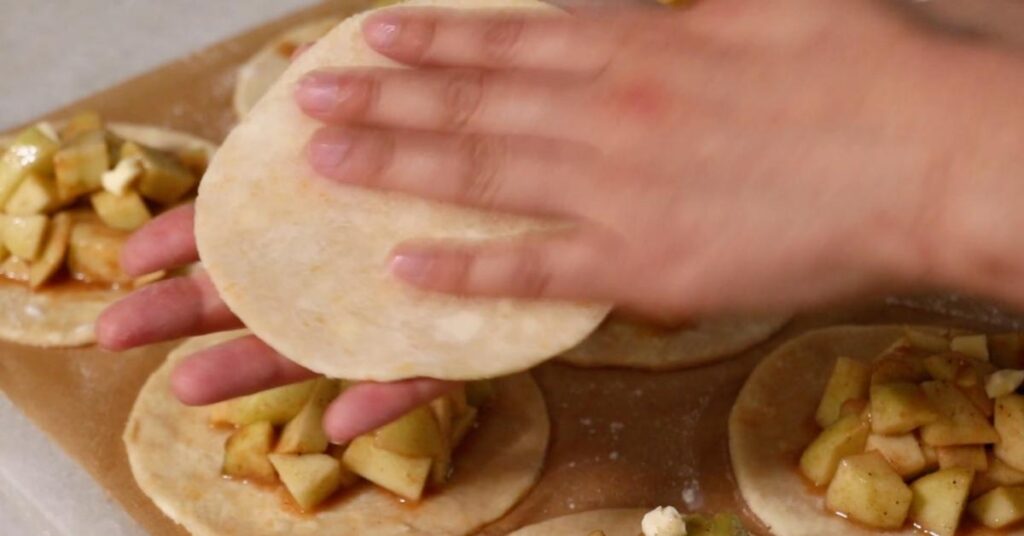
- Place pieces of butter on top of the apples.
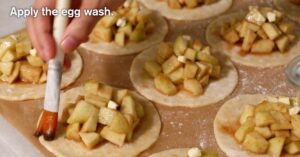
- Apply egg wash all around the edge as glue.
- Place the 2nd circle on top, press down the edge well, and seal the filling.
- Warm up the 2nd dough with your hands if it's too firm and not flexible.
- Flip over the edge, push down, and repeat it all around the edge.


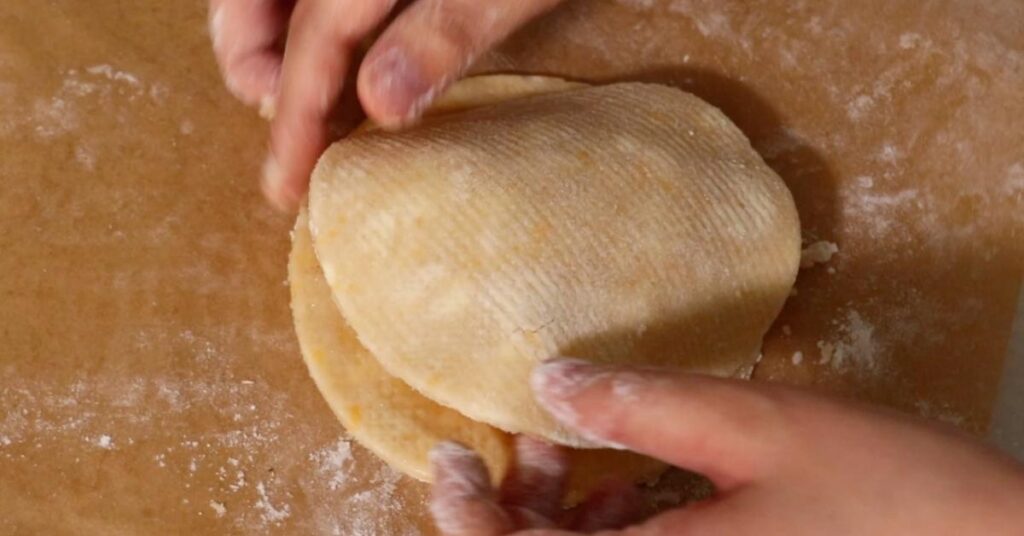

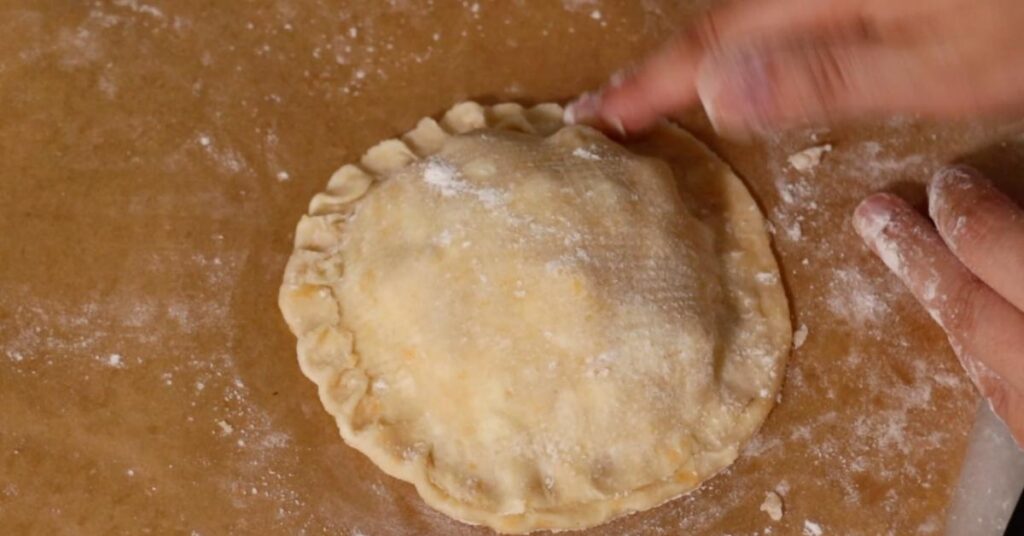
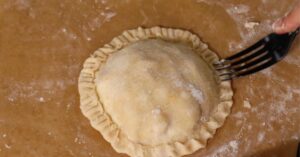
- Push the edge with a fork all around.
- Adjust a shape with your hands.
- Dust bread flour on the working surface to move them more easily.
- Use a dough scraper to transfer them.
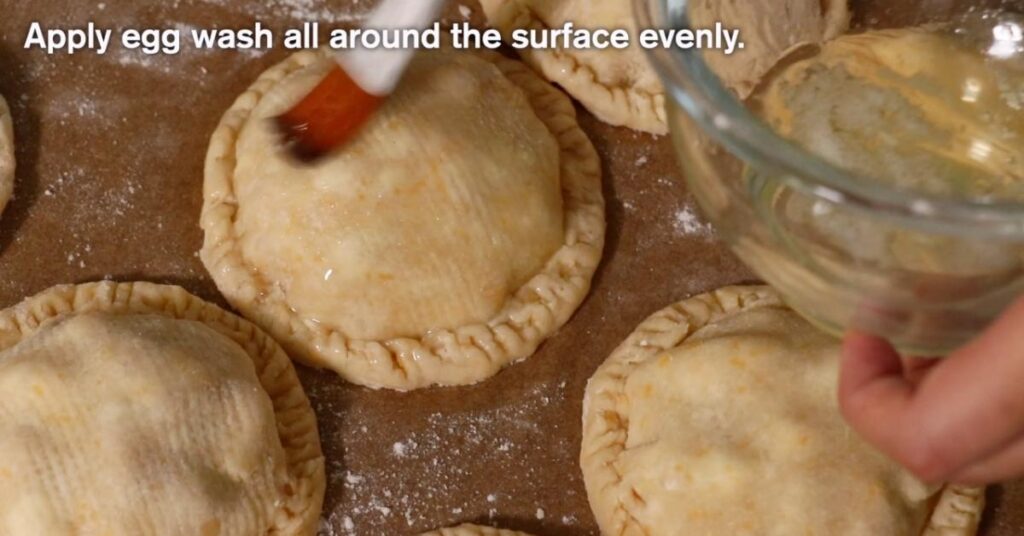
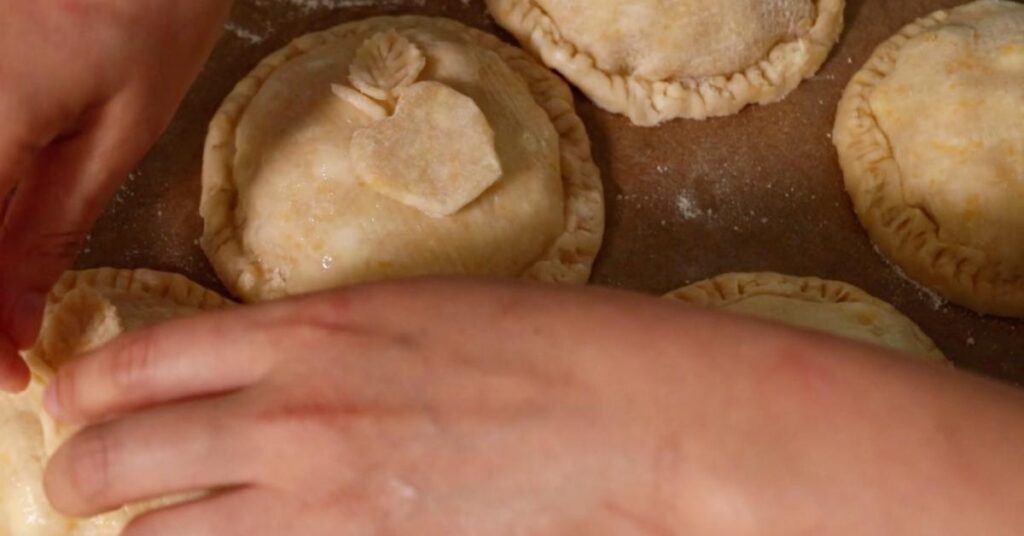
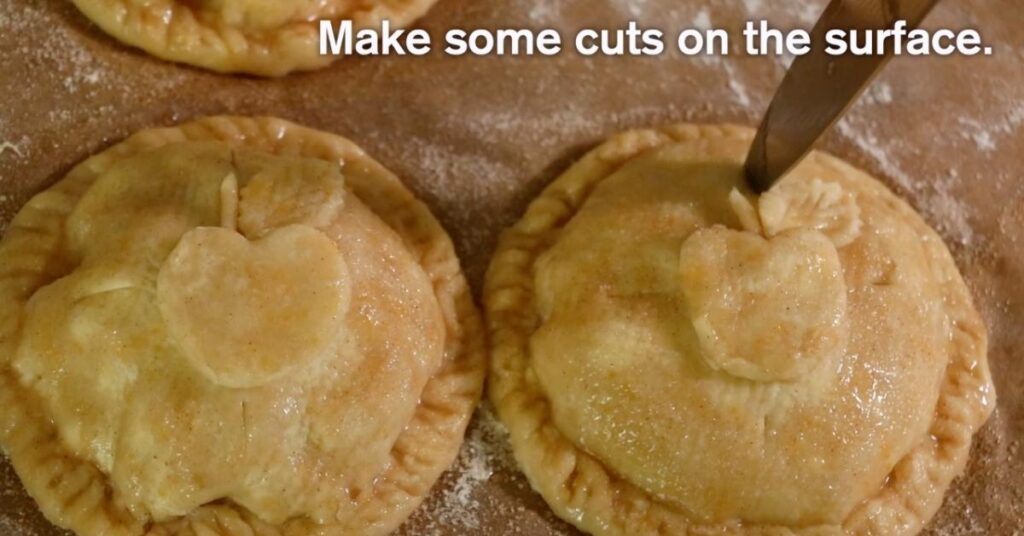
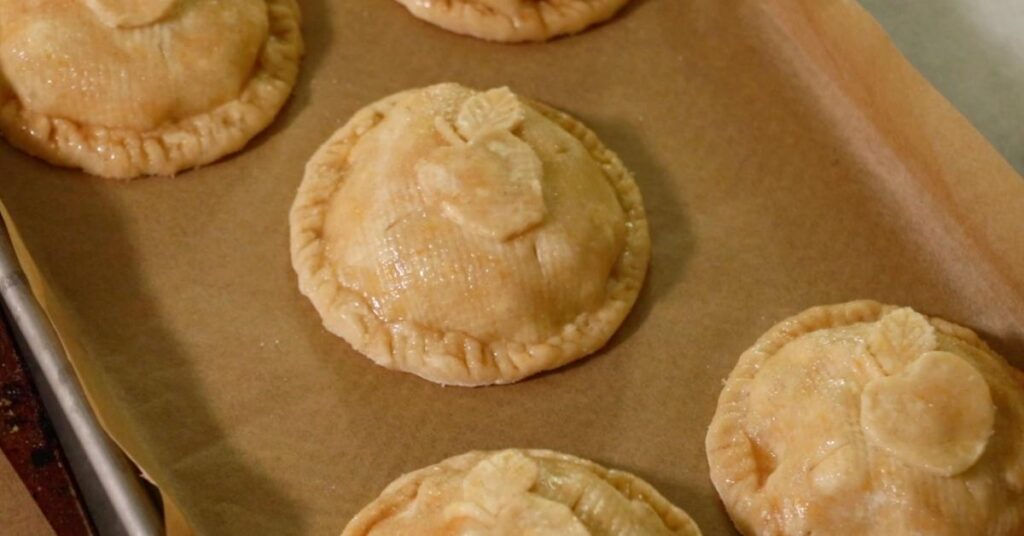
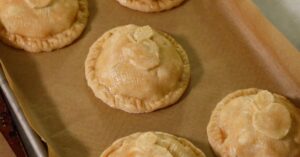
- Apply eggwash all around the surface. Attach the apple decoration and apply more egg wash on top of it.
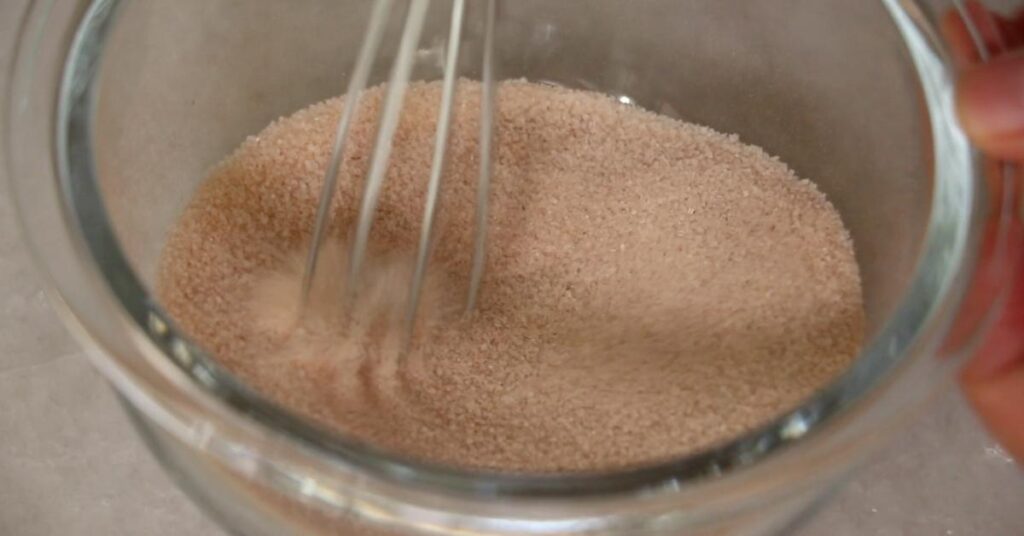
- Mix sugar and cinnamon. Sprinkle the cinnamon sugar all around the surface.
- Make small cuts on the surface.


Bake
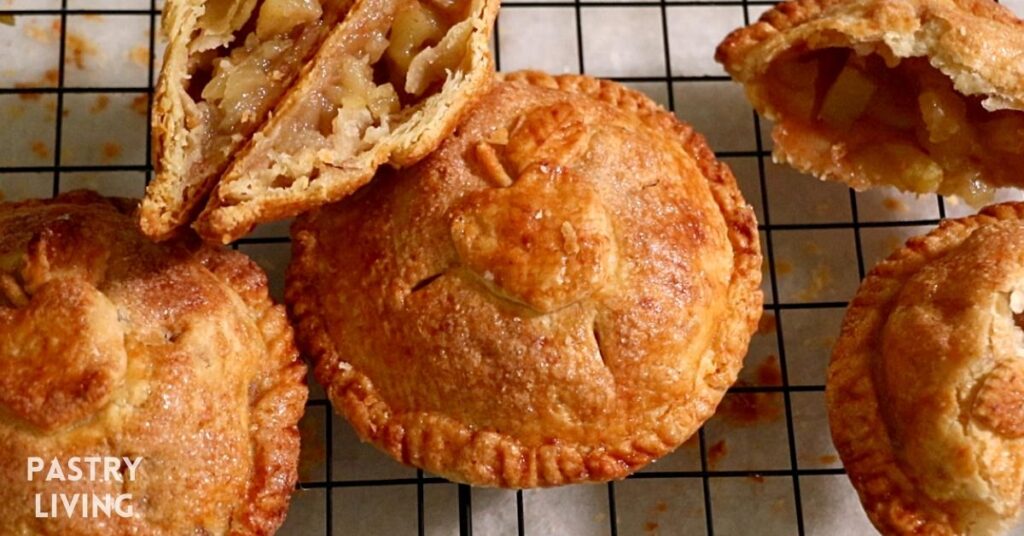
- Chill them in the fridge completely before baking them. By doing it, pies don't spread too much and can hold nice shapes.
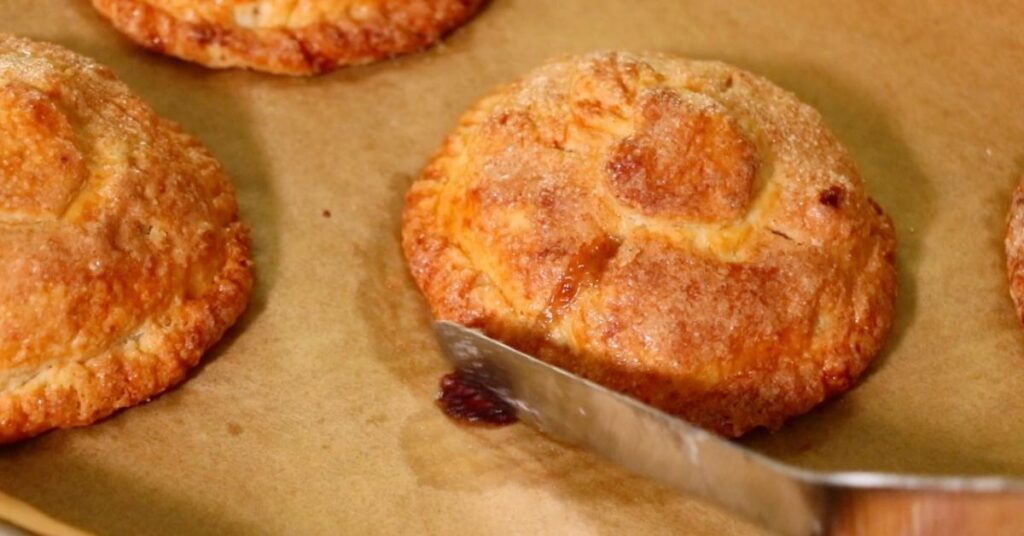
- Bake at 375 F | 190 C for about 35 minutes until the surface is caramelized evenly and the filling starts to come out from the cuts.

💬 If you see caramelized filling around the crust, you can remove it easily while it is still hot. Or cut it with a scissor after it's cooled down.
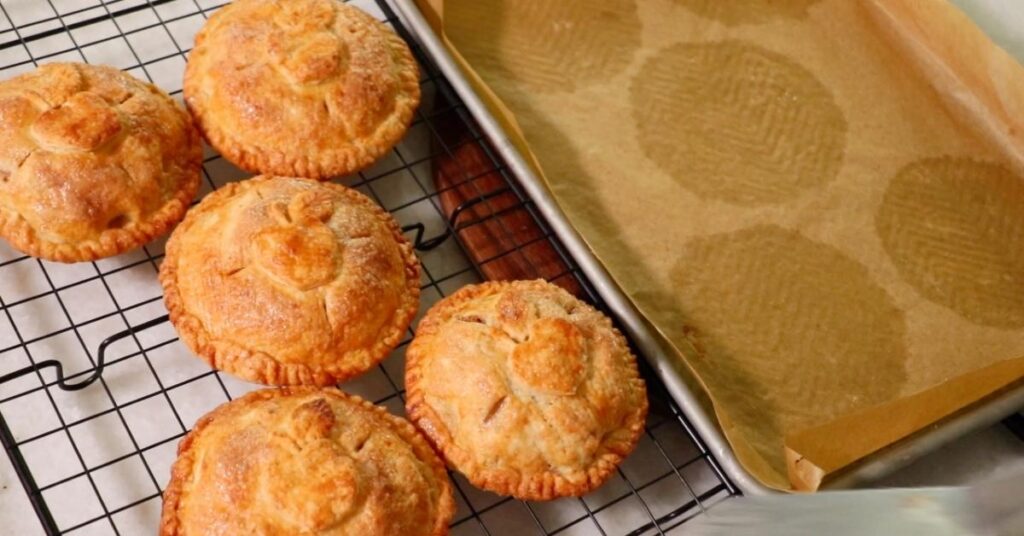
To keep the bottom crust nice and crispy, cool them on a rack.
📌 Uses For Apple Hand Pies
Enjoy this simple pie for your special occasions such as:
- Thanksgiving
- Christmas
- Cute snacks for kids
- Home parties, etc.
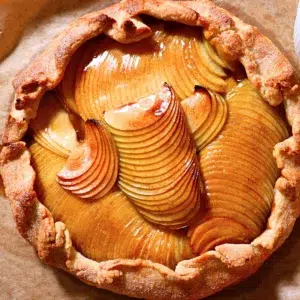
You can also shape it differently into squares, rectangles, etc., and enjoy many versions!
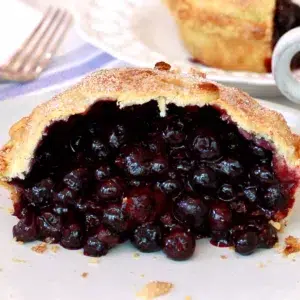
💡 This can easily turn into other types of hand pies such as blueberry, strawberry & rhubarb, cherry hand pies, etc!
📌 Frequently Asked Questions
Wrap them tightly or store them in an air-tight container. You can store them in the fridge for up to 5 days.
To enjoy the crispy pie crust, bake it in the oven again. I usually reheat them at 350 F (You can go higher or lower as you like.) for about 15 minutes. The crust stays very crispy that way even after days!
Yes! You do not need to add it and make the basic pie dough without it.
📌 VIDEO: Watch How To Make It!
To learn how to make apple hand pies visually and have a deeper understanding of all, watch this video!
Don't forget to subscribe if you liked it😉
📌 Printable Recipe
💬 If you loved this recipe, please share your feedback on this post! I always love to hear how you enjoyed it with your friends and family.
Simple Apple Hand Pies
Equipment
- Food processor or bowl with a dough blender (for pie dough)
- Rolling Pin
- Knife
- 12 cm | 4.7 inch cookie cutter or cake ring, etc.
- Fork
- Brush
- Tray
- Parchment paper
Ingredients
Pie Dough
- 13.2 oz All-purpose flour 3 US cups * Calculated as 1 cup = 125 g
- 1 tablespoon Granulated sugar
- ½ teaspoon Salt
- 8 oz Unsalted butter 2 US sticks
- 3.9 oz Icy water ⅓ + ⅛ US cups
- 1 tablespoon Oil
- Some Bread flour to dust on the working surface when you roll the dough.
Apple Filling
- 18 oz Apple (peeled, cored, and cut) or about 4 medium-small apples * I recommend mixing 2 - 3 Granny Smith apples & 1 - 2 golden delicious apples (or other apples that are sweeter, less tart, and break down more with heat.) to create a not-too-mushy yet melty texture with well-balanced tartness and sweetness.
- 1 - 2 teaspoon Lemon juice Add more or less depending on how tart your apples are
- 2.6 oz Granulated sugar ⅓ US cup
- A pinch Salt
- 2 teaspoon All-purpose flour
- 2 teaspoon Corn starch
- ½ teaspoon Cinnamon or more as you like
- ⅛ teaspoon Nutmeg optional
- ¼ lemon Lemon zest optional
Assembling
- 1 tablespoon Butter (cut into small pieces)
- 1 egg Egg white
- 1.7 oz Granulated sugar for cinnamon sugar ¼ US cup
- ¼ teaspoon Cinnamon for cinnamon sugar
Instructions
Pie Dough
- Make one batch of my pie dough. Follow the same steps and tips in the post.Chill in the fridge for at least one hour or more than a few hours, ideally.(As an option, mix in shredded cheddar cheese.)

Apple Filling
- Cut apples into small pieces and toss with lemon juice. Set it aside.18 oz Apple (peeled, cored, and cut), 1 - 2 teaspoon Lemon juice, 2.6 oz Granulated sugar, A pinch Salt, 2 teaspoon All-purpose flour, 2 teaspoon Corn starch, ½ teaspoon Cinnamon, ⅛ teaspoon Nutmeg, ¼ lemon Lemon zest
- Mix all dried ingredients for the apple filling and set it aside. (Do not mix with apples yet.)
Roll The Pie Dough
- Roll the pie dough very thin, about 1.5 - 2 mm | 0.05 - 0.07".Some Bread flour
- Cut its circle with a 12 cm | 4.7-inch cookie cutter or cake ring. You'll get about 20 - 22 circles which are enough to make 10 - 11 hand pies. Chill them in the fridge if they are getting too soft to assemble.
- Cut out pieces for the mini apple decoration, one for each pie. (optional)
Assemble Them
- Mix the apples and the dried ingredients for the filling. Divide it on the center of the circles evenly. Scrape off any juice left in a bowl and add it on top.
- Place pieces of butter on top of the apples.1 tablespoon Butter (cut into small pieces)
- Apply egg wash all around the edge as glue.1 egg Egg white
- Place the 2nd circle on top, press down the edge well, and seal the filling.Warm up the 2nd dough with your hands if it's too firm and not flexible.
- Flip over the edge, push down, and repeat it all around the edge.
- Push the edge with a fork.
- Adjust a shape with your hands.Dust bread flour on the working surface to move them more easily.Use a dough scraper to transfer them.
- Apply egg wash all around the surface. Attach the apple decoration and apply more egg wash on top of it.
- Mix sugar and cinnamon. Sprinkle the cinnamon sugar all around the surface.1.7 oz Granulated sugar for cinnamon sugar, ¼ teaspoon Cinnamon for cinnamon sugar
- Make 4 small cuts on the surface. (so that the steam can get out from them.)


Bake
- Chill them in the fridge completely before baking them. By doing it, pies don't spread too much and can hold nice shapes.
- Bake at 375 F | 190 C for about 35 minutes until the surface is caramelized evenly and the filling starts to come out from the cuts.

Video
Notes
How to store them:
Wrap them tightly or store them in an air-tight container. You can store them in the fridge for up to 5 days. ** For best results, measure ingredients with a scale. All recipes are designed with weighed ingredients using grams/ounces. Cup measurements are provided for your convenience. **Nutrition
📌 Pin It!
Pin it if you love this recipe, and find so many other recipes on my Pinterest page!
You may also like:
Go back to the top of this post.

Leave a Reply