
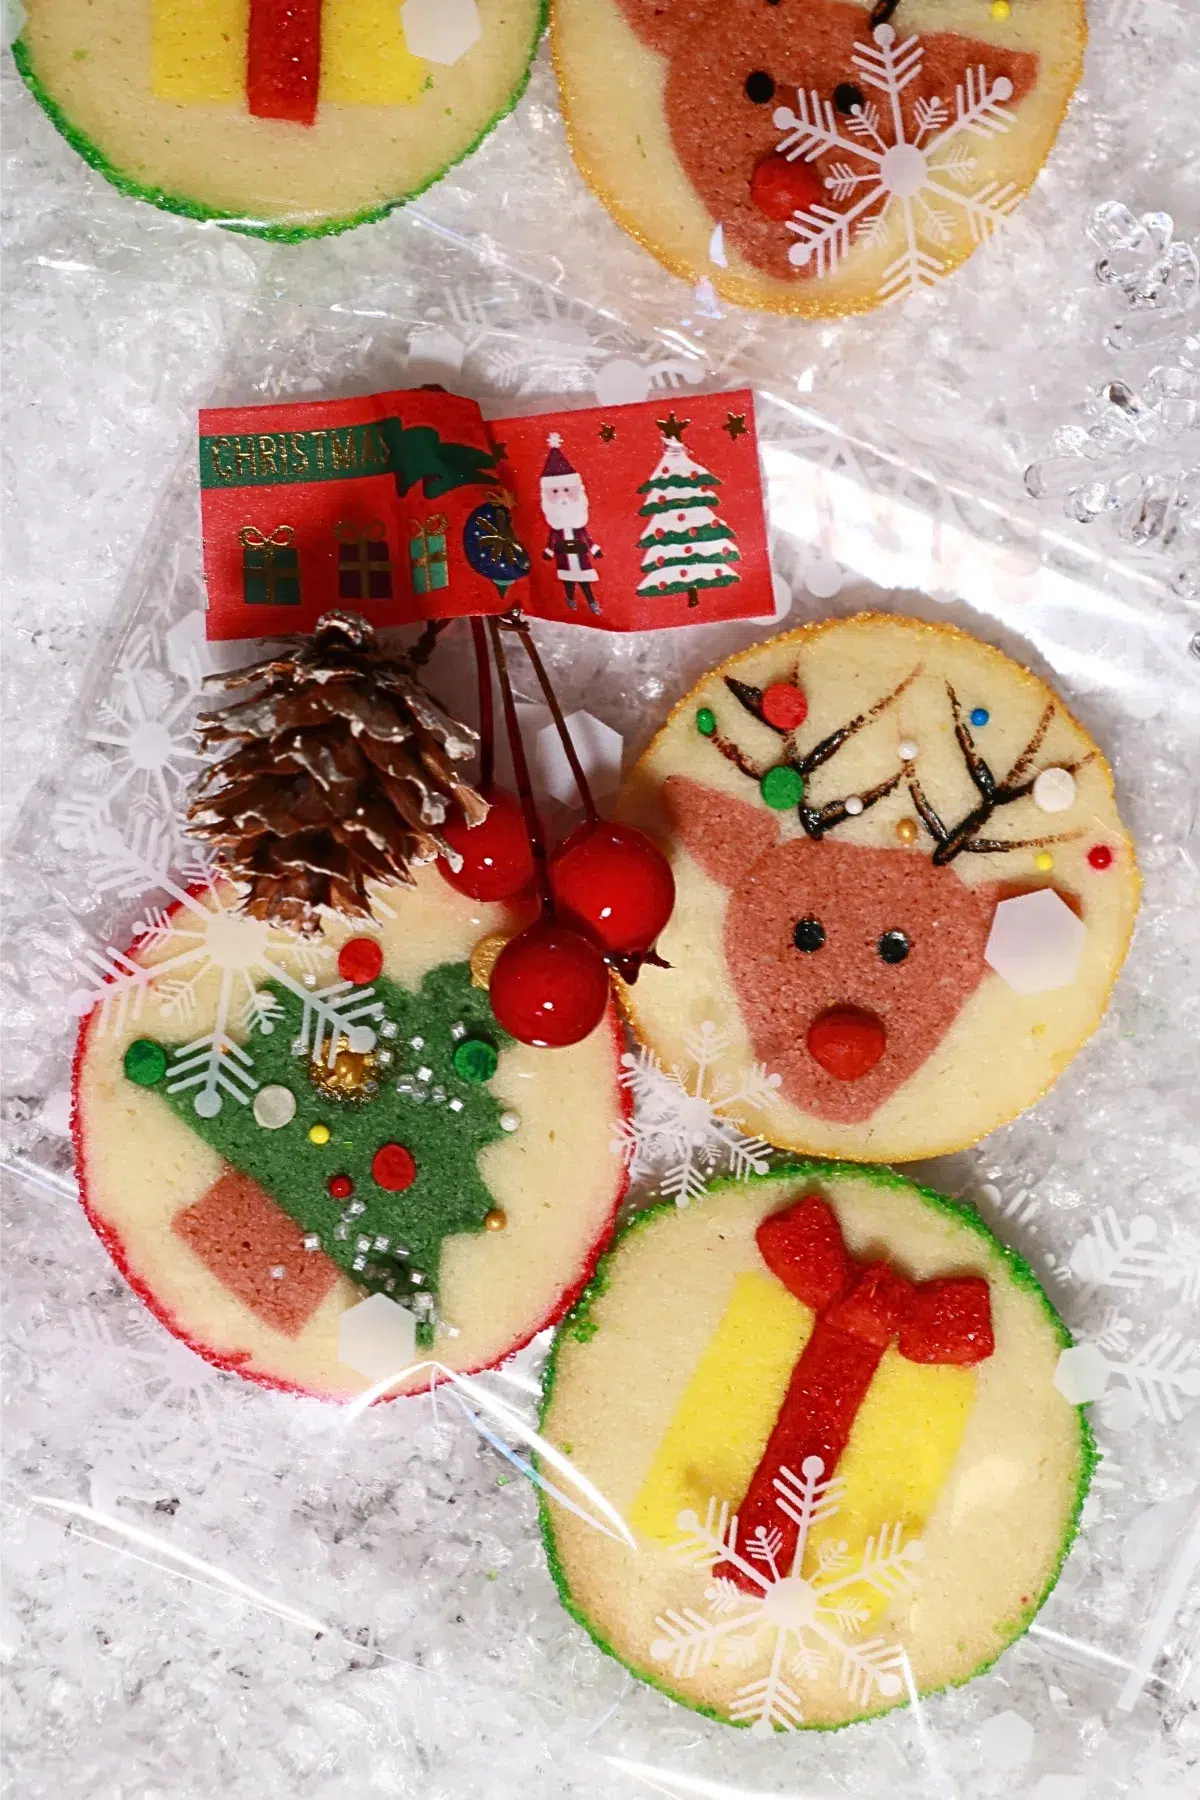
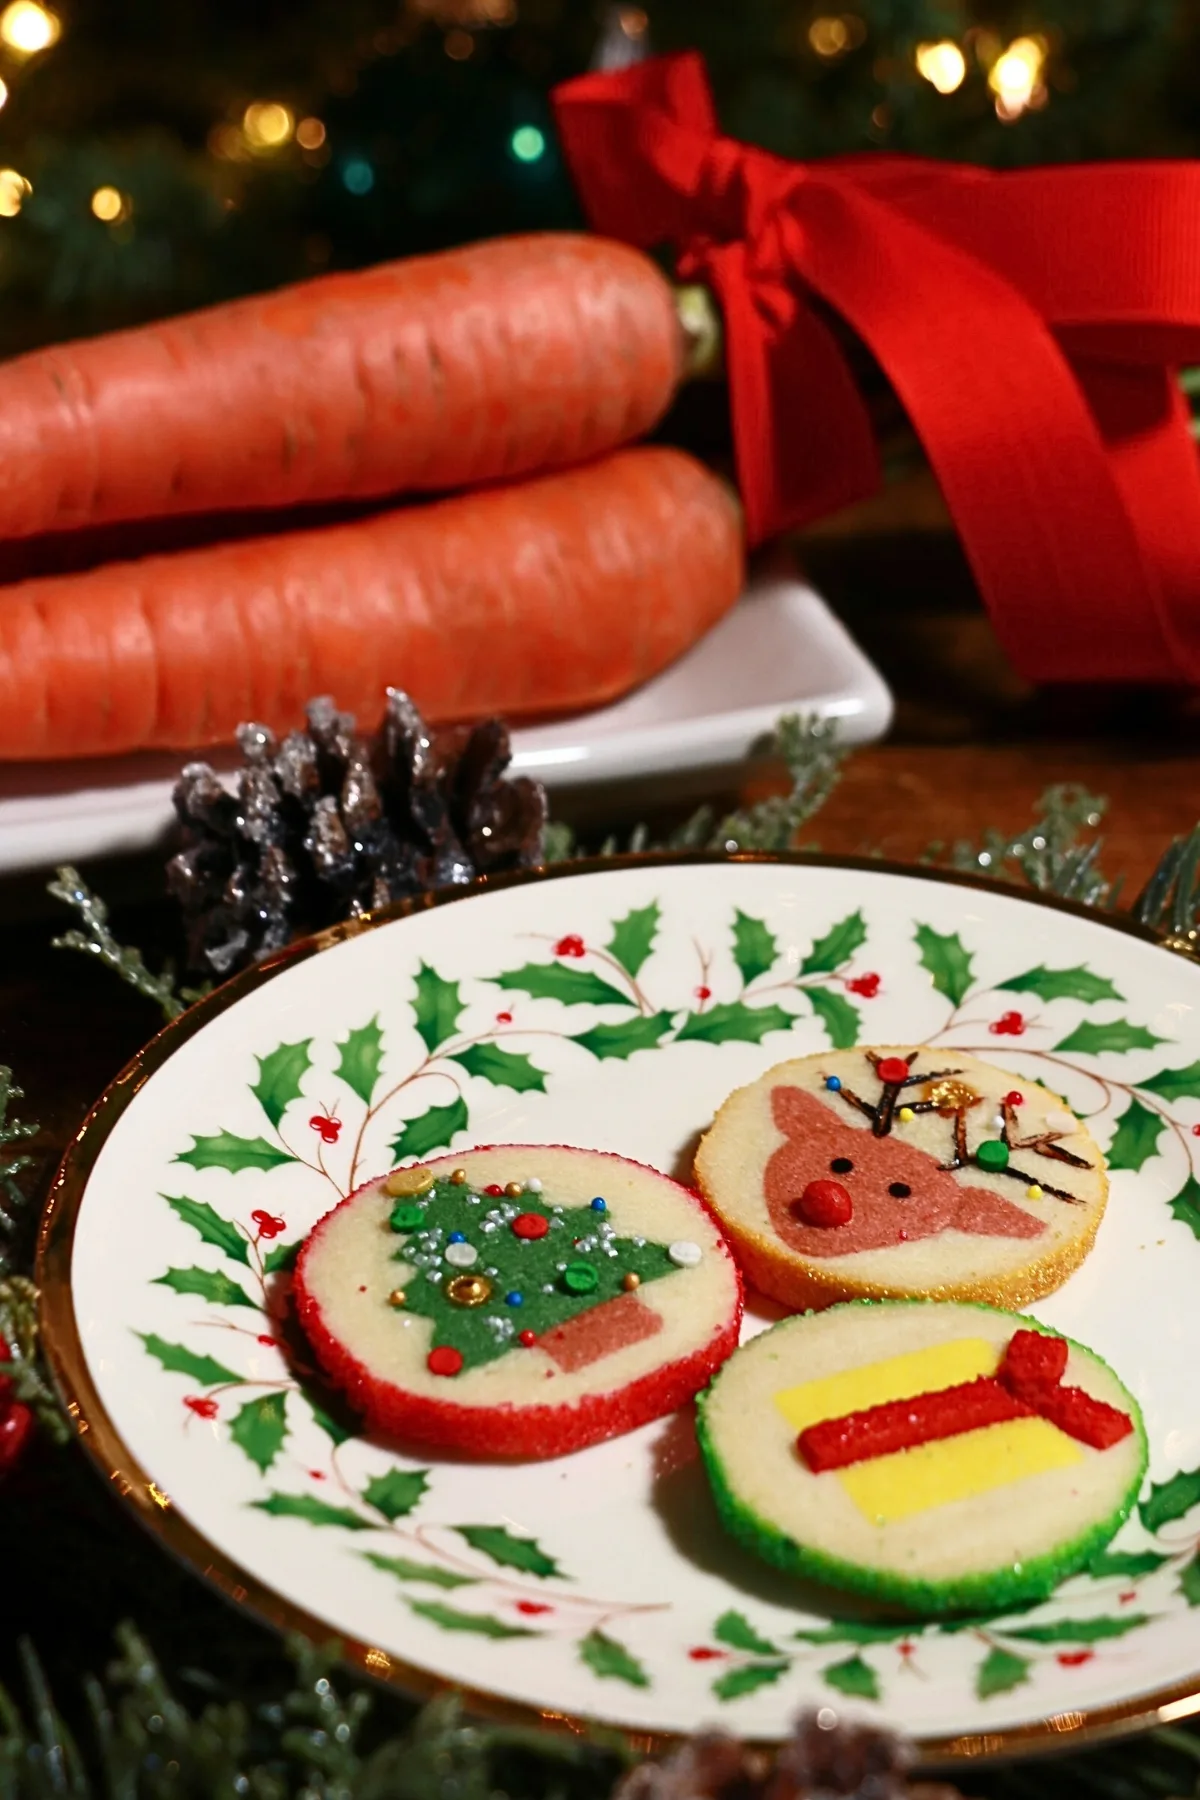
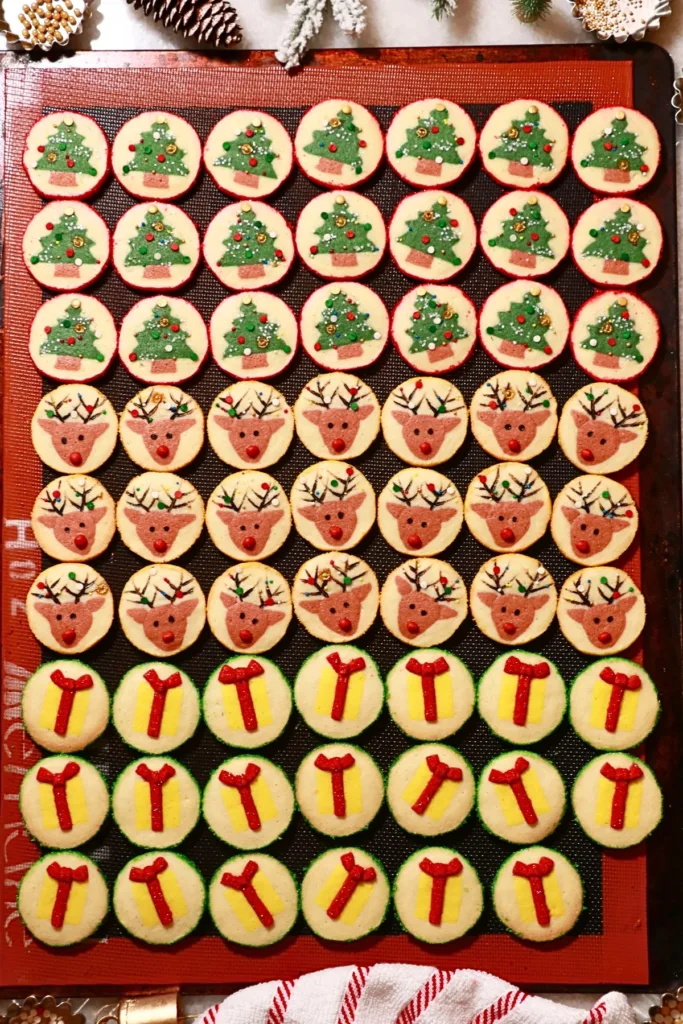
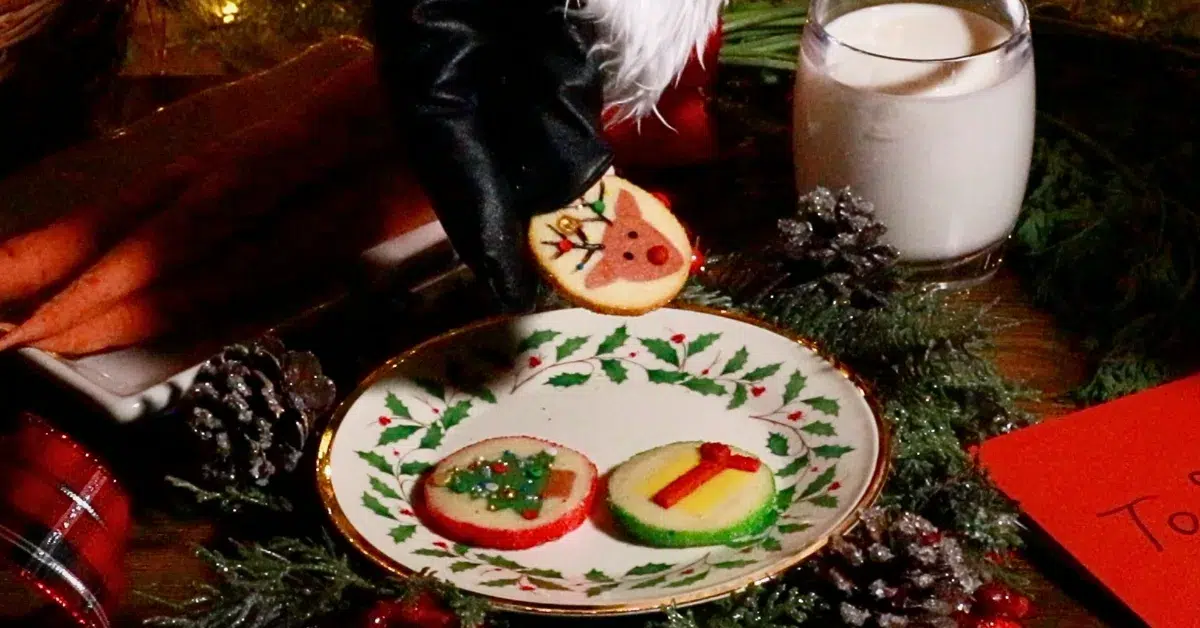
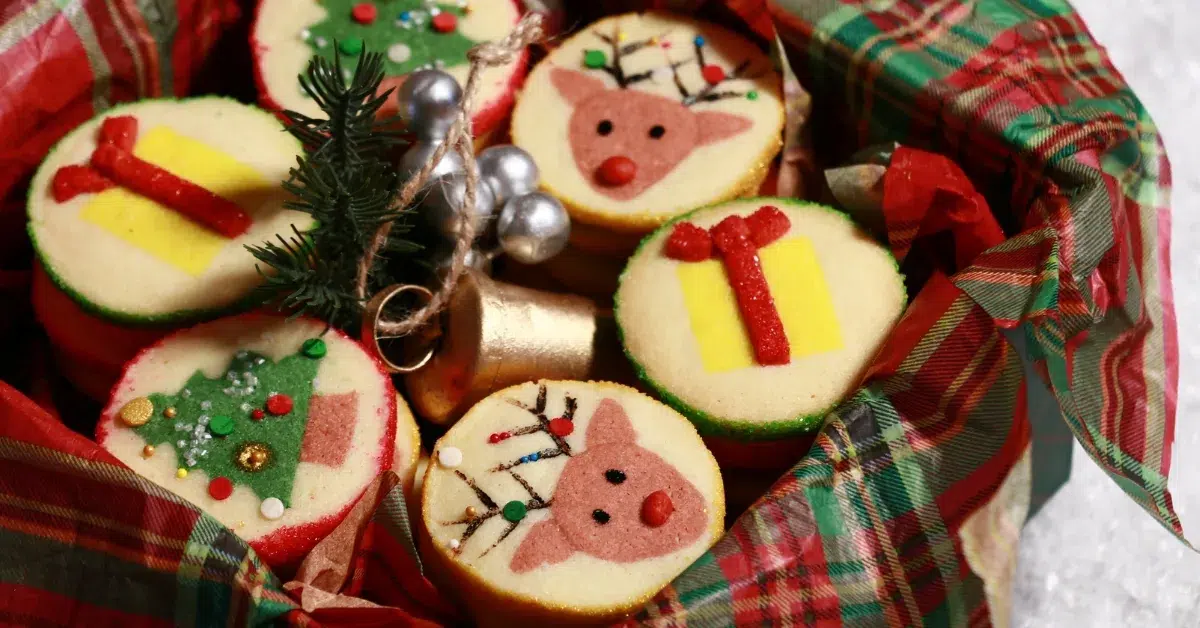
I'm sharing tips & tricks to make 3 kinds of cute slice-and-bake Christmas cookies: Christmas tree, reindeer, and present box! Share them with your friends and family and spread the Christmas joy during this Holiday season!🎁

Last year, I shared another slice-and-bake Christmas cookies: Santa, Santa boots, and wreath cookies. And about a few years ago, I shared how to make slice-and-bake Christmas tree cookies - I focused more on being precise, so it takes a lot more time to complete the cookies with that method - So this time, I wanted to share probably the easiest way to shape a Christmas tree!
I hope you’ll enjoy the tutorial. Merry Christmas🎄
📌 What you'll learn in this post:
In this post, you'll learn essential baking tips, such as:
- Tricks to shape each design more easily
- How to slice them to get the best look
- Tips for baking them to get the most beautiful look
- How to store the dough and cookies properly.
... and more!
Let's get started.

📌 What's In The Slice-and-Bake Christmas Cookies?
The Dough
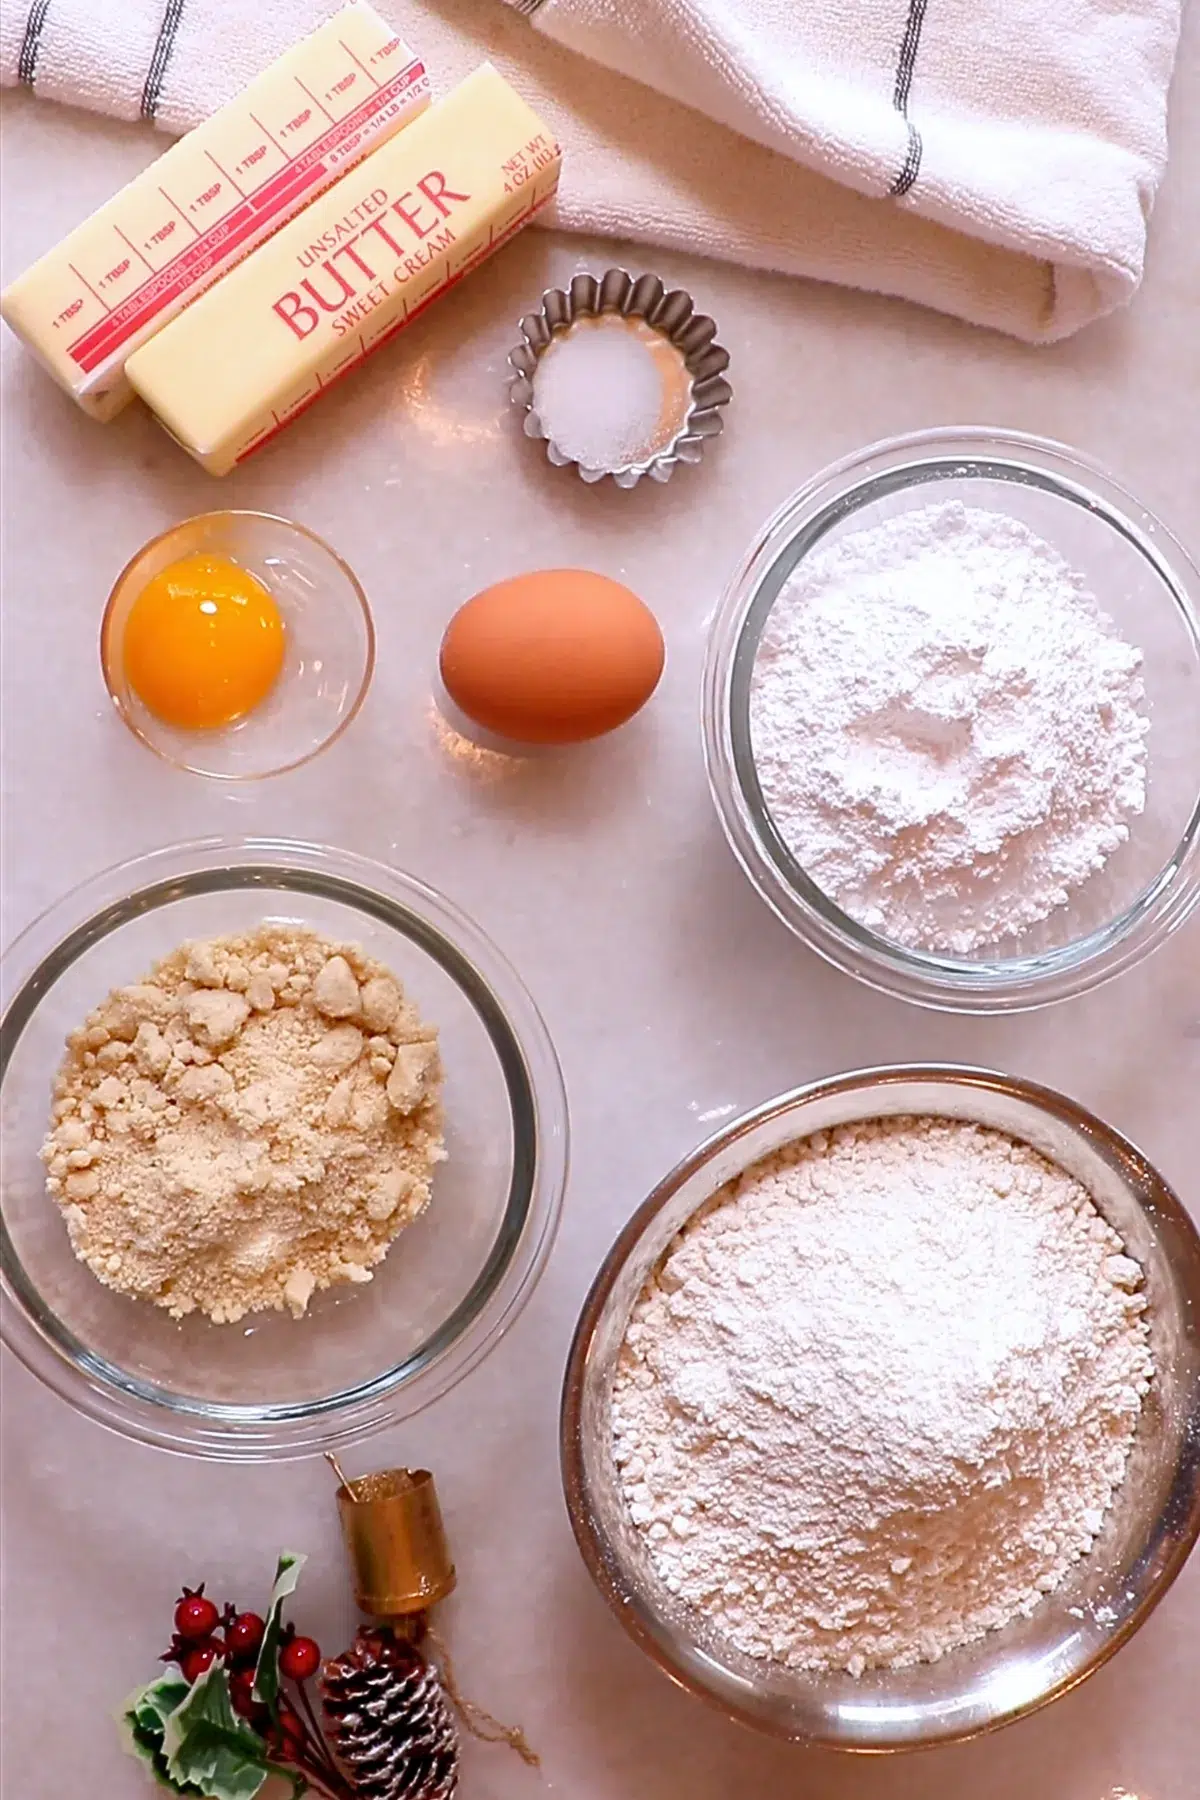
- Unsalted butter: Use soft butter so that everything blends easily.
- Powdered sugar: By using powdered sugar instead of granulated sugar, you can enjoy a more crumbly, flakier texture.
- Salt
- Whole egg
- Egg yolk: Save the egg white for egg wash when the cookie recipe requires it.
- Cake flour
- Almond flour: By adding almond flour, the texture of the cookies gets more crumbly and not too crunchy.
Egg Wash
- Egg white
- Water
Decorations
- Colorings: Green, brown, yellow, and red (Use any color you like!)
- Sprinkles: Your choice!
📌 How To Make The Slice-and-Bake Christmas Cookies
Now, let me share detailed tips on each step, which are all crucial for making the cookies at home successful.
Step 1: Make The Cookie Dough.
Make 1 batch of the cookie dough recipe.

Step 2: Color The Dough
Set aside about ⅔ (580 g | 20.4 oz) of the whole dough (880 g | 31 oz) to cover the designs later. And take a tiny bit of the dough from it and color it with red coloring.
Divide the rest of the dough (⅓ of the whole dough: 300 g | 10.5 oz) into 3 and color each of them with yellow, brown, and green colorings.
- Yellow: 100 g | 3.5 oz
- Brown: 100 g | 3.5 oz
- Green: 100 g | 3.5 oz
Or use any colors you like!

Tips💡:
- I picked a yellow color for the box but the color didn't stand out so much, especially after it's baked. I recommend making the color darker or using a different color.
- I added brown to green dough to make the color darker.
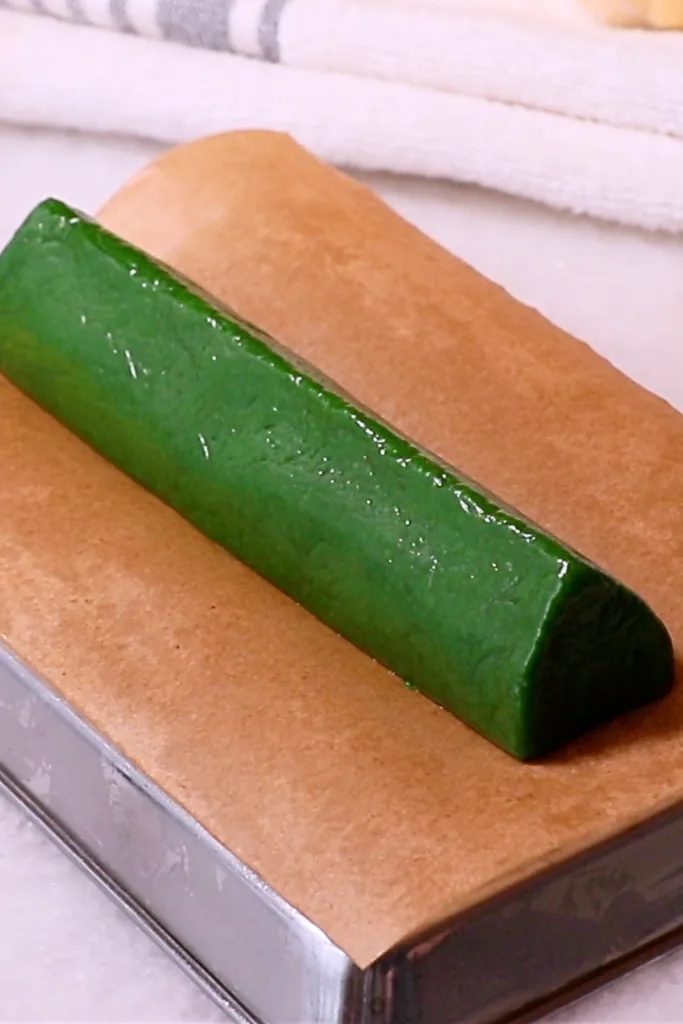
Step 3: Shape Each Dough.
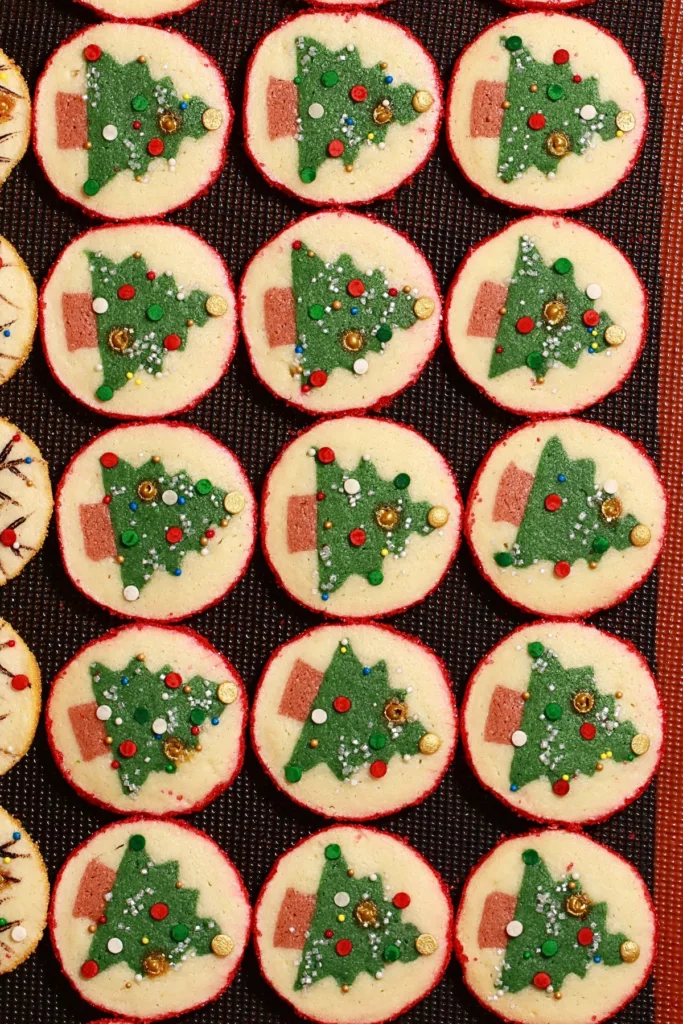
Christmas Tree
- Make a triangle shape. (Width & Height: 2.5 cm | 1 inch, Length: 15 cm | 6 inches)
- Freeze it.
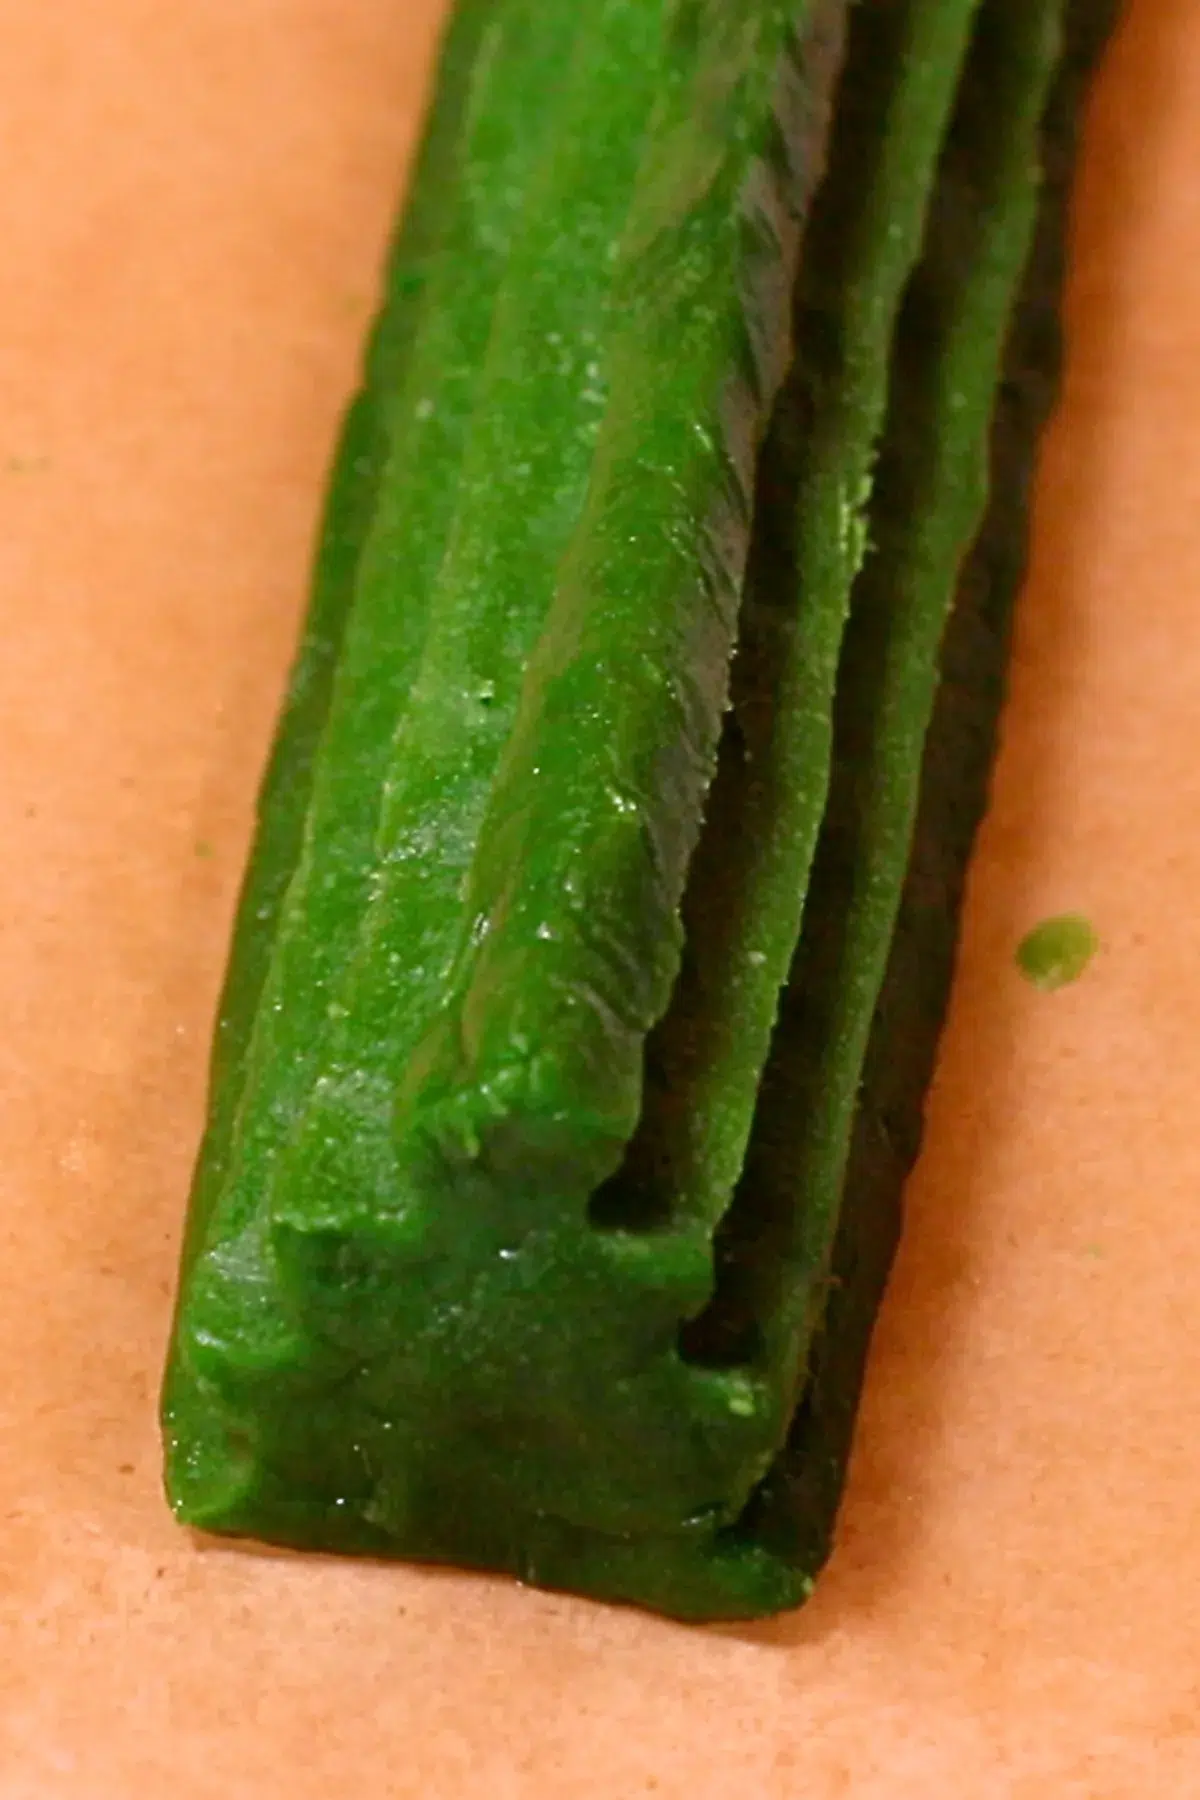
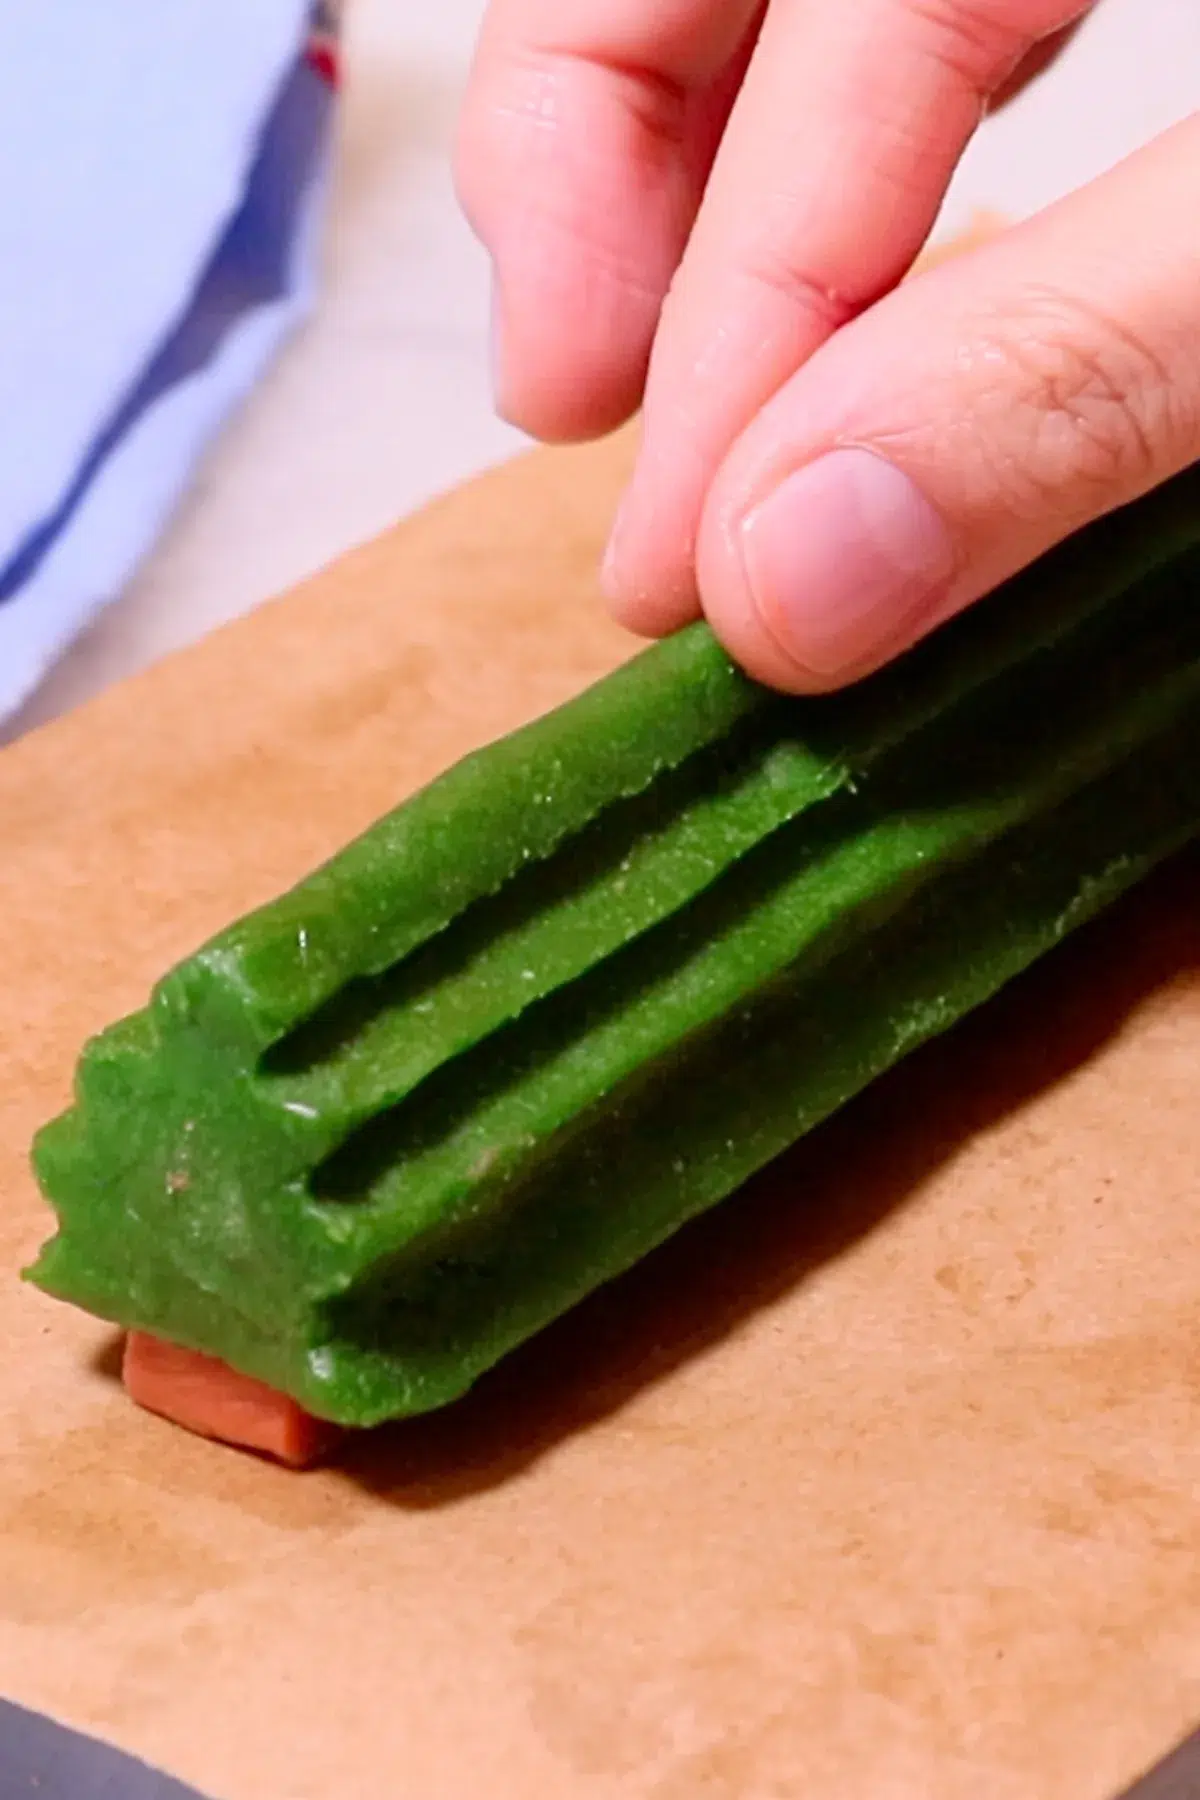
- Use anything with a sharp corner (I used a star cookie cutter) and curve the surface to create the zigzags.

- Make a rectangle shape with brown dough for the tree trunk. (Height: 2.5 cm | 1 inch, Length: 15 cm | 6 inches)
- Freeze it.
- Cut the sides. (Width: 1 cm | 0.4 inch)
- Mix egg white and water to make the egg wash. Attach a little bit of the dough and egg wash on the tree trunk and connect it with the green body.
- Freeze it.


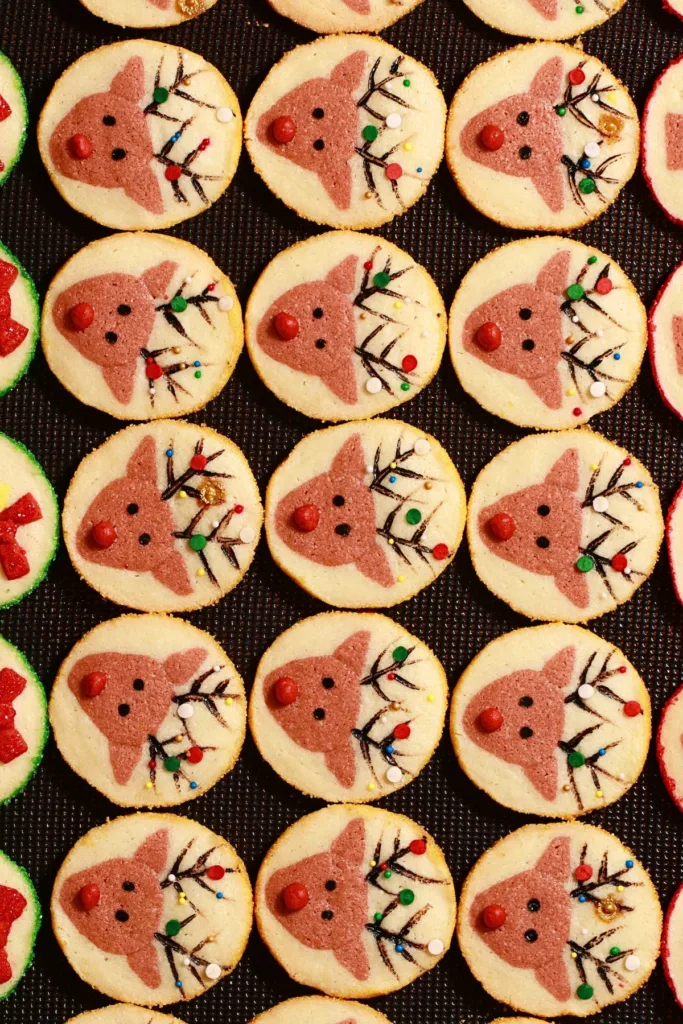
Reindeer
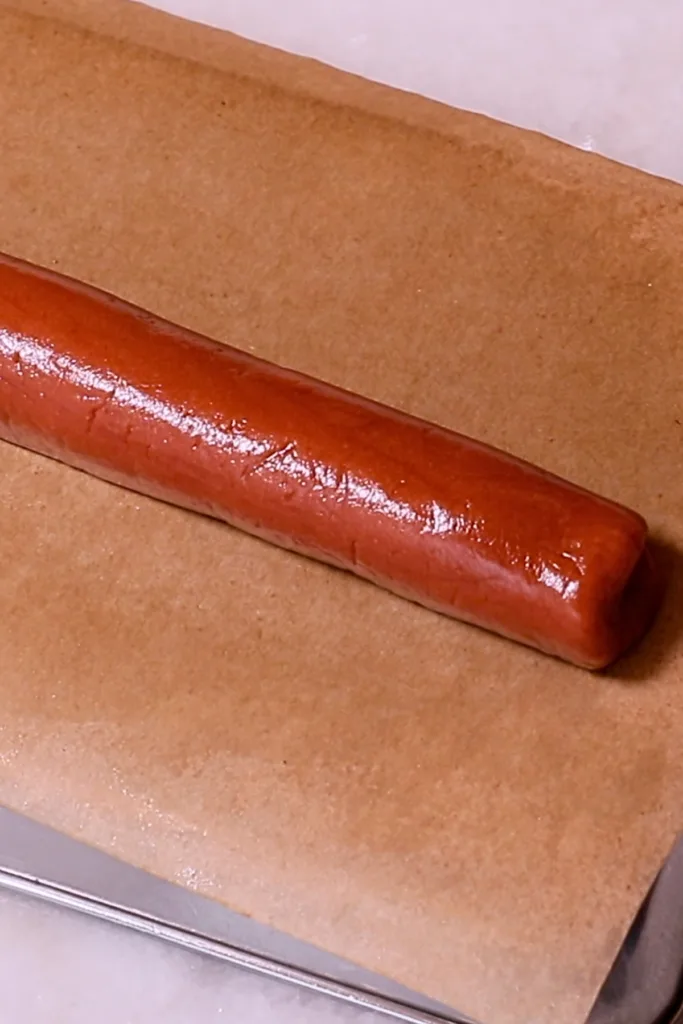
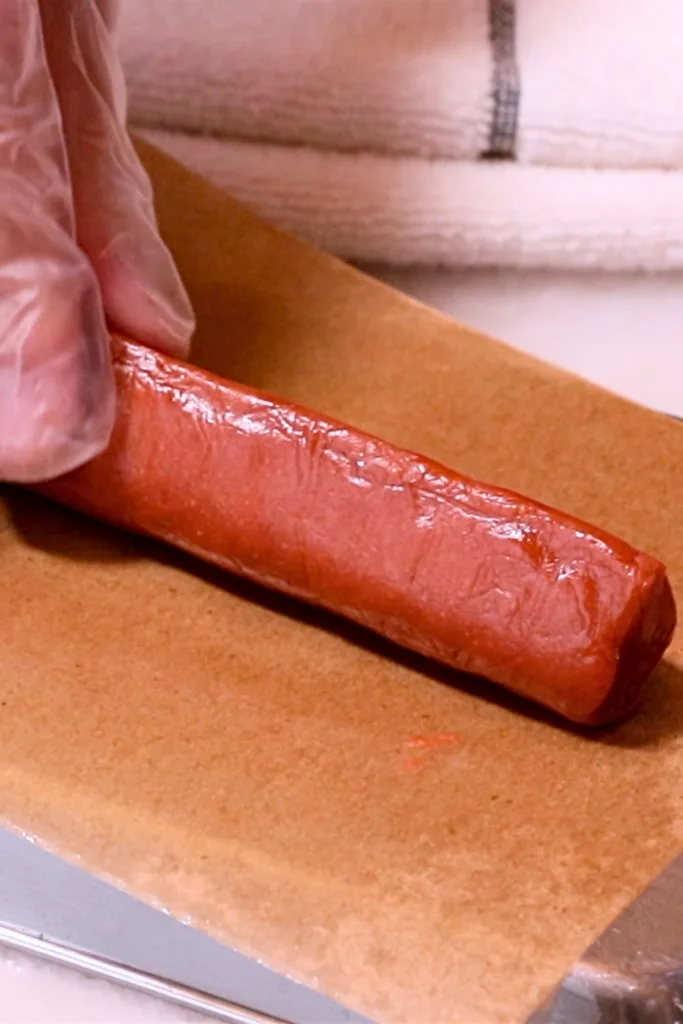
- Make a log. (Length: 15 cm | 6 inches)
- Freeze it. * The dough is very soft at room temperature, so chill that in the freezer and come back.
- Shape the face shape (Width: 1.5 cm | 0.6 inch, Height: 2 cm | 0.8 inch)
- Make the ears using the rest of the brown dough. (Height: 0.6 cm | ¼ inch, Length: 15 cm | 6 inches)
- Freeze them.
- Attach them to the head using a little bit of the dough and egg wash.
- Freeze it.


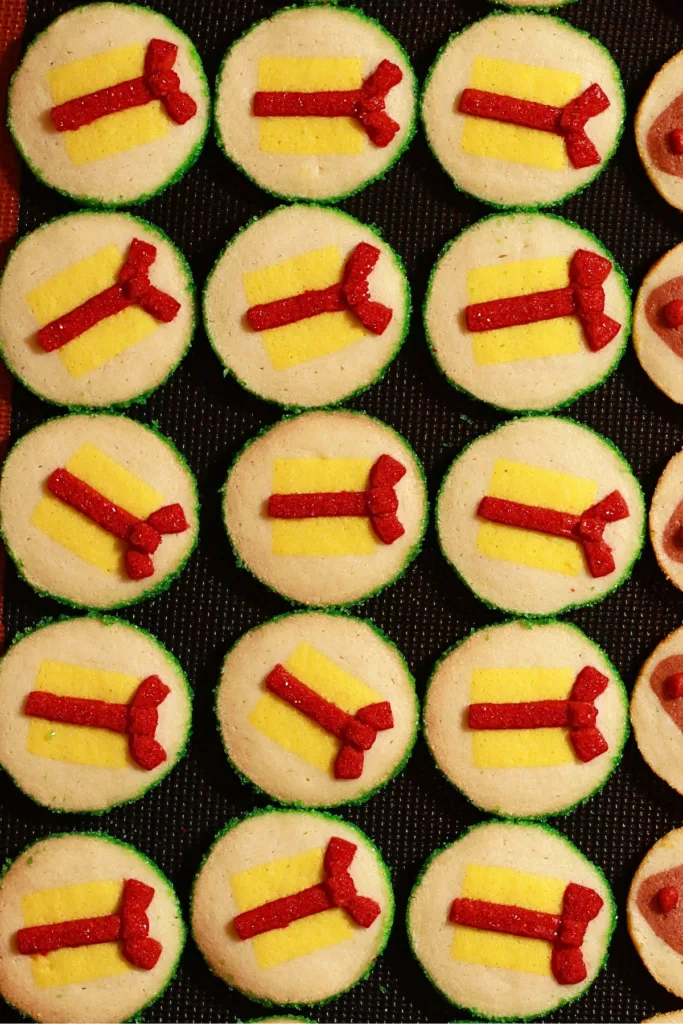
Present Box
- Make a square shape with yellow dough. (Width & Height: 2 cm | 0.8 inch, Length: 15 cm | 6 inches)
- Freeze it.
- Cut off the sides to create a more clean square shape.
- Freeze it.


Tip💡:
- [Christmas tree] I curved the dough pretty deep this time but it might be easier to curve shallower with more zigzags - you can try whichever you like!
- Whenever you feel the dough is getting soft, freeze it again and come back to prevent it from getting squished by hand.
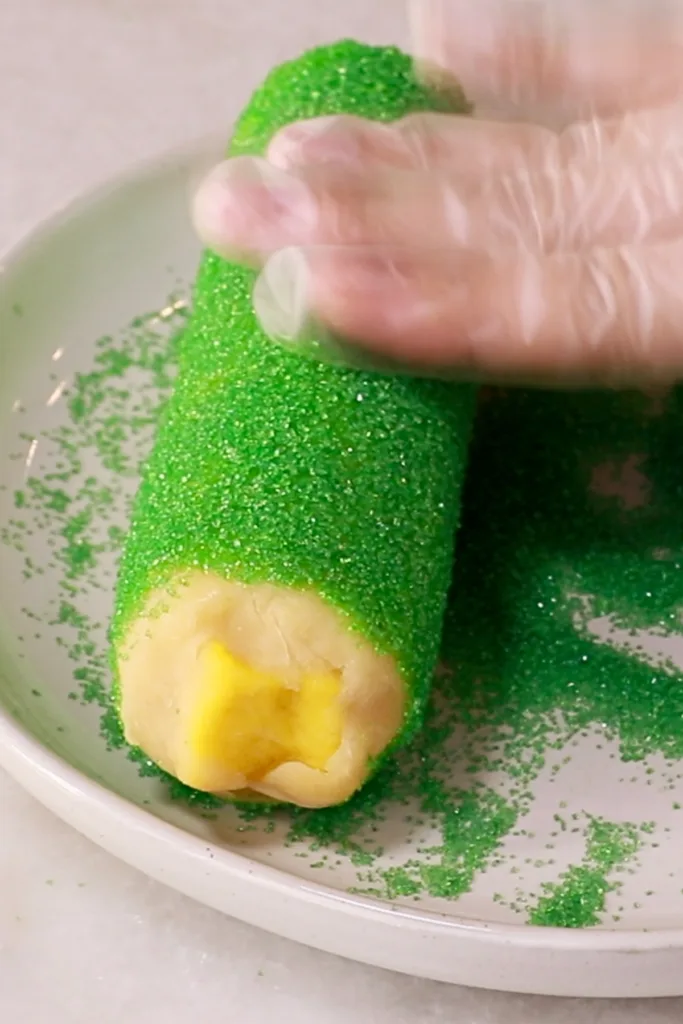
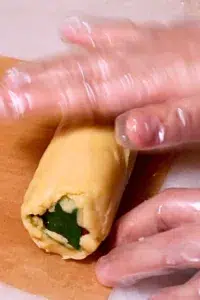
Step 4: Cover Each Design With Plain Dough.
Divide the plain dough that we set aside earlier into 3 and cover each design with them.
[The logs] Length: 15cm | 5.9", The diameter: 4cm | 1.6".


Tips💡:
- Ensure that each design is completely frozen when you do this to avoid squishing the shape.
- When you are afraid of the dough getting soft as you do this, just cover the design all around thinly first, freeze it, and cover it with the rest of the plain dough.
- You don't have to stick to the length and diameter when you're making it with kids or if it might stress you out. The most important thing is to have fun!
- I like to use a peeler to adjust the shape - If you find the part that is too thick, peel it off, and attach it somewhere else.
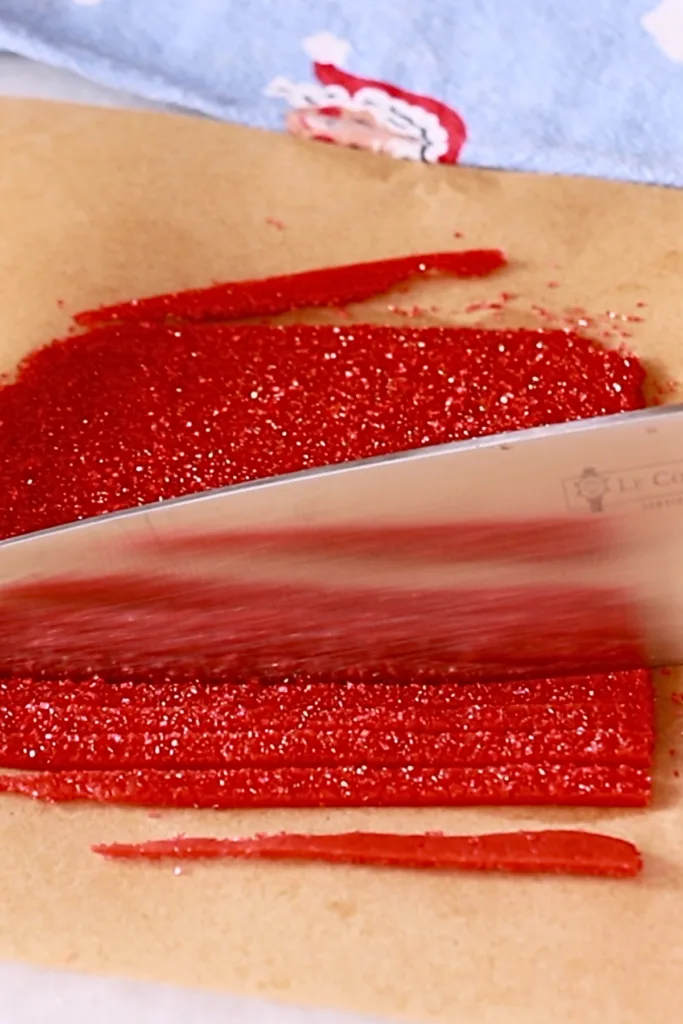
Step 5: Slice The Log.
Brush egg wash all around the surface and attach sprinkles.
Slice each log with 5 mm intervals.

Tips💡:
- Ensure that the dough is frozen to cut very clean and to avoid squishing the shape.
- The dough spreads more in the oven when it's thicker - Try not to cut too thick!
Step 6: Decorate them.
Make reindeer noses with the red dough. Roll the rest very thinly, brush egg wash, attach sprinkles, and slice thinly to make the ribbon stripes.

If you don't have time, make this decoration part very simple!


Reindeer eyes: Black coloring, The antlers: Brown coloring


Step 7: Bake!
- Bake at 350 F | 176 C for about 7 mins.
- Turn the temperature down to 330 F | 165 C and bake for another 5 - 7 minutes or more until the edge is slightly toasted.
Chill the dough before baking
Chill the dough completely in the fridge until right before you bake them to prevent them from spreading more in the oven.
Tips💡:
- This cookie is so fun to make, but it takes a good amount of time to complete! If you want to make it quicker, I suggest picking just one design from the 3. It's going to make the process a lot easier.
- It's nice to have crispy cookies, but be careful not to bake these cookies too long because the surface starts getting toasted and the vivid colors don't show as much as they should. Stop baking before the surface starts getting toasted or when the edges are slightly toasted.
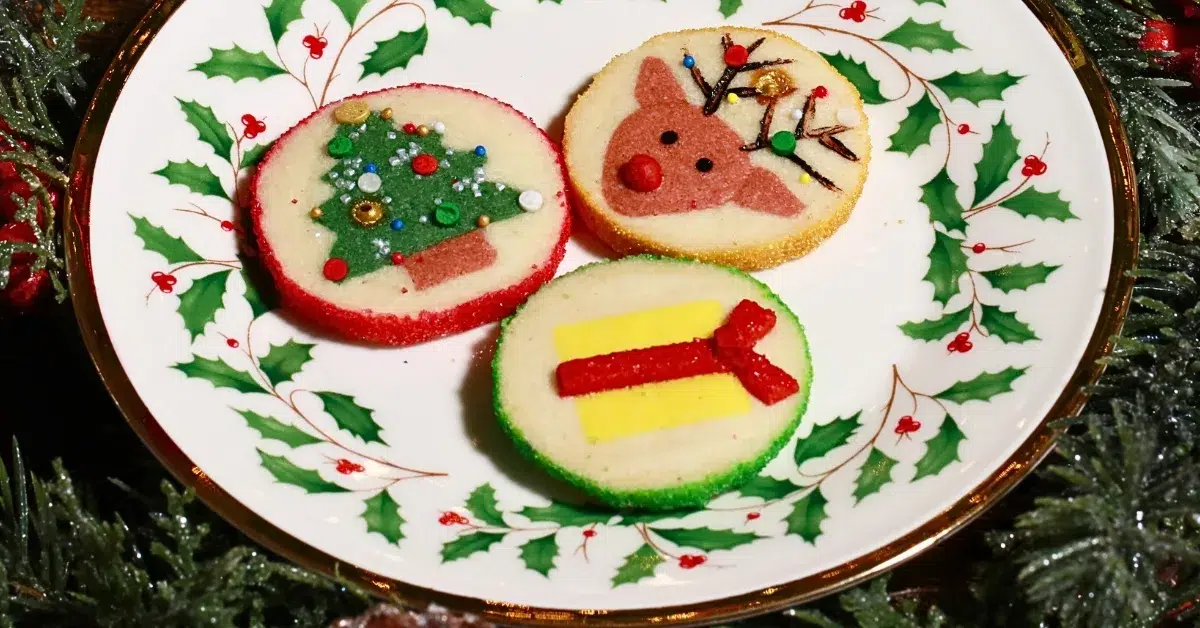
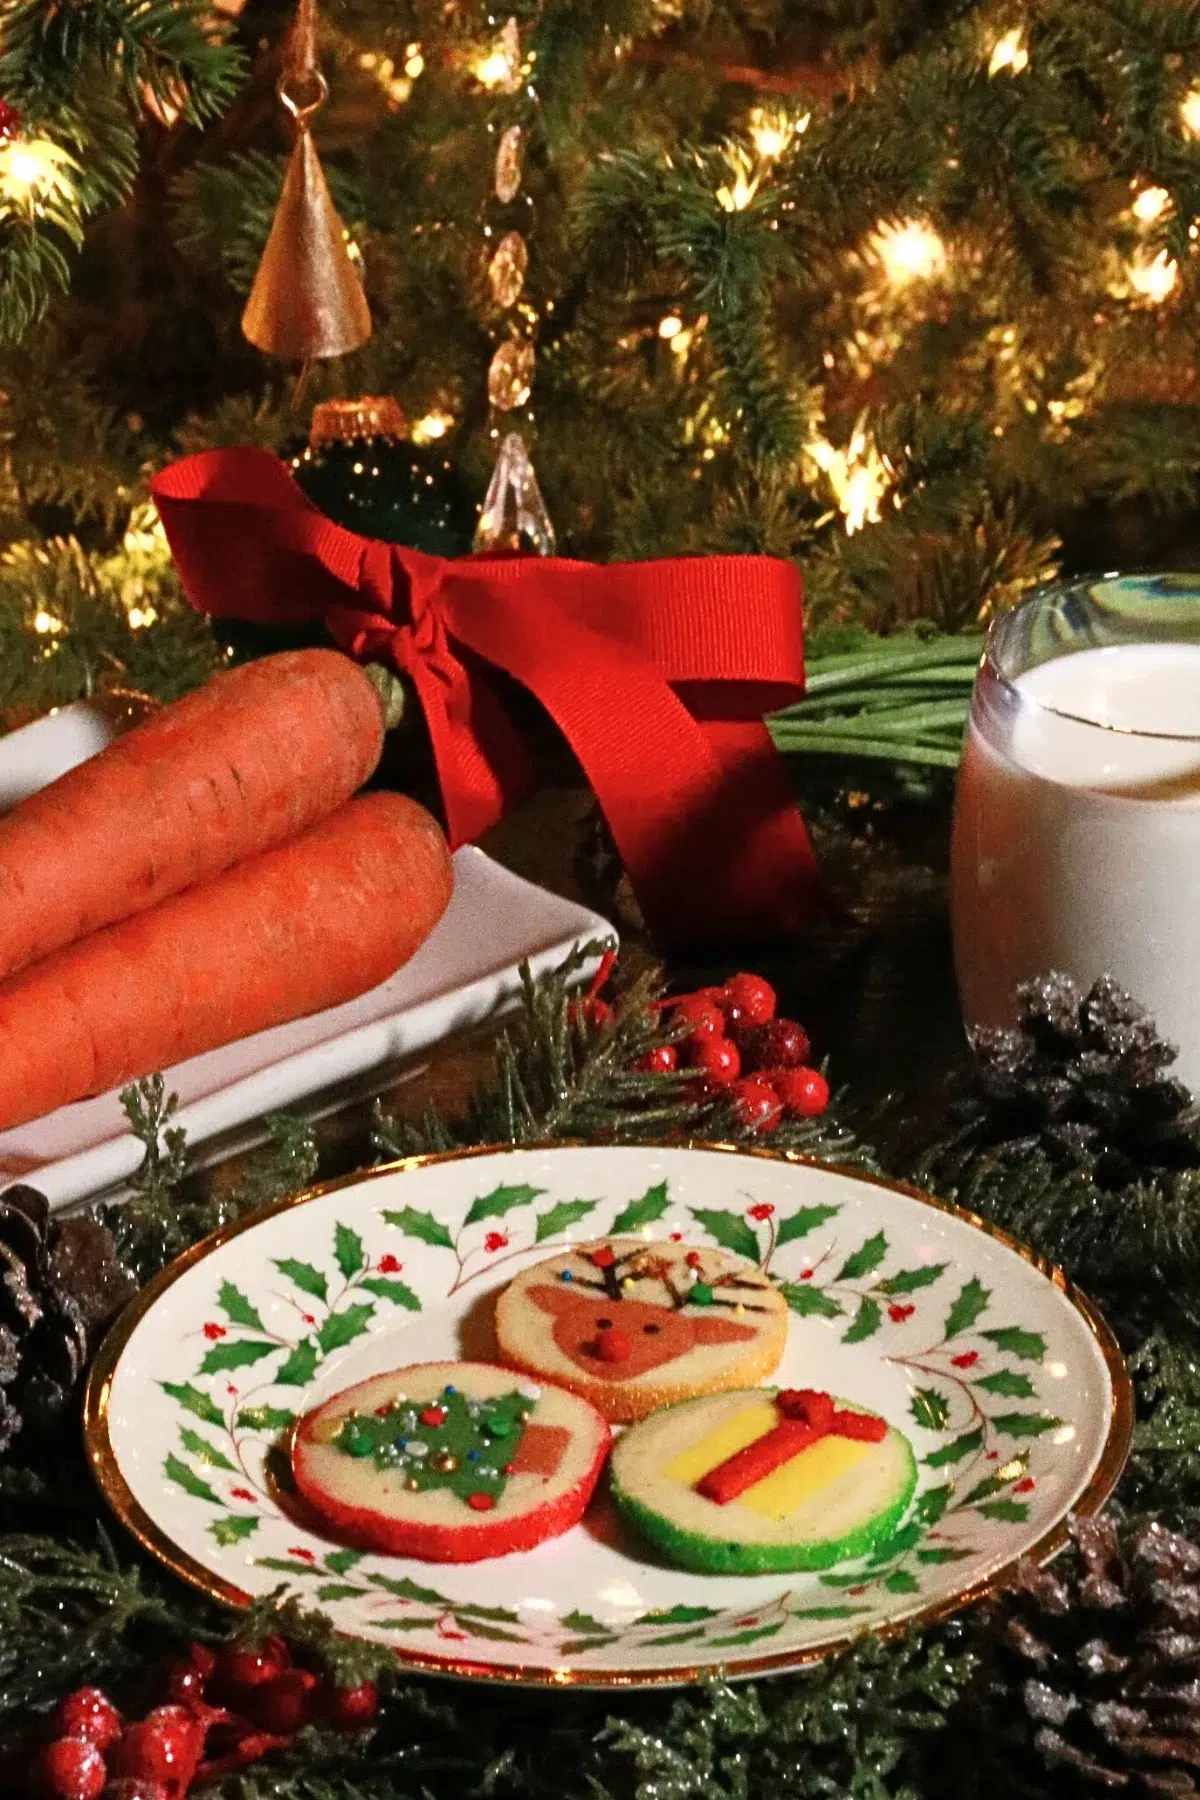
📌 Uses For Slice-and-Bake Christmas Cookies
Enjoy the cookies in many ways, such as:
- Christmas cookie box
- Treats for kids
- Sharing them with neighbors and coworkers in small gift bags
- Snack for Christmas parties or family gatherings.
... and so on!
🎅🏼 Also check out the Santa, Santa boots, and Christmas tree version! You can pick a design from it as well.

📌 Frequently Asked Questions
Store them in an air container and leave them at room temperature for up to 4 - 5 days or in the fridge for up to a few weeks.
When you're planning to share these cookies as a gift, I recommend putting silica gel in the box or plastic bag, especially when they might not eat them right away. It helps to absorb all the moisture in the air and keep the cookies nice and crispy.
You can make this dough ahead and store it in the fridge for up to 4 days or freezer for up to a few months. Leave it at room temperature ahead to make it soften.
One batch of the recipe should make 50 - 60 cookies if you slice them in about 5mm | 0.2" intervals. (The length of the logs is 15cm | 5.9", and the diameter is 4cm | 1.6".)
📌 VIDEO: Watch How To Make It!
To learn how to make the cookies visually and have a deeper understanding of all, watch the video!
Don't forget to subscribe if you liked it 😉
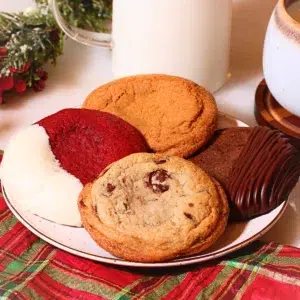
📌 Other Cookie Recipes
Basics
Holidays
- 10 Holiday cookies from one dough!
- Slice-and-Bake Christmas cookies
- 10 fall cookies
- 4 kinds of soft & chewy cookies from one dough
📌 Printable Recipe
💬 If you loved this recipe, please share your feedback on this post! I always love hearing how you enjoyed it with your friends and family.

Slice & Bake! Christmas Cookies (Christmas Tree, Reindeer & Gift Box)
Equipment
- Stand mixer with a pedal Or a bowl with a whisk and spatula
- Whisk to mix flours
- Spatula
- Plastic wrap to wrap the dough to store
Ingredients
Cookie Dough
- 8 oz Butter (soft) 2 US sticks
- 5.6 oz Powdered sugar 1 ⅓ US cups
- ¼ teaspoon Salt
- 1 egg Whole egg
- 1 yolk Egg yolk Save the egg white for egg wash.
- 12.3 oz Cake flour 3 US cups
- 2.5 oz Almond flour ¾ US cup
Egg Wash
- Some Egg white Mix the same amount of egg white and water to make the egg wash.
- Some Water
Decorations
- Food colorings Your choice!
- Sprinkles Your choice!
Instructions
The Dough
- Make 1 batch of my icebox cookie dough.8 oz Butter (soft), 5.6 oz Powdered sugar, ¼ teaspoon Salt, 1 egg Whole egg, 1 yolk Egg yolk, 12.3 oz Cake flour, 2.5 oz Almond flour


Color The Dough.
- Set aside about ⅔ (580 g | 20.4 oz) of the whole dough (880 g | 31 oz) to cover the designs later. And take a tiny bit of the dough from it and color it with red coloring.Divide the rest of the dough (⅓ of the whole dough: 300 g | 10.5 oz) into 3 and color each of them with yellow, brown, and green colorings. Yellow: 100 g | 3.5 oz, Brown: 100 g | 3.5 oz, Green: 100 g | 3.5 ozOr use any colors you like!Tips💡:1. I picked a yellow color for the box but the color didn't stand out so much, especially after it's baked. I recommend making the color darker or using a different color.2. I added brown to green dough to make the color darker.Food colorings

Shape Each Dough.
- Christmas Tree1. Make a triangle shape. (Width & Height: 2.5 cm | 1 inch, Length: 15 cm | 6 inches)2. Freeze it.3. Use anything with a sharp corner (I used a star cookie cutter) and curve the surface to create the zigzags.4. Make a rectangle shape with brown dough for the tree trunk. (Height: 2.5 cm | 1 inch, Length: 15 cm | 6 inches)5. Freeze it.6. Cut the sides. (Width: 1 cm | 0.4 inch)7. Mix egg white and water to make the egg wash. Attach a little bit of the dough and egg wash on the tree trunk and connect it with the green body.8. Freeze it.Reindeer1. Make a log. (Length: 15 cm | 6 inches)2. Freeze it. * The dough is very soft at room temperature, so chill that in the freezer and come back.3. Shape the face shape (Width: 1.5 cm | 0.6 inch, Height: 2 cm | 0.8 inch)4. Make the ears using the rest of the brown dough. (Height: 0.6 cm | ¼ inch, Length: 15 cm | 6 inches)5. Freeze them.6. Attach them to the head using a little bit of the dough and egg wash.7. Freeze it.Present Box1. Make a square shape with yellow dough. (Width & Height: 2 cm | 0.8 inch, Length: 15 cm | 6 inches)2. Freeze it.3. Cut off the sides to create a more clean square shape.4. Freeze it.Tips💡:1. [Christmas tree] I curved the dough pretty deep this time but it might be easier to curve shallower with more zigzags - you can try whichever you like!2. Whenever you feel the dough is getting soft, freeze it again and come back to prevent it from getting squished by hand.Some Egg white, Some Water

Cover Each Design With Plain Dough.
- Divide the plain dough that we set aside earlier into 3 and cover each design with them.[The logs] Length: 15cm | 5.9", The diameter: 4cm | 1.6".Tips💡:1. Ensure that each design is completely frozen when you do this to avoid squishing the shape.2. When you are afraid of the dough getting soft as you do this, just cover the design all around thinly first, freeze it, and cover it with the rest of the plain dough.3. You don't have to stick to the length and diameter when you're making it with kids or if it might stress you out. The most important thing is to have fun!4. I like to use a peeler to adjust the shape - If you find the part that is too thick, peel it off, and attach it somewhere else.
Slice The Logs.
- Brush egg wash all around the surface and attach sprinkles.Slice each log with 5 mm intervals.Tips💡:1. Ensure that the dough is frozen to cut very clean and to avoid squishing the shape.2. The dough spreads more in the oven when it's thicker - Try not to cut too thick!

Decorate Them.
- Make reindeer noses with the red dough. Roll the rest very thinly, brush egg wash, attach sprinkles, and slice thinly to make the ribbon stripes.If you don't have time, make this decoration part very simple!Reindeer eyes: Black coloring, The antlers: Brown coloringSprinkles

Bake Them!
- 1. Bake at 350 F | 176 C for about 7 mins.2. Turn the temperature down to 330 F | 165 C and bake for another 5 - 7 minutes or more until the edge is slightly toasted.Chill the dough before bakingChill the dough completely in the fridge until right before you bake them to prevent them from spreading more in the oven.Tips💡:1. This cookie is so fun to make, but it takes a good amount of time to complete! If you want to make it quicker, I suggest picking just one design from the 3. It's going to make the process a lot easier.2. It's nice to have crispy cookies, but be careful not to bake these cookies too long because the surface starts getting toasted and the vivid colors don't show as much as they should. Stop baking before the surface starts getting toasted or when the edges are slightly toasted.

Video
Notes
How to store them:
Store them in an air container and leave them at room temperature for 4 - 5 days or in the fridge for a few weeks.When you're planning to share these cookies as a gift, I recommend putting silica gel in the box or plastic bag, especially when they might not eat them right away. It helps to absorb all the moisture in the air and keep the cookies nice and crispy. Chill the dough completely until right before baking. By doing that, they don't spread too much in the oven. I like to freeze them to maximize the result!
Nutrition
📌 Pin It!
Pin it if you love this recipe, and find so many other recipes on my Pinterest page!


Leave a Reply