
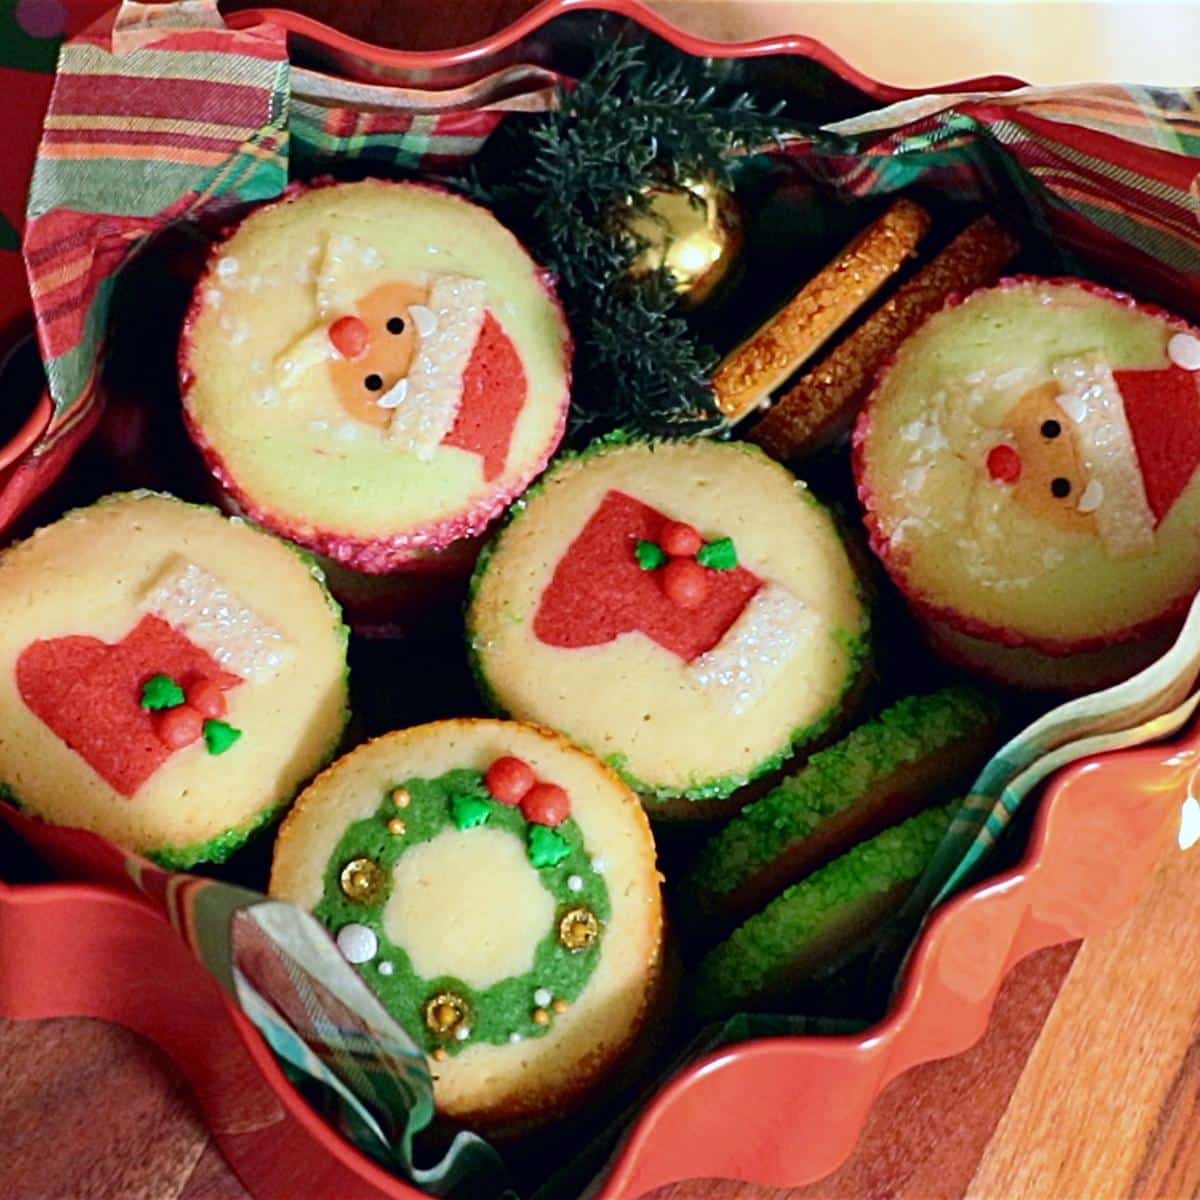
In this post, I am sharing how to make 3 kinds of cute slice-and-bake Christmas cookies: Santa, Santa boots, and wreath cookies! Give them to your family and friends and share the jolly spirits!🎄


📌 What I love about this recipe
If you know me, you may know I LOVE making slice-and-bake cookies. In the past, on my YouTube channel, I shared how to make slice-and-bake easter egg cookies, happy clover cookies, and Christmas tree cookies.
Slicing the dough is like opening up a present you have patiently awaited. I'm excited, nervous, and feeling like a kid again!
The cookies are buttery and crunchy. It's just a perfect little treat to enjoy with a hot drink during this holiday season.
Last year, I made slice-and-bake Christmas tree cookies. This year, I tried to simplify the process a little bit more so that you can make them with less effort!


📌 What you'll learn in this post:
In this post, you'll learn essential baking tips, such as:
- The techniques to shape each design
- How to cut/shape them easier - temperature control
- Decorating tips you can apply to different kinds of cookies
- How to bake them to maximize the result.
... and more!
Let's get started.
📌 Ingredients For Christmas Cookies
Cookie Dough
- Make one batch of this cookie dough recipe.
Decorations
- Food coloring: Red (Santa hat, boot, and red deco), green (wreath), orange (Santa face), and black (Santa eyes) as the main colors. Use any colors you like!
- Egg wash: Mix the same amount of egg white and water.
- Sprinkles: Gold, pink, and green sprinkles to cover the logs. And white, gold, and tree sprinkles to decorate the sliced cookie dough. Pick any sprinkle you like!
📌 How to Make Christmas Cookies
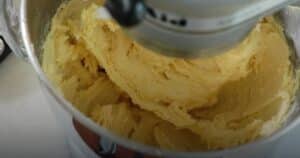
Step 1: Make Cookie dough.
Make 1 batch of the cookie dough recipe.

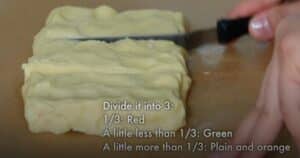
Step 2: Divide and color the dough.
Take about 300 g | 10.5 oz from the whole dough and divide it into 3 to color each. (Save the rest to cover the parts later.)
- ⅓: red (Santa hat and boots)
- A little less than ⅓: green (Wreath)
- A little more than ⅓: Color about ⅓ of it with orange (Santa face) and use the rest for plain parts. (a center of the wreath and Santa beard)
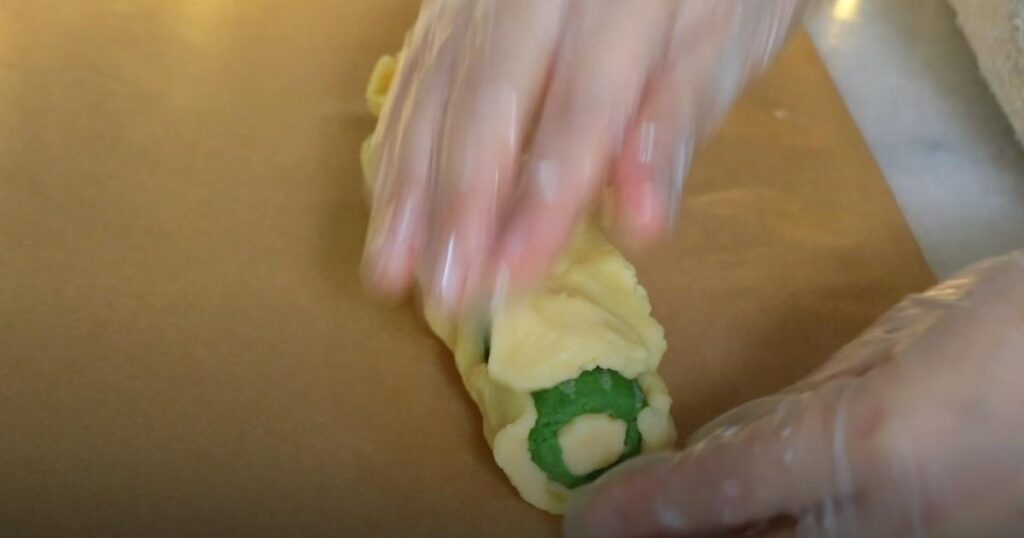
Step 3: Shape the dough.
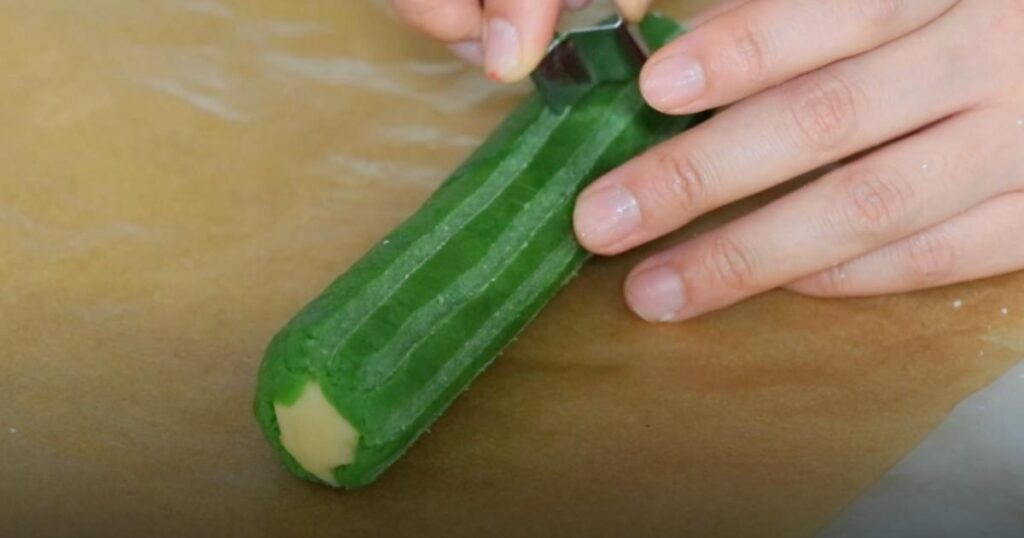
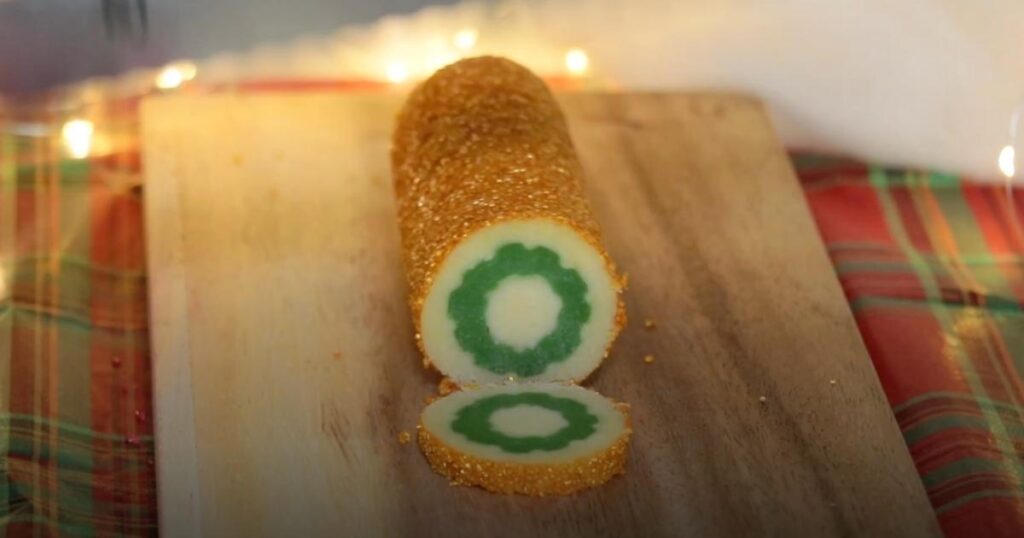
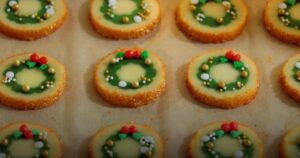
- Shaping wreath:
- Make a pole. (Diameter: 1.5 cm | 0.6") Freeze. Curve it with a star cookie cutter to make a ruffle pattern.
- Cover it with the green dough evenly. Freeze. Curve it with a cookie cutter again.
- Cover it with plain dough evenly. Freeze.
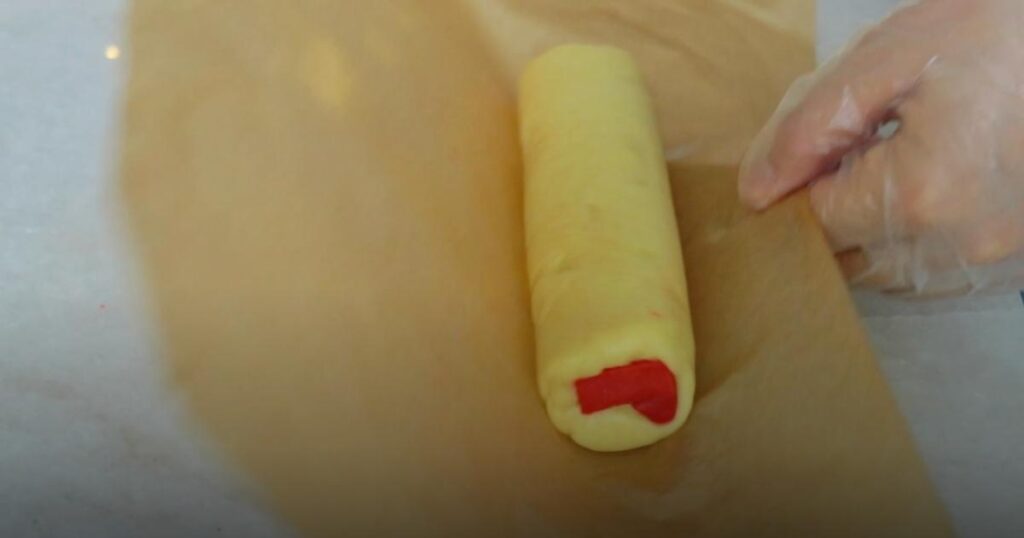
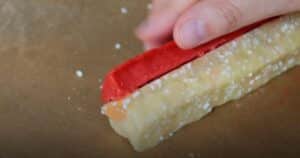
- Shaping Santa boots:
- Make a rectangle shape. (Width: 1.5 cm | 0.6", Height: 2.5 cm | 1") with red dough. Freeze. Cut the sides with a knife. Use the extra dough to complete the foot shape. Chill it again.
- Cover it with plain dough evenly. Freeze.

- Shaping Santa:
- Make a semicylinder. (Width: 2.5 cm | 1", Height: 1 cm | 0.4") Freeze.
- Attach plain dough on top of it as his beard. (Mix in white sprinkles if you like.) Chill it again.
- Make a hat part. (Width: 2.5 cm | 1", Height: 1.3 cm | 0.5") Freeze.
- Attach the face and hat parts with extra dough and egg wash. Chill.
- Cover it with pale green dough evenly. Freeze.


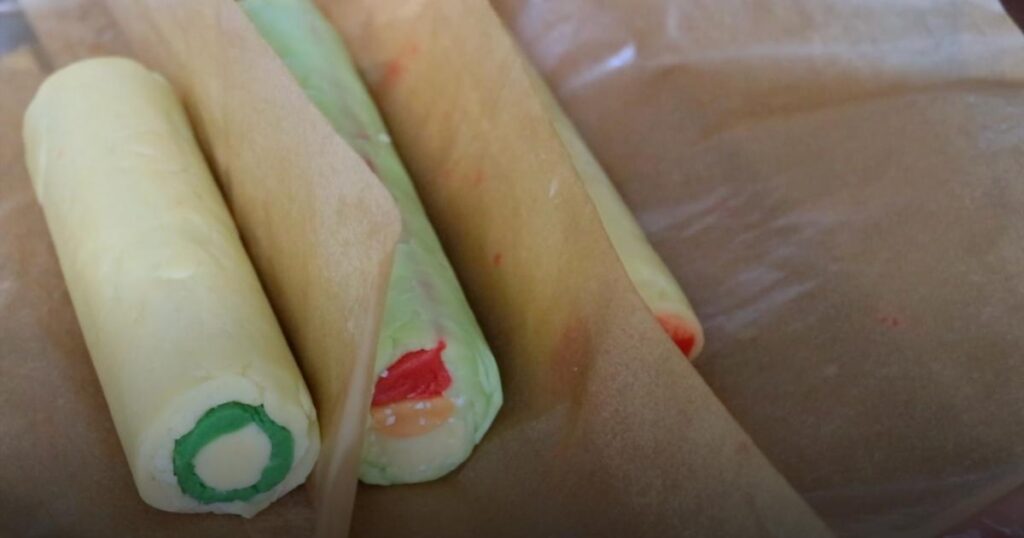
Step 4: Make decoration parts.
Make decoration parts with extra dough:
- Roll the extra plain dough and attach white sprinkles. Chill it. Cut to use it as fluffs for the Santa boots, hat, and beards.
- Tiny red balls as plant fruits
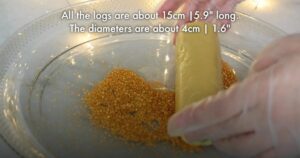
- Apply a thin layer of egg wash and attach sprinkles to the logs.
- The diameter of the logs: About 4 cm | 1.6"
- The length of the logs: About 15 cm | 5.9"
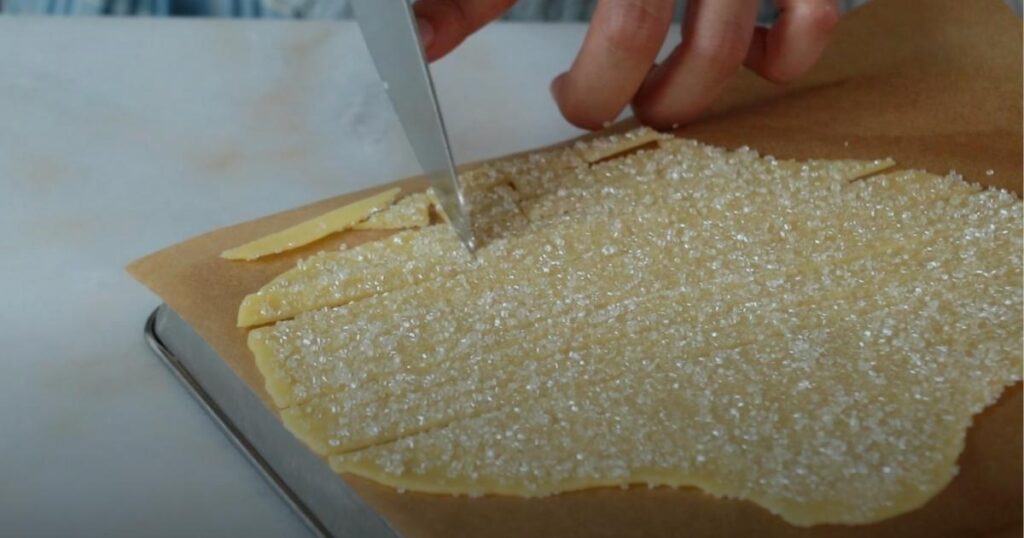


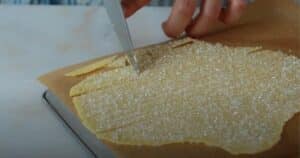
Step 5: Slice the log.
Slice the logs into 5 mm intervals.


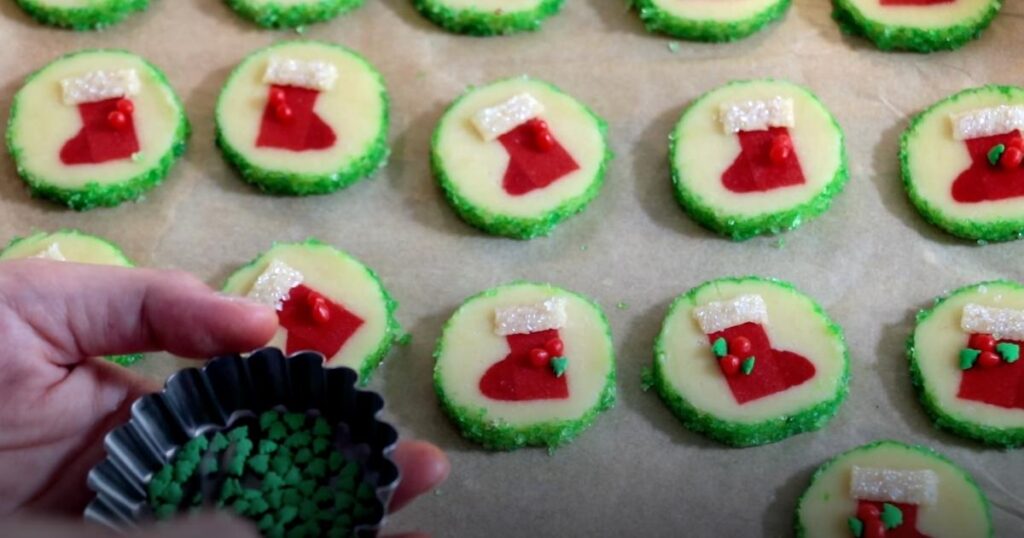
Step 6: Finish decorating.
- Wreath: Attach tiny red balls and sprinkles
- Santa boots: Attach the dough for fluffs, tiny red balls, and sprinkles as the leaf.
- Santa: Attach the dough for fluffs (hat and beard), sprinkles (his browse and pom-pom of his hat), red balls (his nose), and black coloring (his eyes).


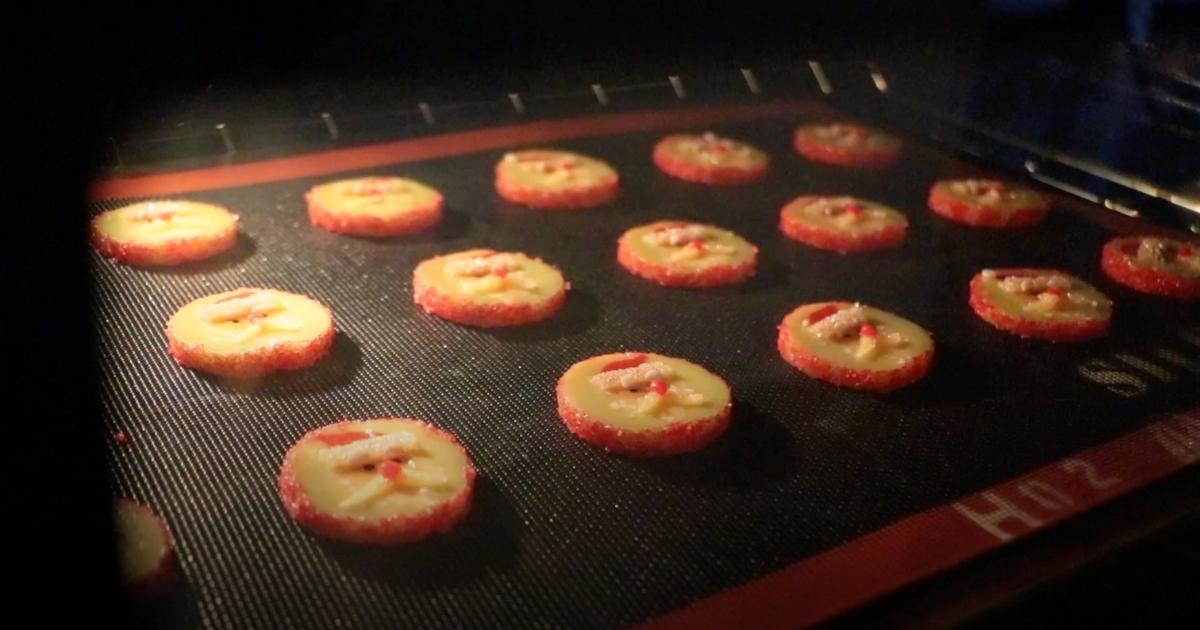
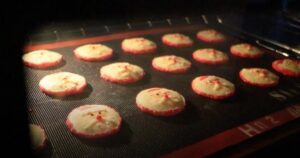
Step 7: Bake!
Freeze the cookies until right before you bake.
The baking time and temperature:
- First, bake at 350 F | 176 C for about 7 minutes.
- Next, bake at 330 F | 165 C for another 7 minutes or more until the edge is slightly toasted.


Baking Tips
👩🏻🍳 Chill the sliced cookie dough completely until right before baking By doing that, they don't spread too much in the oven. Freeze them to maximize the result!
🔥 First, Bake at 350 F | 176 C (Preheated) for about 7 minutes
Turn the temperature down to 330 F | 165 C and bake for another 7 minutes or more until the edge is slightly toasted.
- Adjust the time and temperature depending on the oven and the size of your cookies. (Today, it was about 2 inches | 5 cm)
- To enjoy the crispy texture, bake cookies until you see nice golden caramelization around the edge.

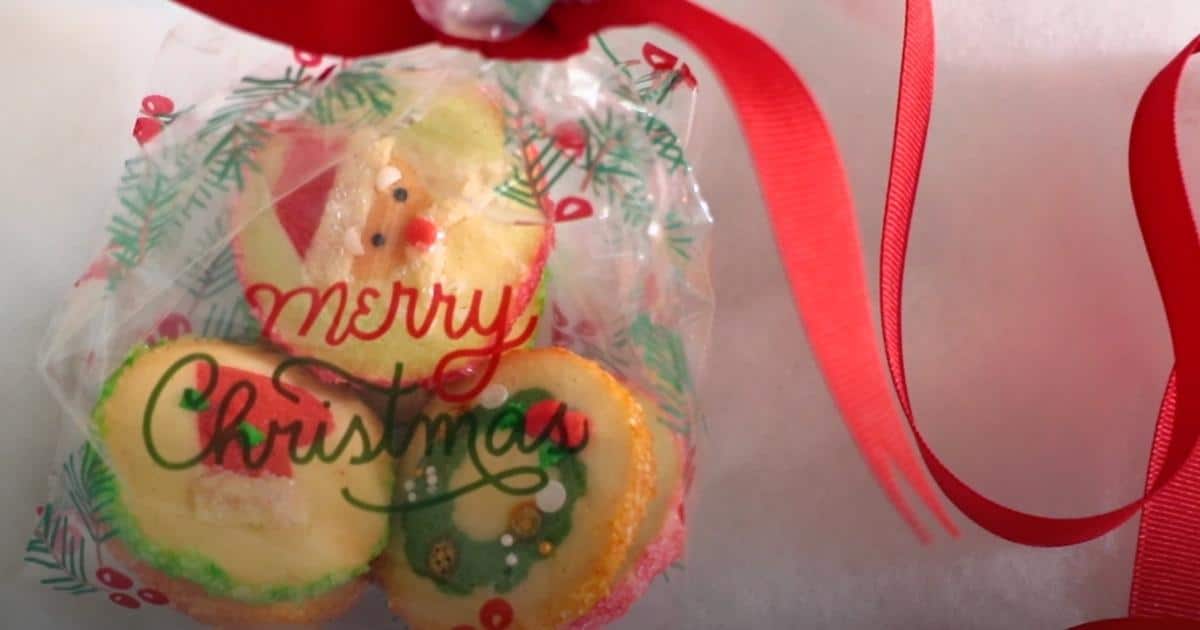
📌 Uses For Slice & Bake Christmas Cookies
Gift these special cookies to share with your friends and family! Make a cute Christmas cookie box or decorate it in a glass jar or gift bag with some candies and marshmallows...?? I can already see their smiles!
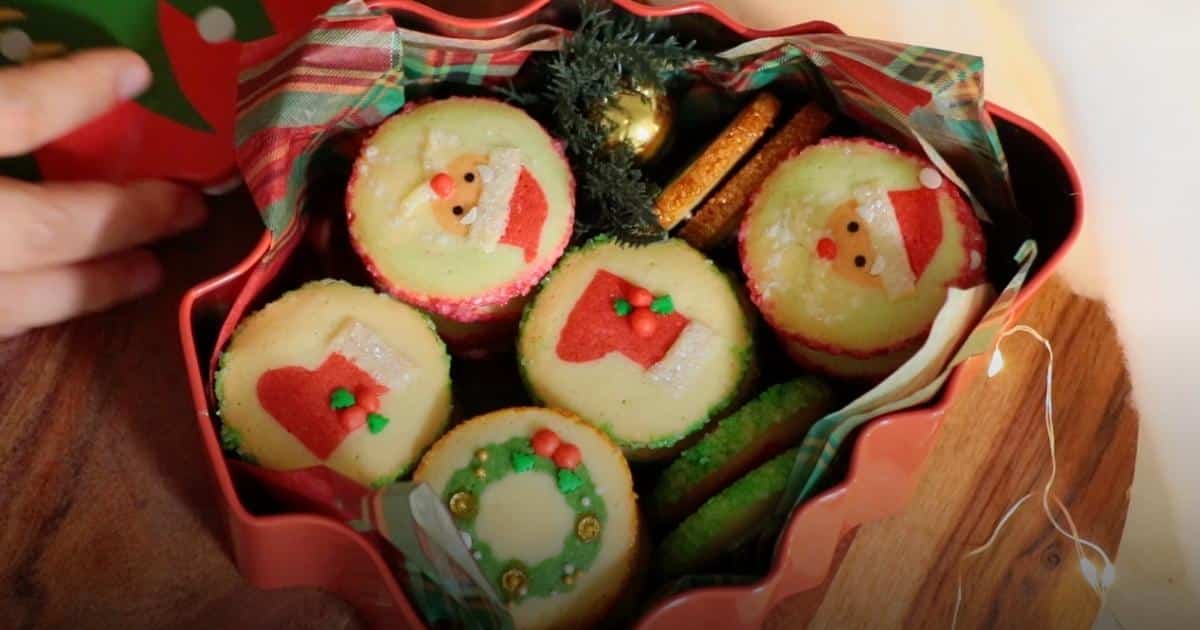
I gotta say, these cookies are definitely not something you can make quickly. It does take time to make! But I think The details and efforts move people's hearts sometimes.
Also, if you don't have time, simply omit some decorations. Or pick just 1-2 designs! You do not need to make everything I showed today. Change the color, size, and shape as you like. No need to stress out too much about making them look super precise; The most important thing is for you to have fun!

📌 Frequently Asked Questions
Store them in an air-tight container for up to 4 days at room temperature or a few weeks in the fridge. But of course, eating them sooner is better for the freshness.
Adding silica gels to the container is a great option if you want your cookies to stay crispy.
YES! For example, you can make the dough and color it on Day 1, shape it and make the logs on Day 2-3, slice and bake on Day 4, box them up on Day 5, etc. Do it a little by little at your pace. You can also freeze the dough between the tasks to keep it fresh.
It should make 50-60 cookies if you slice them in 5mm | 0.2" intervals. The length of the logs is about 15cm | 5.9", and the diameter is about 4cm | 1.6". You can change them as you like. No need to stick to the size and length!
Wrap the dough tightly and store it in a fridge for up to 4 days or a few months in a freezer.
Yes! You can add any flavors you like. Don't add too much so the cookies don't spread a lot in the oven.
I do not recommend that since it contains raw eggs in it. Store in a fridge or freezer for food safety reasons.
📌 VIDEO: Watch How To Make It!
Watch this video to learn how to make these cookies visually and have a deeper understanding of all.
Don't forget to subscribe if you liked it 😉
📌 Other Holiday Recipes
📌 Printable Recipe
💬 If you loved this recipe, please share your feedback on this post! I always love hearing how you enjoyed it with your friends and family.

Slice & Bake! 3 Christmas Cookies (Santa, Santa boots & Wreath)
Equipment
- Stand mixer with a pedal Or a bowl with a whisk and spatula
- Whisk to mix flours
- Spatula
- Plastic wrap to wrap the dough to store
Ingredients
Cookie Dough
- 8 oz Butter (soft) 2 US sticks
- 5.6 oz Powdered sugar 1 ⅓ US cups
- ¼ teaspoon Salt
- 1 egg Whole egg
- 1 yolk Egg yolk Save the egg white for egg wash.
- 12.3 oz Cake flour 3 US cups
- 2.5 oz Almond flour ¾ US cup
Decorations
- Food colorings Your choice!
- Sprinkles Your choice!
- Egg white Mix the same amount of egg white and water to make the egg wash.
Instructions
- Make 1 batch of my icebox cookie dough.8 oz Butter (soft), 5.6 oz Powdered sugar, ¼ teaspoon Salt, 1 egg Whole egg, 1 yolk Egg yolk, 12.3 oz Cake flour, 2.5 oz Almond flour

Divide and color the dough.
- Take about 300 g | 10.5 oz from it to make all the parts. (Save the rest to cover the parts later.)Divide it by 3 and color each:* ⅓: red (Santa hat and boots)* A little less than ⅓: green (Wreath)* A little more than ⅓: Color about ⅓ of it with orange (Santa face) and use the rest for plain parts. (a center of the wreath and Santa beard)Food colorings
Shape the dough.
- Shaping Wreath: 1. Make a pole. (Diameter: 1.5 cm | 0.6 ") Freeze. Curve it with a star cookie cutter to make a ruffle pattern. 2. Cover it with the green dough evenly. Freeze. Curve it with a cookie cutter again.3. Cover it with plain dough evenly. Freeze.
- Shaping Santa Boots:1. Make a rectangle shape. (Width: 1.5 cm | 0.6 ", Height: 2.5 cm | 1 ") with red dough. Freeze. 2. Cut the sides with a knife. Use the extra dough to complete the feet shape. Chill it again.3. Cover it with plain dough evenly. Freeze.
- Shaping Santa:1. Make a semicylinder. (Width: 2.5 cm | 1 ", Height: 1 cm | 0.4 ") Freeze. 2. Attach plain dough on top of it as his beard. (Mix in white sprinkles if you like.) Chill it again.3. Make a hat part. (Width: 2.5 cm | 1 ", Height: 1.3 cm | 0.5 ") Freeze.4. Attach the face and hat parts with extra dough and egg wash. Chill.5. Cover it with pale green dough evenly. Freeze.Egg white


Make decoration parts.
- Make decoration parts with extra dough:* Tiny red balls as plant fruits and a Santa nose.* Roll the extra plain dough and attach white sprinkles. Chill it. Cut it for the Santa boots, hat, and beards.
- Apply a thin layer of egg wash and attach sprinkles to the logs. * The diameter of the logs: About 4cm | 1.6"* The length of the logs: About 15cm | 5.9"Egg white, Sprinkles
Slice the log.
- Slice all the logs with about 5mm intervals.

Finish decorating.
- * Wreath: Attach tiny red balls and sprinkles* Santa boots: Attach the dough for fluffs, tiny red balls, and sprinkles as the leaf.* Santa: Attach the dough with white sprinkles (hat and beard), white sprinkles (his browse and pom-pom of his hat), red balls (his nose), and black coloring (his eyes).Sprinkles
Bake!
- Freeze the cookies until right before you bake.1. First, bake at 350 F | 176 C (Preheated) for about 7 mins. 2. Next, turn the temperature down to 330 F | 165 C and bake for another 7 mins or more until the edge is slightly toasted.
Video
Notes
How to store them:
Store them in an air-tight container for up to 4 days at room temperature or a few weeks in a fridge. But eat them sooner for the best taste.Adding a silica gel to the container is a great option if you want your cookies to stay crispy. Chill the dough completely until right before baking. By doing that, they don't spread too much in the oven. I like to freeze them to maximize the result!


BADR says
you are great
i like your imagination in the design of shapes
i really enjoy it
thx so much ...pls keep on i found it very interesting
ayacaliva says
Thank you! I'm so glad you enjoyed it!
Cathy says
These look amazing! Can you use plain flour instead of almond flour and cake flour? I would love to make these without using different flours.
ayacaliva says
Hi! I never tried it with all-purpose flour, so I'm sorry to say I can't give you the exact measurements but I think it's possible by alternate almond flour with all-purpose flour - Just note that the texture of the cookies will get more crunchy. You also might want to reduce the amount to get better result.
- Or, you could try my butter cookie recipe instead. They might spread a bit more in the oven but that could be another way to go if you want to avoid almond flour.
Chantal says
Bonjour,
Merci pour ce partage de ces biscuits impressionnants et délicieux.
Une petite question s'il vous plaît. Qu'est-ce que la farine à gâteau ?
Merci d'avance pour toute réponse.
Bien cordialement
Et Joyeux Noël !
ayacaliva says
Hi, I don't understand French, so I translated it on google. I hope you can too!:
Cake flour contains less protein than all-purpose flour, which creates less gluten. It allows the sponge to get very fluffy and light because of that.
I recently learned that it's not sold at some countries. I am guessing it's not available in France? It might be sold with different names but oftentimes, the protein level is between 6.5-8.5 %.
Merry Christmas to you too!