
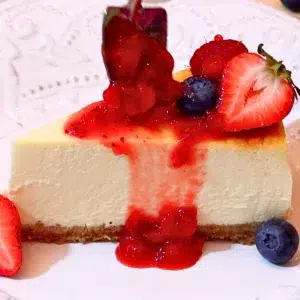
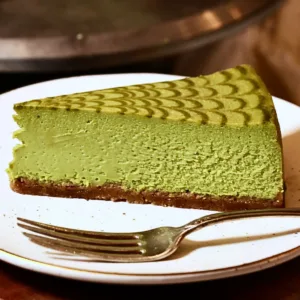
Looking for a best, classic New York cheesecake? Look no further! In this post, I’m guiding you through how to make the perfect cheesecake with a smooth and creamy filling and buttery graham cracker crust with simple ingredients.


📌 In Pursuit Of The Best New York Cheesecake...
There is a reason why baked cheesecake has been so loved all over the world for centuries - The perfectly tangy, creamy filling with a toasty buttery crust feels nothing like other desserts. The one bite instantly gives us a rich, indulgent moment that lifts us up no matter how bad our day is.
As a cheesecake lover, I used to walk around everywhere to find the best cheesecake. I marked rewarded Cheesecake shops in New York and visited as many as possible during my solo trip as a backpacker. Now, fast forward almost 2 decades, after countless trials and errors, and I have created the best-baked cheesecake. Now I can enjoy it with my kids and family at home without a trip.

Why you'll love this cheesecake:
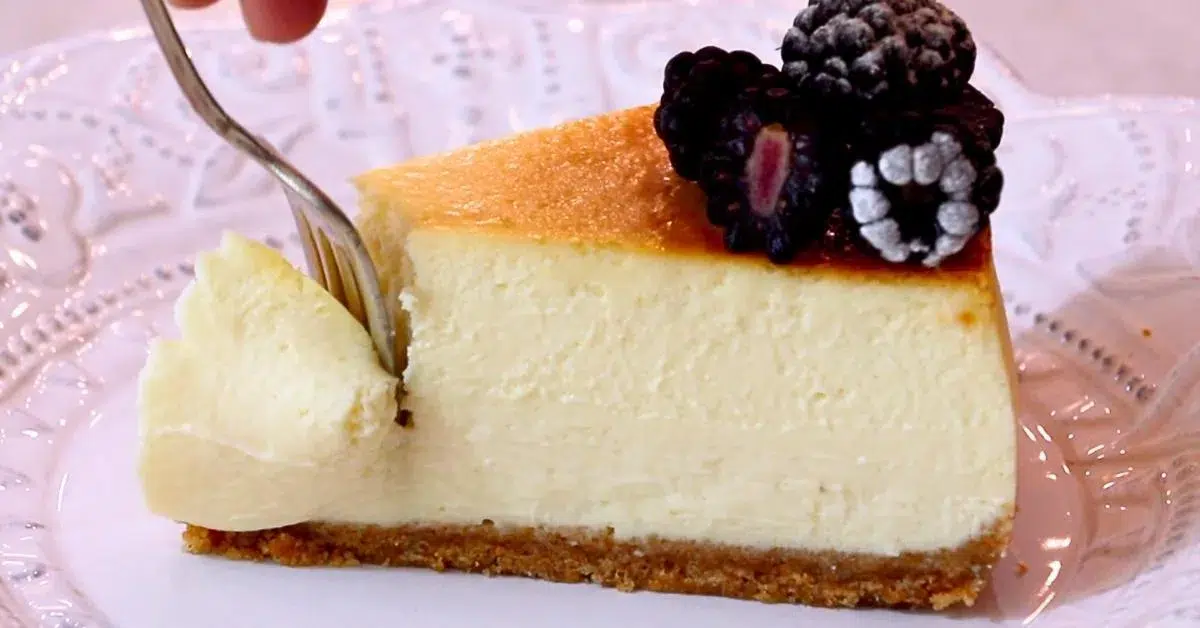
- Incredibly smooth and creamy texture: The texture of the filling is the best thing about this cheesecake! - It is, no doubt, the smoothest cheesecake I've ever had. Cooking it at a low temperature with a water bath is one of the secrets to creating an amazing texture.
- Perfectly rich yet not too dense: The cheesecake is rich but not overly heavy and has nice lightness.
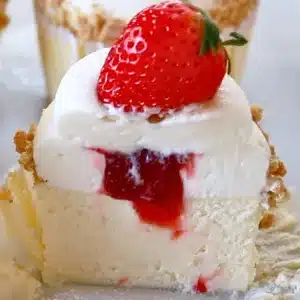
- Tall elegant look: I love tall cheesecake that is more than 2 inches thick. It looks so festive as celebration cakes.
- Not-overly sweet: Just enough amount of sugar is added to create an amazing texture and compliment the flavor of cream cheese.
- Easy to make: Cheesecake is one of the easiest cakes to make. Just mix the simple ingredients, and the filling is done in 5 - 10 minutes!
- Versatile: You can enjoy it in many ways: as a crustless cheesecake or cupcakes with any topping of your choice. Check toward the end of the post to see the topping ideas.
💬 In the past, I shared how to make strawberry mini cheesecakes which contain more sour cream than this. This recipe tastes more classic, while both of them have a perfect balance of lightness and richness.
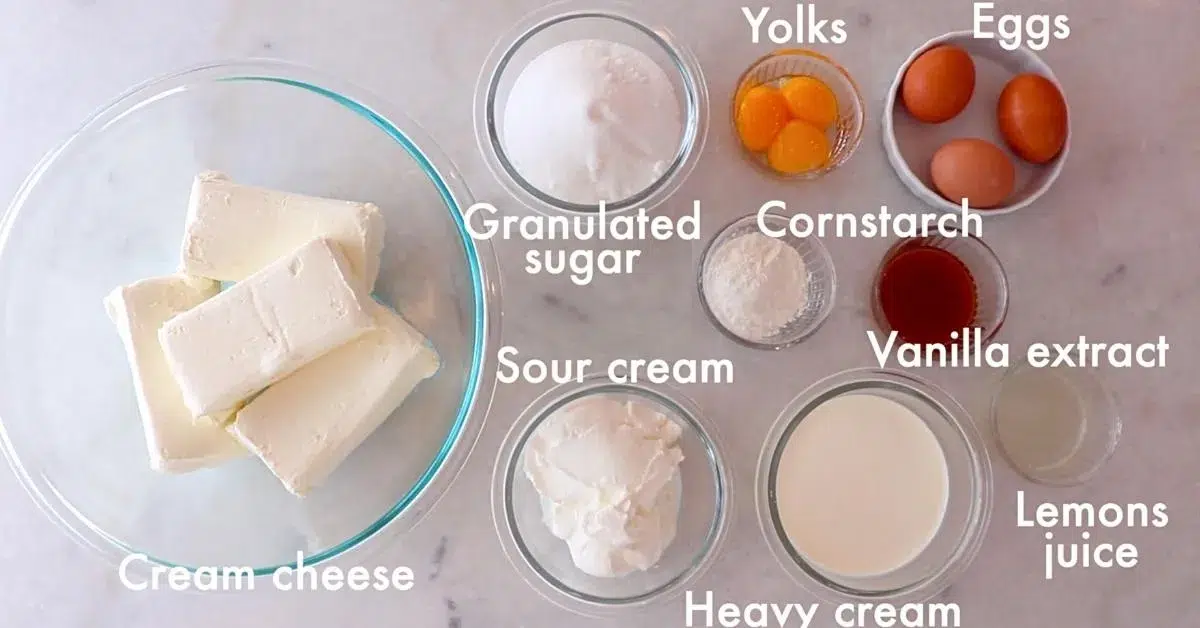
📌 Tips For The Ingredients
Cheesecake Crust
- Graham crackers: Use your favorite graham crackers. Here is the product I used this time.
- Granulated sugar: A little bit of sugar adds a nicer texture.
- Unsalted butter: It helps to form the crust.
Cheesecake Filling
- Cream cheese: Use full-fat cream cheese. I like Philadelphia cream cheese. Do not use spreadable soft-type cheesecake.
- Granulated sugar: Use white sugar, such as caster or granulated sugar.
- Sour cream: Sour cream is a must-add-on whenever I make a cheesecake. It adds a refreshing taste, natural tartness, and creaminess.
- Heavy cream: It helps to create a milder cream cheese flavor and a lighter texture.
- Cornstarch: It creates a lighter texture when baked with sour cream and heavy cream.
- Egg yolks: Yolks add a rich and deep flavor. It also helps to set the cheesecakes.
- Whole egg: It helps to set the cheesecakes.
- Vanilla extract: The vanilla flavor matches so well with cheesecakes.
- Lemon juice: Adjust the amount as you like! You can also add lemon zest to add an amazing refreshing note.
Use softened cream cheese.
One of the most essential tips when making cheesecake is to use room-temperature cream cheese.
When you use firm, cold cream cheese, it doesn't blend well and leaves many chunks, which leads to not-so-smooth, lumpy cheesecake.
Leave it at room temperature for 3 - 6 hours to soften it, depending on the room temperature.

📌 Tools You'll Need
- 9-inch spring form pan
- Aluminum foil (or oven bag)
- Ziplock bag with a rolling pin (or food processor) for the crust
- Large bowl with a whisk (or stand mixer with a paddle attachment) for the filling
- Rubber spatula
- Pot for hot water
- Large roasting pan (or deep baking tin) for water bath
- Wire rack
What if I don't have a springform pan to bake a cheesecake?
You can use a regular round pan with good height. Most importantly, lay a cake liner on the bottom to take out the cake later! (The cake could be stuck in a pan if you don't! 😫)
1. After completely cooling the cake in the fridge, insert a knife around the side to ensure the cheesecake is detached.
2. Flip the pan gently to take out the cheesecake. (See the image below to see the 4 steps.) Do not do this when the cheesecake is not chilled completely! Chill it for at least 6 hours in the fridge or longer to be safe.
Regular pans can be a good option for you, especially when you plan to cover the top with a topping in case you get any scratches on the surface. It also eliminates any risk of leakage from the water bath.

📌 How To Make Cheesecake
Preparation:
- Leave cream cheese at room temperature until it gets soft.
- Prepare hot water for a water batch.
- Melt butter.
- Coat a thin layer of soft butter inside the 9-inch pan. (The cheesecake comes out from the pan more easily when a thin layer of butter is applied.)

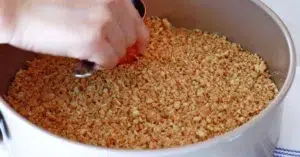
Cheesecake Crust:
- Crush graham crackers in a ziplock with a rolling pin (or use a food processor). Leave some pieces in them for a better texture instead of crushing the crackers completely and making them powdery.
- Mix melted butter, crushed graham crackers, and sugar in a bowl until evenly incorporated. Press it on the prepared pan with something solid and flat, like a measuring cup, to form a crust. The crust could fall apart later if you don't press it enough.


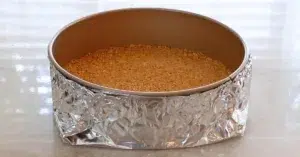
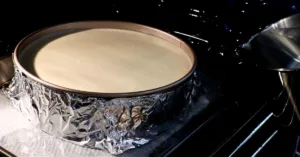
- Cover the sides of the pan with a few layers of aluminum foil (or an oven bag). Do this very gently to prevent the foil from getting torn and causing water leaks (hence a soggy crust!) Chill it in the fridge until right before use.

Should we pre-bake the cheesecake crust?
You can bake this cheesecake without pre-baking the crust, but bake it in advance if you want to make it a little bit crispier!
Bake (Preheated) at 340ºF (171ºC) for about 7 - 8 mins until the edges are slightly golden brown. Let it cool completely before use.
Cheesecake Filling:
- Mix cream cheese in a large bowl until smooth.
- Add granulated sugar and mix until smooth.


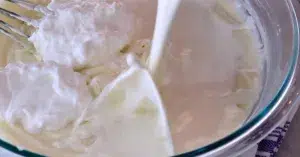
- Add sour cream and heavy cream. Mix well until smooth. Scrape off the sides and bottom of a bowl to ensure everything is evenly blended.
- Add cornstarch and mix well until you don't see lumps.


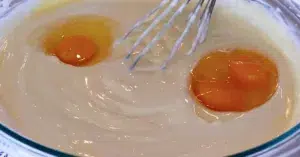
- Add yolks and whole eggs. Mix well until evenly incorporated. Do not whip a lot to prevent it from holding too many air bubbles inside.
- Add vanilla extract and lemon juice and mix until combined. Scrape off the sides and bottom of the bowl with a spatula at the end to ensure everything is blended evenly.


- Pour the cheesecake batter into the prepared pan. Lay a thin towel or kitchen paper on a roasting pan and place the cheesecake pan on top of it. Place it on an oven rack and pour hot water on a roasting pan up to about ⅓ of the height of a springform pan.
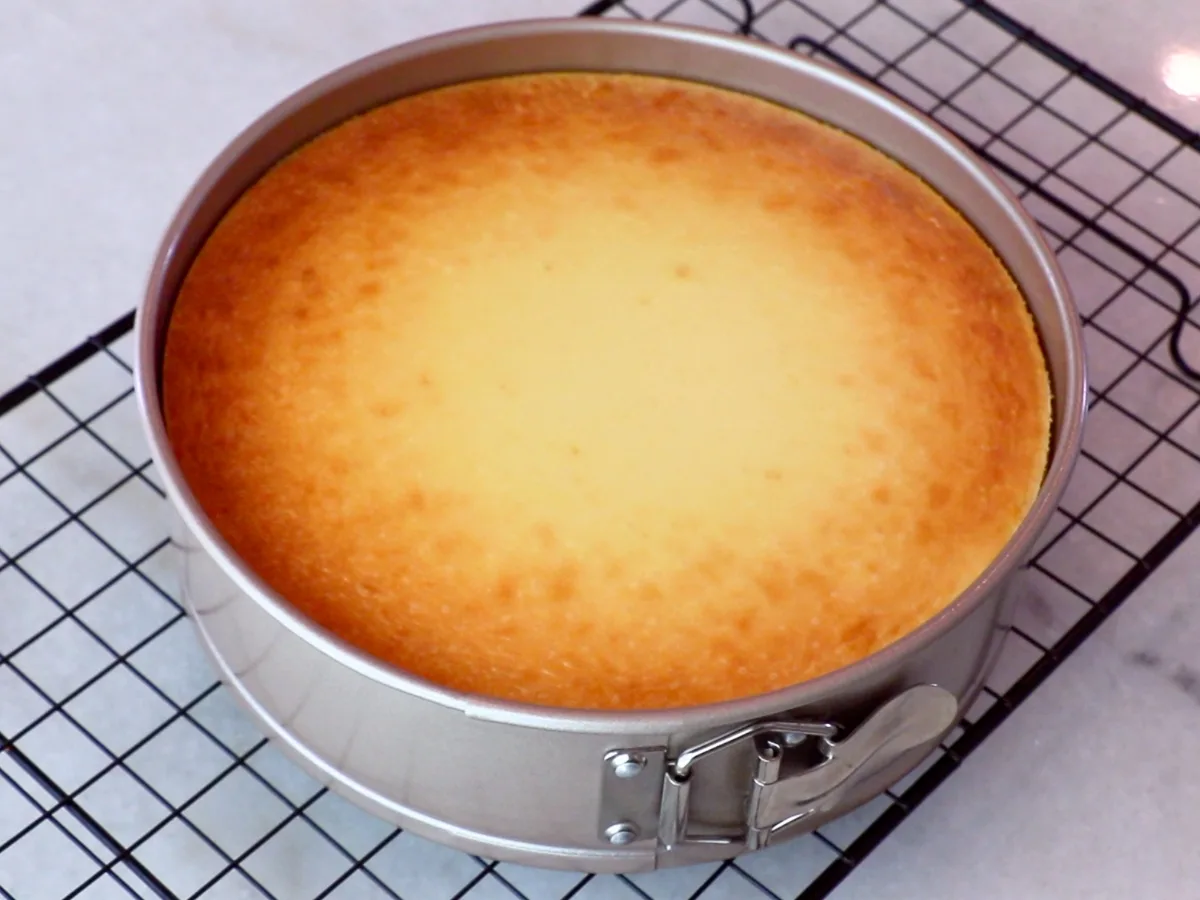
- Bake (Preheated) at 340ºF (171ºC) for 30 mins with a water bath.
- Turn it down to 310ºF (154ºC) and bake for another 65 - 75 minutes until the surface of the cheesecake wobbles like pudding or jello when tapping the side gently. Do not open the oven door frequently to get the best result. Adjust the time and temperature accordingly depending on the oven, the size of the pan, etc. (Today, I baked it at 340ºF | 171ºC for the first 30 minutes because I like nice golden caramelization on the surface. But you can also start baking it at 310ºF | 154ºC if you prefer not to brown it. Bake a little bit longer in that case!)
- Turn off the heat, leave it open about an inch with a wooden spoon, and wait for 30 minutes before taking it out from the oven. This will ensure the cheesecake is cooked through the center.


The benefits of baking cheesecake with a water bath
By baking it in a water bath, the heat gets delivered more evenly and slowly, creating a creamier and smoother cheesecake texture. It also decreases the chance of the top getting cracked. It is totally worth it, even if it takes an extra step!
After baking it:
- Let the cheesecake cool on a cooling rack. Chill in the fridge for more than 6 hours before removing it from a pan.
- Follow the 4 steps to remove the cheesecake from a pan:
- Carefully insert a small cake spatula or petty knife along the side. Remove the side of the springform pan.
- Insert a small cake spatula around the bottom edge to remove the crust easily.
- Insert a large cake palette under the crust and carefully detach it from the bottom of a pan.
- Transfer the cake to a plate or cake board using the palette.


📌 How To Slice Cheesecake
Follow the 5 steps:
- Warm a sharp knife with hot water.
- Wipe off the excess moisture.
- Slice.
- Clean a knife with a kitchen paper towel or cloth.
- Repeat the process.
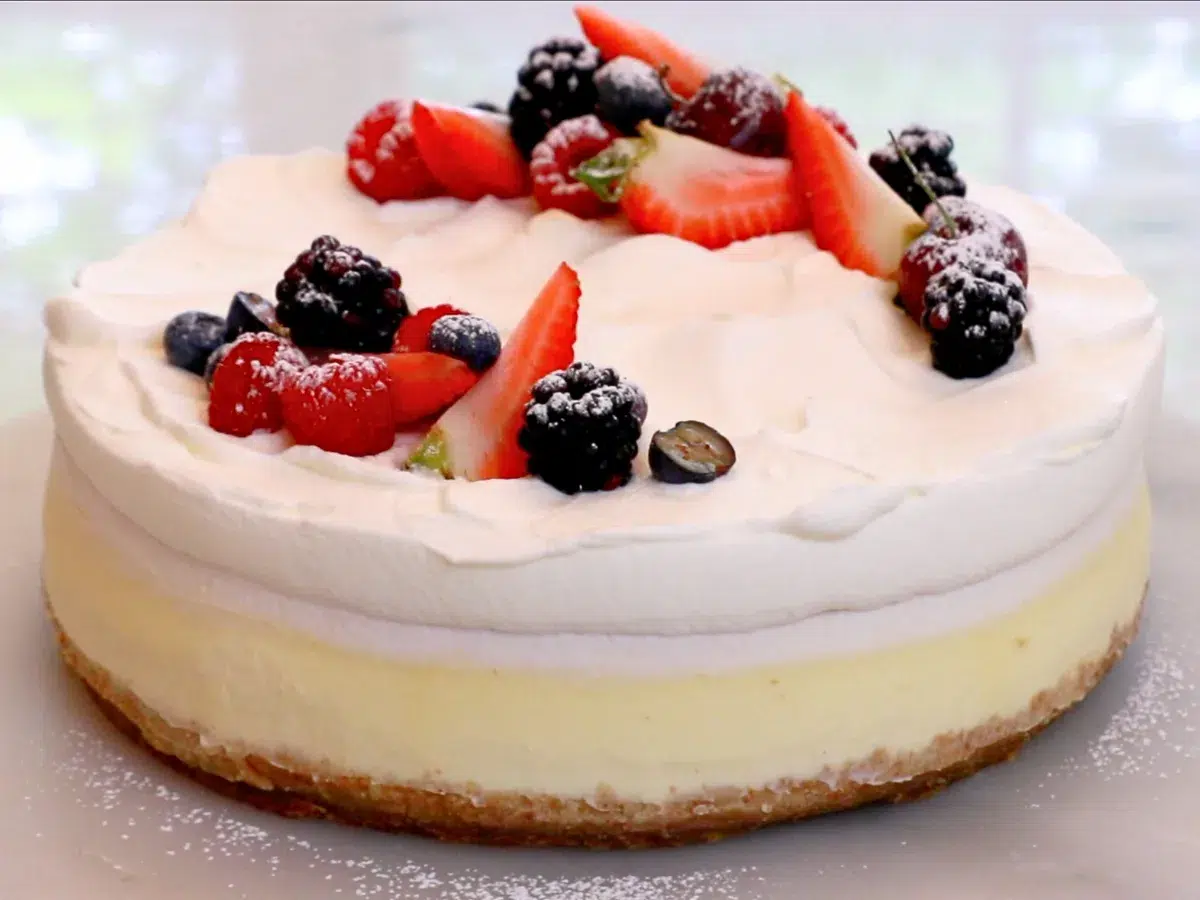
📌 Toppings For New York Cheesecake
Enjoy the creamy cheesecake with any topping of your choice!
- Whipped cream
- Sour cream
- Lemon curd
- Jam: Strawberry jam, blueberry jam, etc.
- Fruit sauce: Strawberry sauce, blueberry sauce, etc.
- Fresh fruits
- Caramel sauce
- Chocolate sauce
- Cream cheese frosting
- Chocolate whipped cream
- Mascarpone whipped cream


What's your favorite topping to add to the cheesecake? Let me know!
📌 Mini New York Cheesecake
You can also use different types of pans. Just adjust the oven temperature and time depending on the size.
For regular cupcakes, you can bake at 300°F (149°C) for about 25 minutes until the cheesecakes wabble like puddings when you add vibrations. Follow the same direction as my strawberry mini cheesecake recipe. (The recipe is different, but you can bake it the same way!)

📌 Frequently Asked Questions
How should I store cheesecake, and what's the shelf-life?
Wrap it tightly and protect the cut side with plastic wrap to prevent it from getting dried. You can store it in the fridge for 4 - 5 days.
When is the best time to eat cheesecake?
I recommend eating it within a few days for the best taste. It gets slightly richer and heavier as it sits longer in the fridge. (The difference is minor after a day or two.)
Can I bake it as a crustless cheesecake?
Yes! Omit the crust, and follow the same steps.
Why did the surface of the cheesecake crack?
Here are the possible causes:
The water bath
Do not skip the water bath! By baking the cheesecake with steam, the heat delivers more evenly, which helps prevent the surface from cracking. It is an extra step, but it is worth it for the texture, too - it makes the cheesecake incredibly smooth.
The temperature of the oven
Each ovens act differently - the surface can crack when the heat is too strong. Try lowering the temperature, especially if the cheesecake was cooked faster than the recipe says.
The cheesecake filling was stuck in the pan.
Cheesecake rises in the oven, but it also goes down as it cools to room temperature. The cracking can happen if the cheesecake is stuck on the sides of the pan. To prevent it, coat butter in the pan evenly. Insert a small cake spatula or petty knife a moment after the pan is out of the oven when it looks like the cheesecake is stuck on one of the sides.
📌 VIDEO: Watch How To Make It!
To learn how to make the classic New York-style cheesecake visually and have a deeper understanding of each step, watch this video!
Don't forget to subscribe if you liked it 😉
📌 More Classic Dessert Recipes
If you love this New York cheesecake, also try other classic desserts!


📌 Printable Recipe
💬 If you loved this recipe, please share your feedback on this post! I always love hearing how you enjoyed it with your friends and family.
Best New York Cheesecake
Equipment
- 9-inch springform pan
- Spatula
- Bowl
- Ziplog + a rolling pin Or a food processor
- Whisk Or a stand mixer with a paddle attachment
- Alminum foil or oven bag for a water bath
- Deep baking tray for a water bath
- Paper towel or thin cloth for a water bath
- Pot for a water bath
- Small cake palette
- Cake palette to transfer a cake
Ingredients
Cheesecake Crust
- 6.3 oz Graham crackers 1.5 US cups or 12 rectangle sheets
- 2 tablespoon Granulated sugar
- 3.5 oz Unsalted butter 7 Tbsp
- Some Additional unsalted butter to coat on a pan
Cheesecake Filling
- 32 oz Full-fat Cream cheese 4 8-oz blocks
- 8.8 oz Granulated sugar 1 ¼ US cups
- 8.8 oz Sour cream 1 US cup
- 6.3 oz Heavy cream ¾ US cup
- 0.6 oz Cornstarch 2 tablespoon ***Please level the surface.
- 3 yolks Yolk about 1.8 oz | 50 g
- 3 large eggs Whole egg about 5.8 oz | 165 g
- 2 teaspoon Vanilla extract
- 2 teaspoon Lemon juice Adjust it as you like!
Instructions
Preparation
- * Leave cream cheese at room temperature until it gets soft.* Prepare hot water for a water batch.* Melt butter. * Coat a thin layer of soft butter inside the 9-inch pan. (The cheesecake comes out from the pan more easily when a thin layer of butter is applied.)


Cheesecake Crust
- Crush graham crackers in a ziplock with a rolling pin (or use a food processor). Leave some pieces in them for a better texture instead of crushing the crackers completely and making them powdery.3.5 oz Unsalted butter, Some Additional unsalted butter to coat on a pan
- Mix melted butter, crushed graham crackers, and sugar in a bowl until evenly incorporated. Press it on the prepared pan with something solid and flat, like a measuring cup, to form a crust. The crust could fall apart later if you don't press it enough.6.3 oz Graham crackers, 2 tablespoon Granulated sugar
- Cover the sides of the pan with a few layers of aluminum foil (or an oven bag). Do this very gently to prevent the foil from getting torn and causing water leaks (hence a soggy crust!) Chill it in the fridge until right before use.Optional: Bake (Preheated) at 340ºF (171ºC) for about 7 - 8 mins until the edges are slightly golden brown. Let it cool completely before use.

Cheesecake Filling
- Mix cream cheese in a large bowl until smooth.32 oz Full-fat Cream cheese
- Add granulated sugar and mix until smooth.8.8 oz Granulated sugar
- Add sour cream and heavy cream. Mix well until smooth. Scrape off the sides and bottom of a bowl to ensure everything is evenly blended.8.8 oz Sour cream, 6.3 oz Heavy cream
- Add cornstarch and mix well until you don't see lumps.0.6 oz Cornstarch
- Add yolks and whole eggs. Mix well until evenly incorporated. Do not whip a lot to prevent it from holding too many air bubbles inside.3 yolks Yolk, 3 large eggs Whole egg
- Add vanilla extract and lemon juice and mix until combined. Scrape off the sides and bottom of the bowl with a spatula at the end to ensure everything is blended evenly.2 teaspoon Vanilla extract, 2 teaspoon Lemon juice
- Pour the cheesecake batter into the prepared pan. Lay a thin towel or kitchen paper on a roasting pan and place the cheesecake pan on top of it. Place it on an oven rack and pour hot water on a roasting pan up to about ⅓ of the height of a springform pan.Bake (Preheated) at 340ºF (171ºC) for 30 mins with a water bath.Turn it down to 310ºF (154ºC) and bake for another 65 - 75 minutes until the surface of the cheesecake wobbles like pudding or jello when tapping the side gently. Do not open the oven door frequently to get the best result. Adjust the time and temperature accordingly depending on the oven, the size of the pan, etc. (Today, I baked it at 340ºF | 171ºC for the first 30 minutes because I like nice golden caramelization on the surface. But you can also start baking it at 310ºF | 154ºC if you prefer not to brown it. Bake a little bit longer in that case!)Turn off the heat, leave it open about an inch with a wooden spoon, and wait for 30 minutes before taking it out from the oven. This will ensure the cheesecake is cooked through the center.


After baking the cheesecake
- Let the cheesecake cool on a cooling rack. Chill in the fridge for more than 6 hours before removing it from a pan.
- Follow the 4 steps to remove the cheesecake from a pan: 1. Carefully insert a small cake spatula or petty knife along the side. Remove the side of the springform pan. 2. Insert a small cake spatula around the bottom edge to remove the crust easily.3. Insert a large cake palette under the crust and carefully detach it from the bottom of a pan. 4. Transfer the cake to a plate or cake board using the palette.


Video
Notes
How to store it:
Wrap it tightly and protect the cut side with plastic wrap to prevent it from getting dried. You can store it in the fridge for 4 - 5 days. ** For best results, measure ingredients with a scale. All recipes are designed with weighed ingredients using grams/ounces. Cup measurements are provided for your convenience. **Nutrition
📌 Pin It!
Pin this New York style cheesecake and many other delicious recipes on my Pinterest page!


Gabriela Espejel says
it was just perfect!!! Thank you so much for sharing. Today I will try lemon pound cake.
ayacaliva says
Thank you!! I'm so glad. I hope you'll like it too!
Angel says
Best cheesecake ever. Although it took me forever to bake at 310 f but still delicious.
ayacaliva says
Thank you!! I'm so glad!