
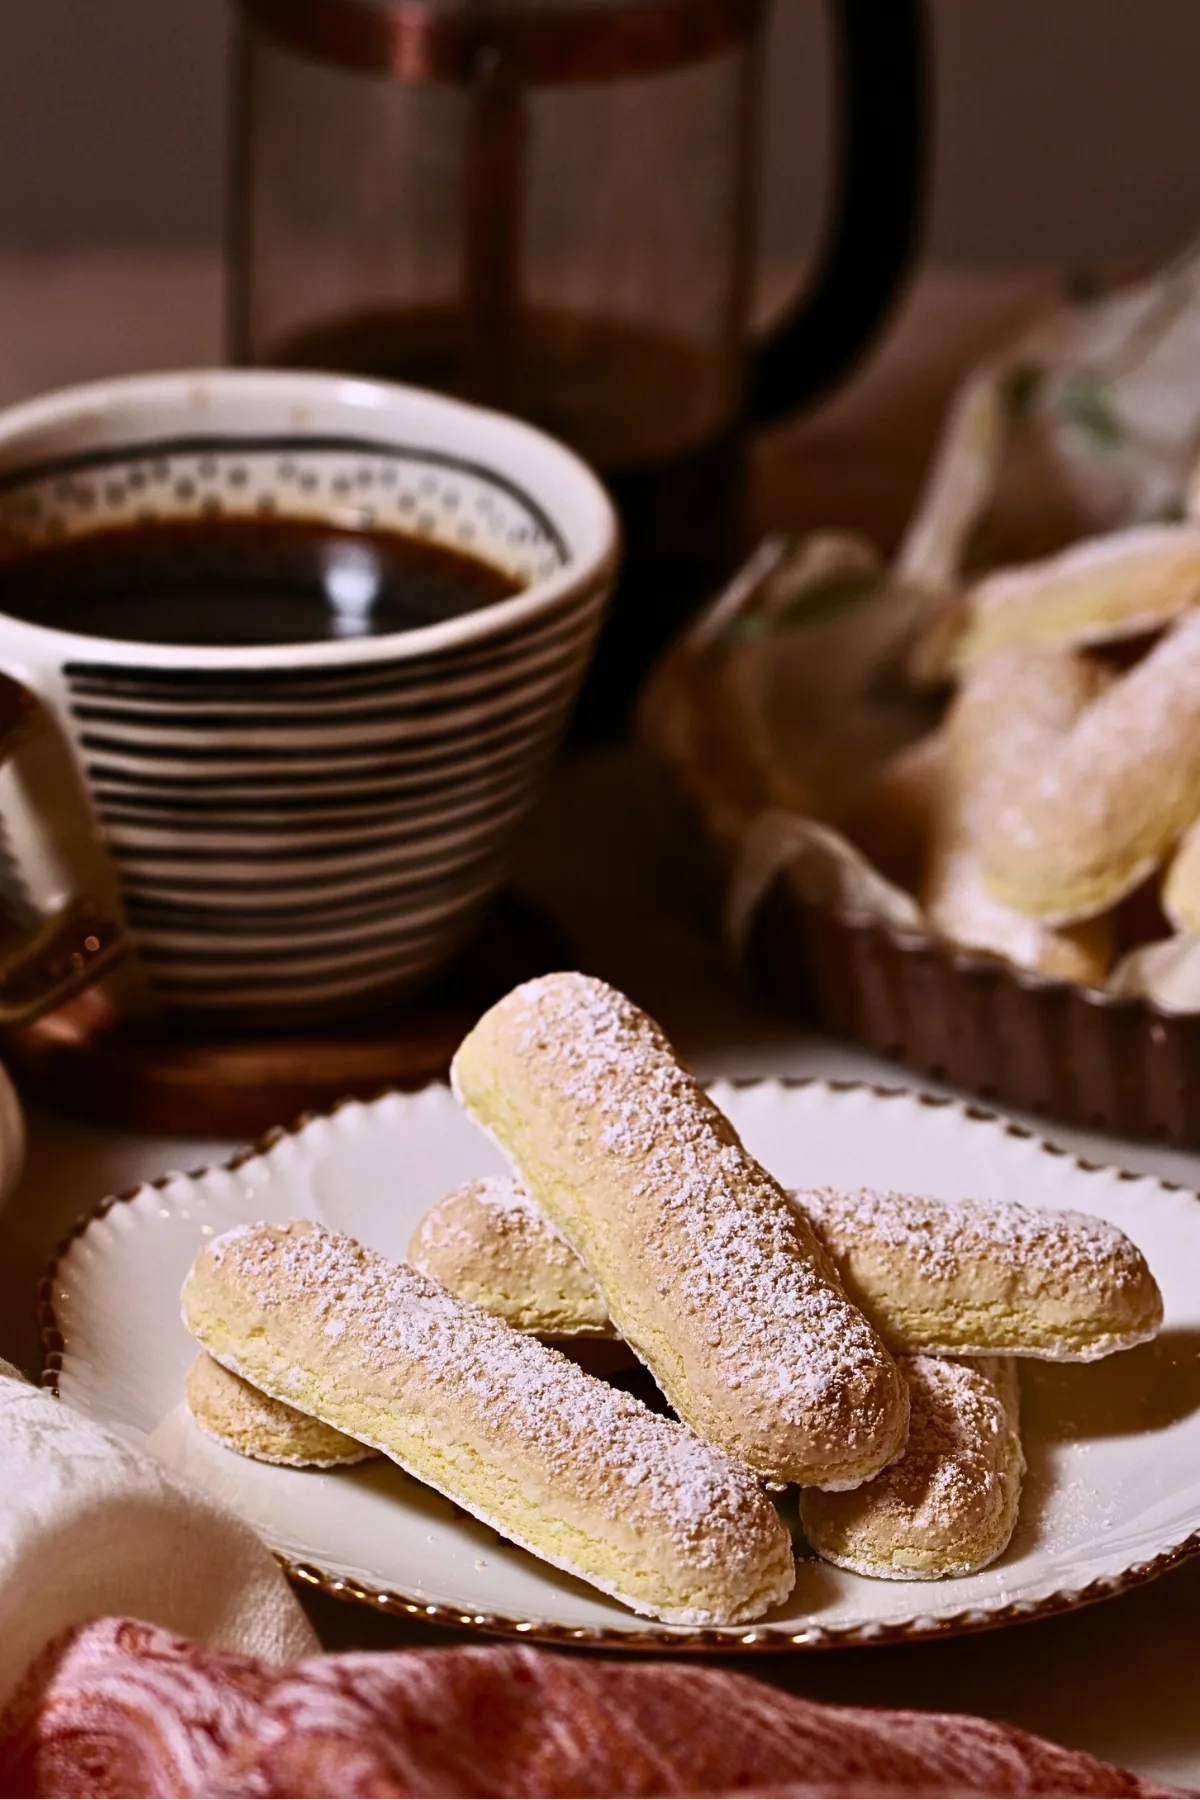
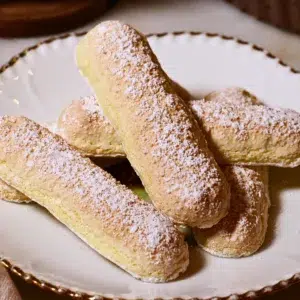
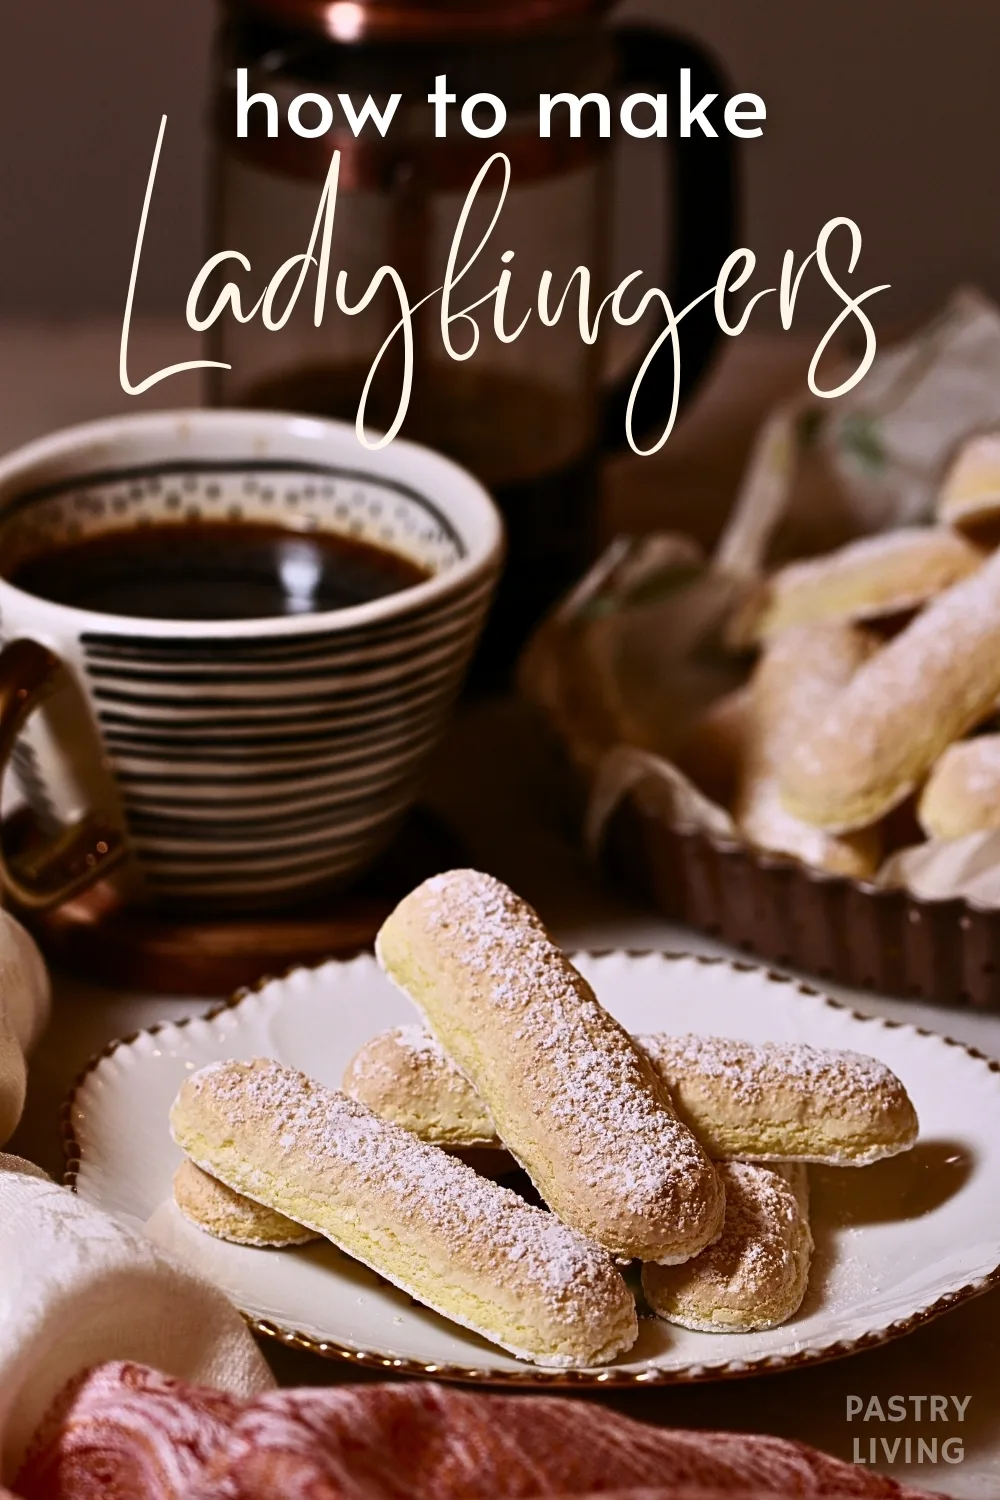
Perfectly light & fluffy homemade ladyfingers can be made quickly at home! Try this simple recipe and you’ll probably don’t want to go back to buying the stale ones at grocery stores anymore. I’m sharing how to make it step-by-step with troubleshooting tips.
📌 Why you’ll love this recipe
Some of the best parts are:
- You can make it easily with just 4 simple ingredients that you probably already have in your kitchen.
- The texture is light - The light ladyfinger tastes great as is. It'll also make delicious Tiramisu.
- The steps are very simple. There is no need to whip egg yolks with this recipe and you can still make the thick batter for delicious ladyfingers.
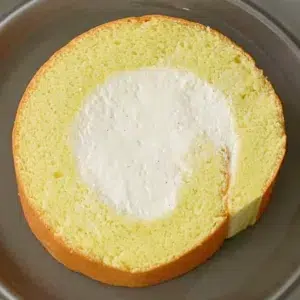
Ladyfinger is a necessary component for Tiramisu recipe, but it's hard to get it at grocery stores in most areas. I strongly recommend making your own ladyfingers if you haven't tried it yet. It tastes so much better and the best part is that it doesn't cost much time and money. You probably don't feel like going back to the stale store-bought versions after making them from scratch!
Let's get started!

📌 What are ladyfingers?
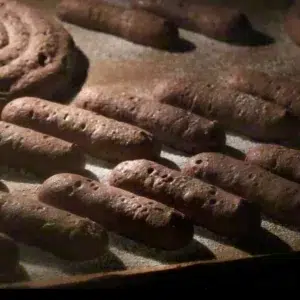
Ladyfinger is a biscuit sponge cake, usually piped into short stripes and dusted with powdered sugar before baking them.
Biscuit sponge cake is made by whipping egg whites and yolks separately and combining them with flour at the end. We call it the Biscuit method.
On the contrary, Genoise sponge cake is made by whipping whole eggs and combining them with flour at the end. It's called the Genoise method.
The history
Ladyfingers were created in the late 15th century at the court of the Duchy of Savoy to make the occasion of a visit by the king of France. The name Savoiardo was given, deriving from Savoy.
The traditional sponge cakes are widely known as ladyfingers nowadays since the shape resembles fingers. Simple! It is also called "sponge fingers" or "finger biscuits" in some regions.

📌 Ingredients you’ll need
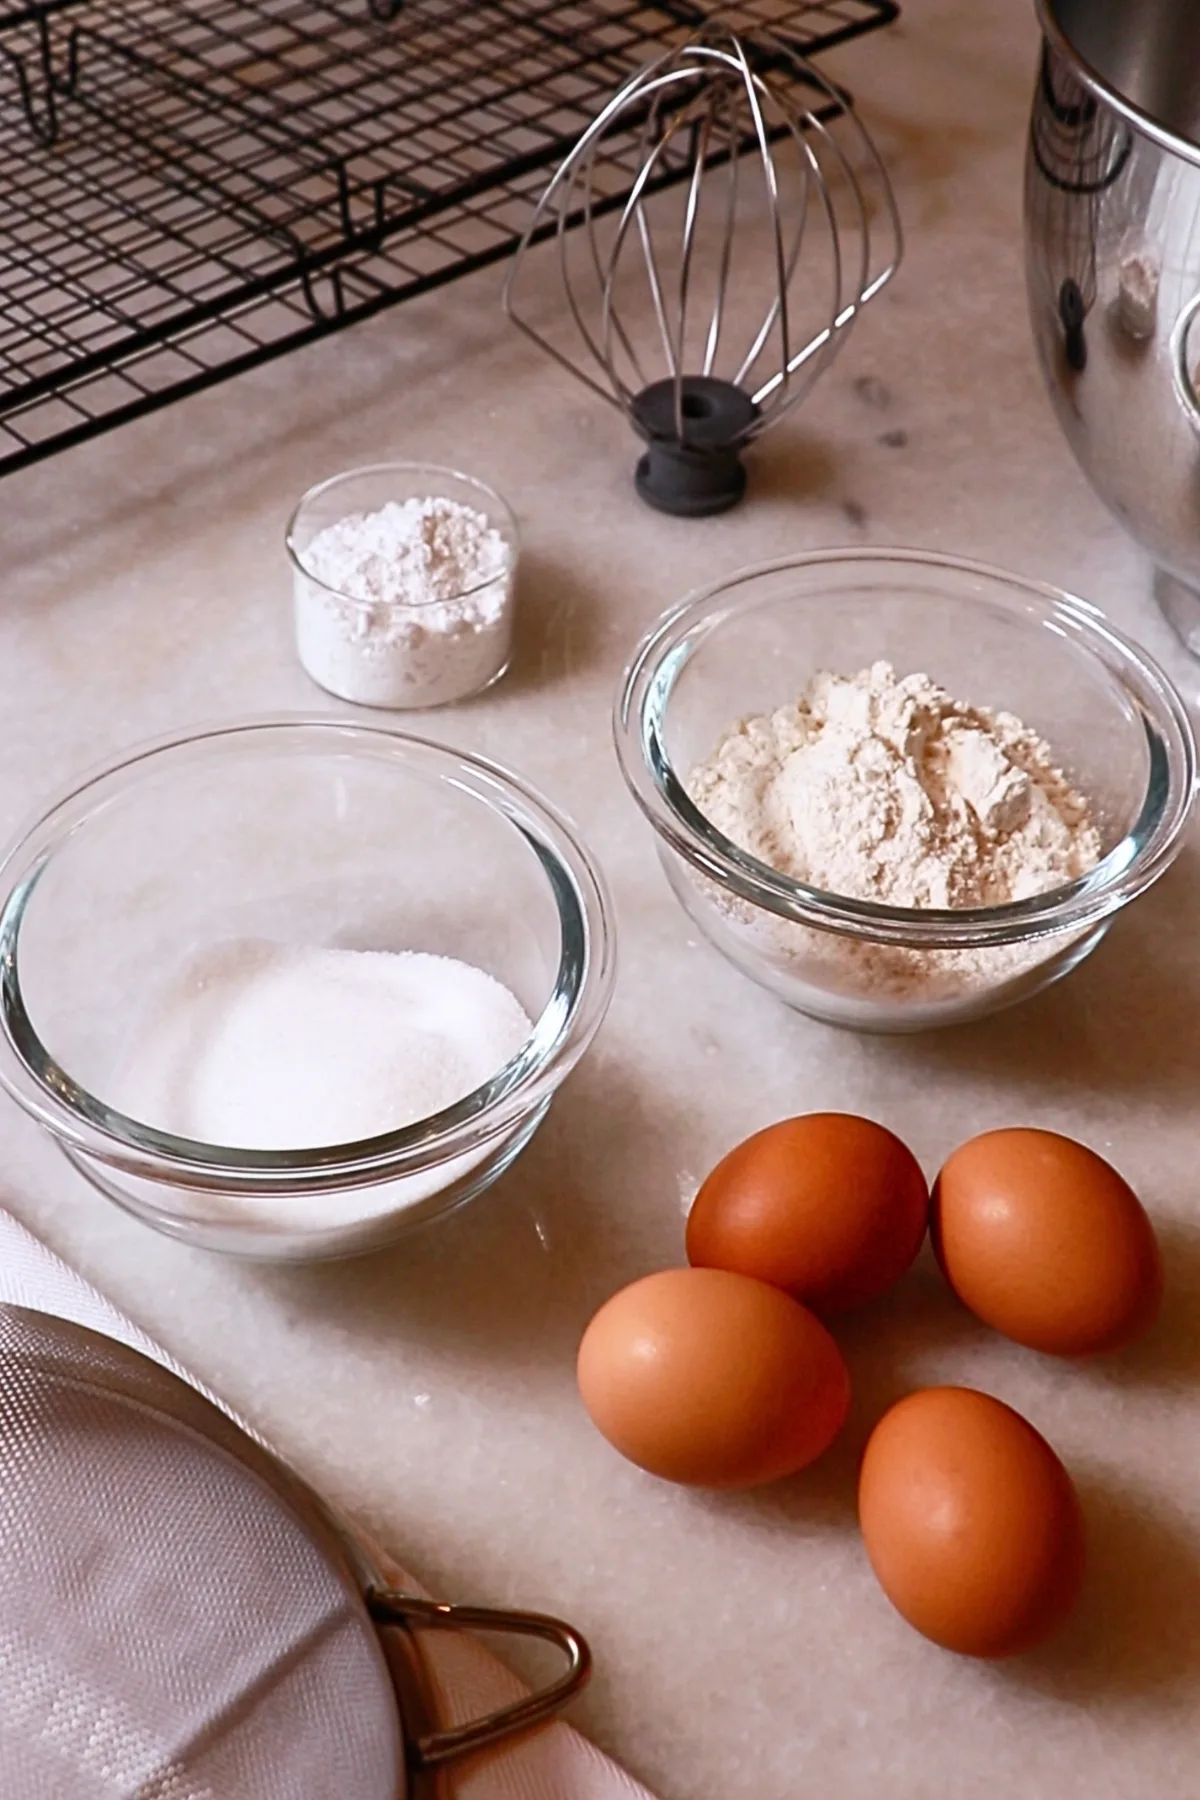
You'll only need 4 basic ingredients to make homemade ladyfingers: eggs, sugar, flour, and powdered sugar.
- Egg white: Ensure that no yolk, liquids, or dirt is mixed in the egg whites to make a fluffy meringue. Use cold eggs since separating eggs without breaking the yolks can get harder with room temperature eggs.
- Granulated sugar: Use white sugar, such as granulated sugar and caster sugar.
- Flour: Use all-purpose flour or cake flour.
- Powdered sugar: It is dusted on the surface of ladyfingers at the very end before baking them.
📌 Step-by-step instructions
Preparation
I recommend finishing all the preparations in the beginning since everything moves quickly after the meringue is done.
- Set a piping bag with a round tip. (and plastic wrap to wrap the cake batter if you decide to use it. Check the piping section to see how to use it.)
- Set a baking sheet pan. (One batch is enough for a full sheet pan or 2 half-sheet pans.)
- Sift flour with a fine sieve.
- Set a fine sieve and powdered sugar together.
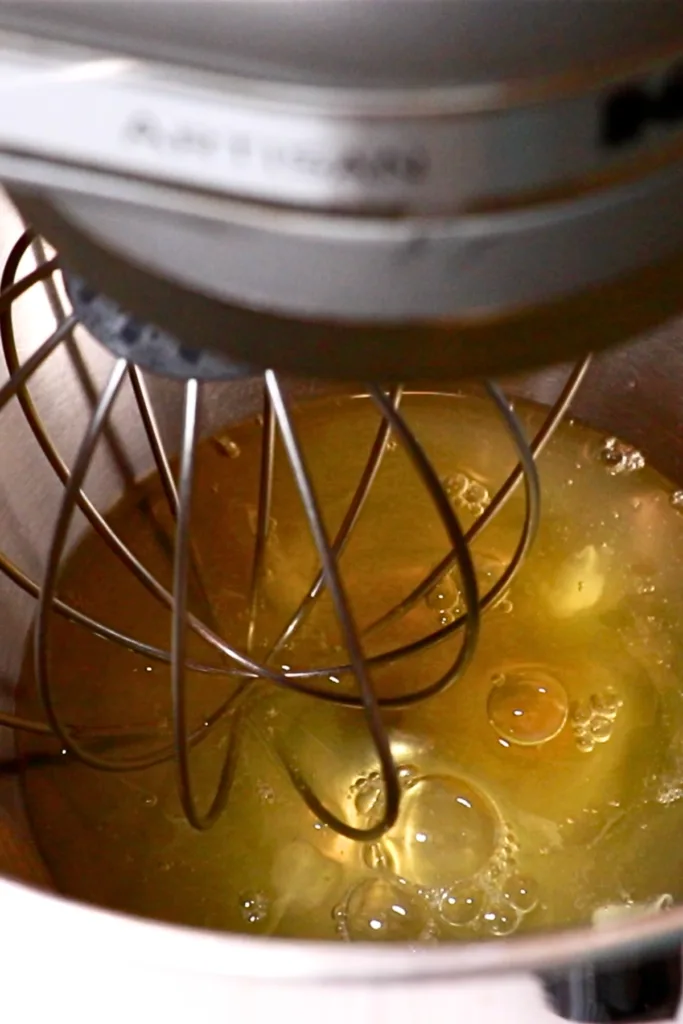
- Separate eggs. Place egg whites in a large mixing bowl and egg yolks in a small bowl.
- Preheat the oven to (390°F | 199°C)


Tip💡
Ensure all the ingredients and tools are clean without yolks, oils, and liquids so that the meringue whips well.
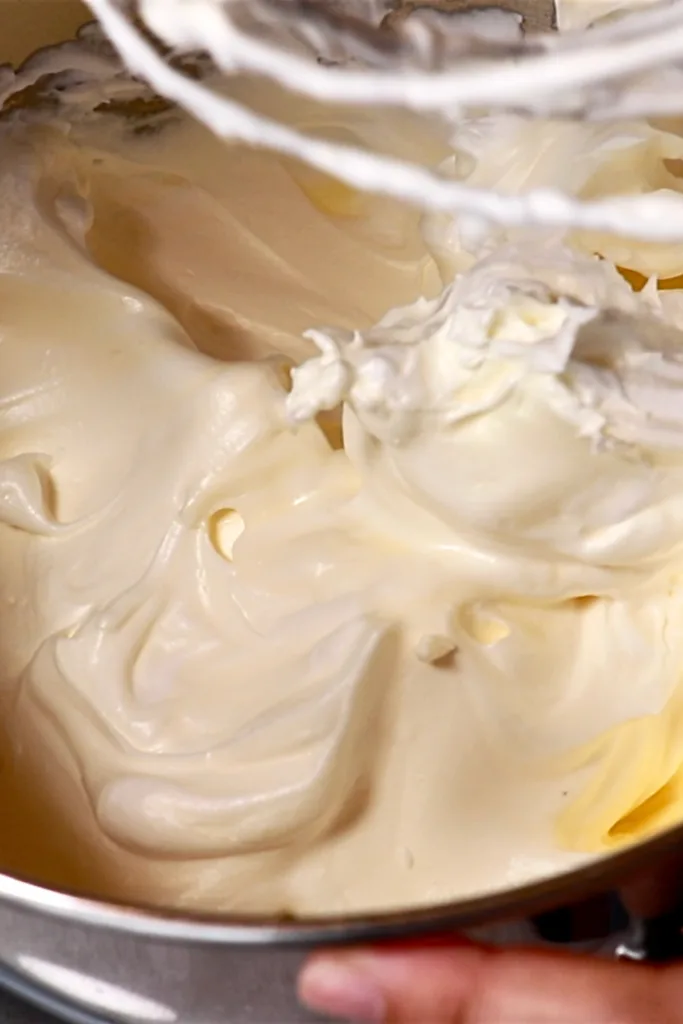
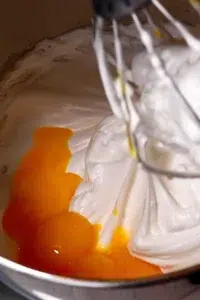
Make meringue.
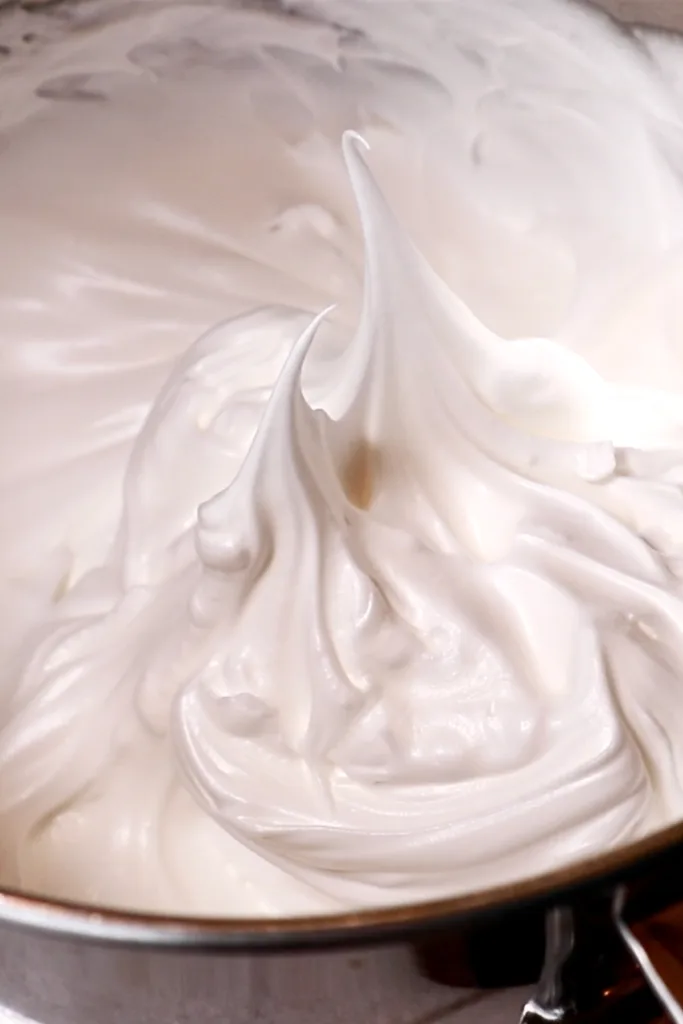
- Whip the egg whites at medium to medium-high speed with a whisk attachment.
- Add about half of the sugar when the meringue looks very fluffy. Add the remaining sugar when it looks even stiffer and fluffier.
- Continue whipping it until it gets very fluffy and stiff. (See the image below.)
Tips💡
- Do not add all the sugar at once in the beginning - The sugar has the effect of preventing the meringue from whipping well when it's added too much before it gets whipped enough.
- Making a stiff meringue is very important to make light, airy, and fluffy ladyfingers that can hold the shapes as you pipe them. Loose meringue leads to the loose cake batter!
Add yolks.
Add yolks and mix roughly until about 50% is blended.

Tip💡
We do not want to take too much time here to keep the meringue nice and airy. Mix them right away while the condition of the meringue is the best. The meringue slowly starts separating as it sits. The process should take seconds!
Add flour.
- Clean the sides of a bowl with a rubber spatula and add the sifted flour.
- Fold it just until you don't see any flour. Clean the spatula, the bottom, and the sides of the bowl on the way to ensure it's mixed evenly.
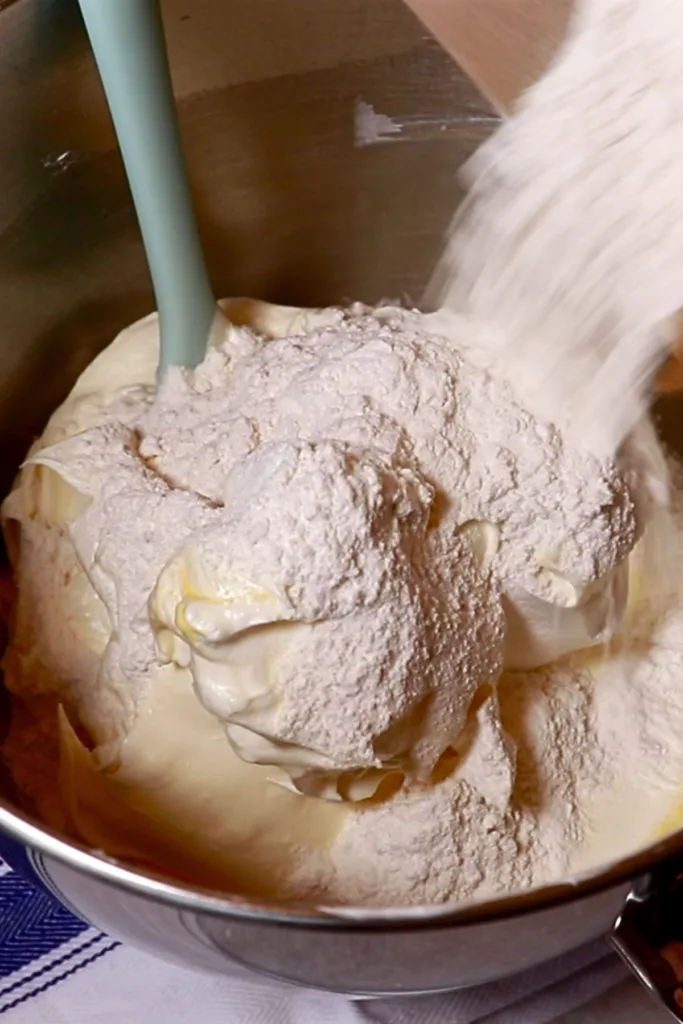

Tip💡
How you fold here is very important. We do not want to mix it vigorously to prevent glutens in flour from forming too much, and also to prevent the air bubbles in the meringue from getting eliminated too much. The finished cake batter should look fluffy and thick.
4 tips to fold the cake batter:
- Move your spatula like you draw a "J."
- Turn the bowl as you flip the batter with a spatula to mix evenly.
- Fold it with speed. It helps to break down chunks of flour and more air bubbles remain in the meringue by finishing faster.
- Clean the spatula and bowl on the way to make an even batter. Ensure that no flour is left on the bottom or sides of a bowl.
Focus on the 4 tips when you are not used to the movement yet.
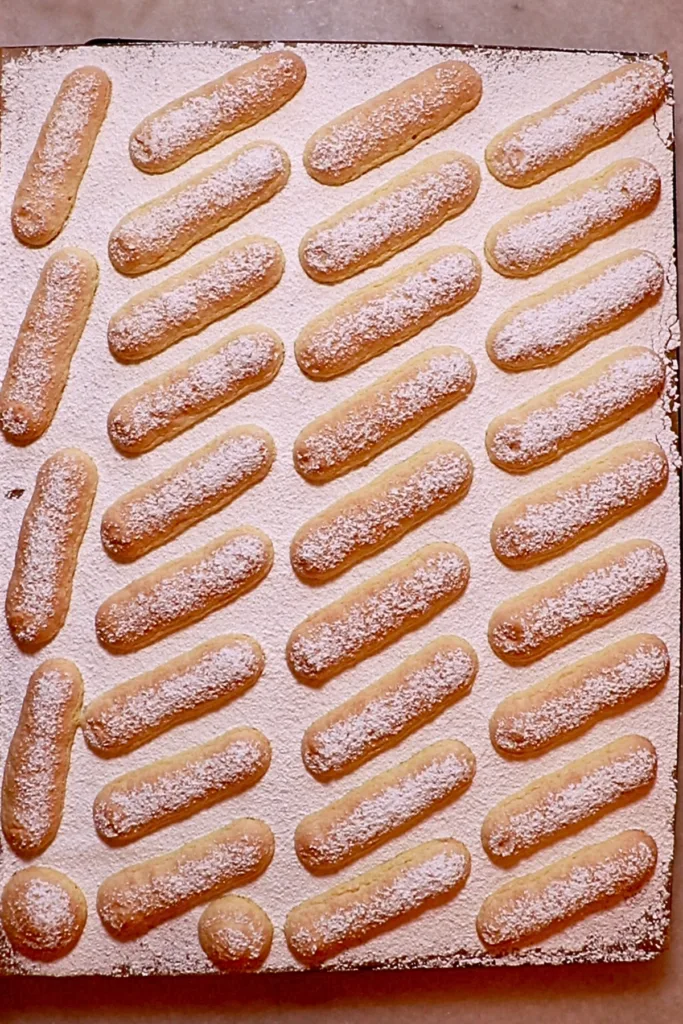
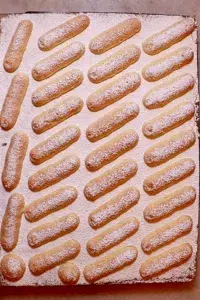
Pipe the cake batter.
- Pour the sponge cake batter into a piping bag. Or divide it in half and wrap each with plastic wrap, cut the edge, and insert it into a piping bag. That way, I can finish the piping process faster.
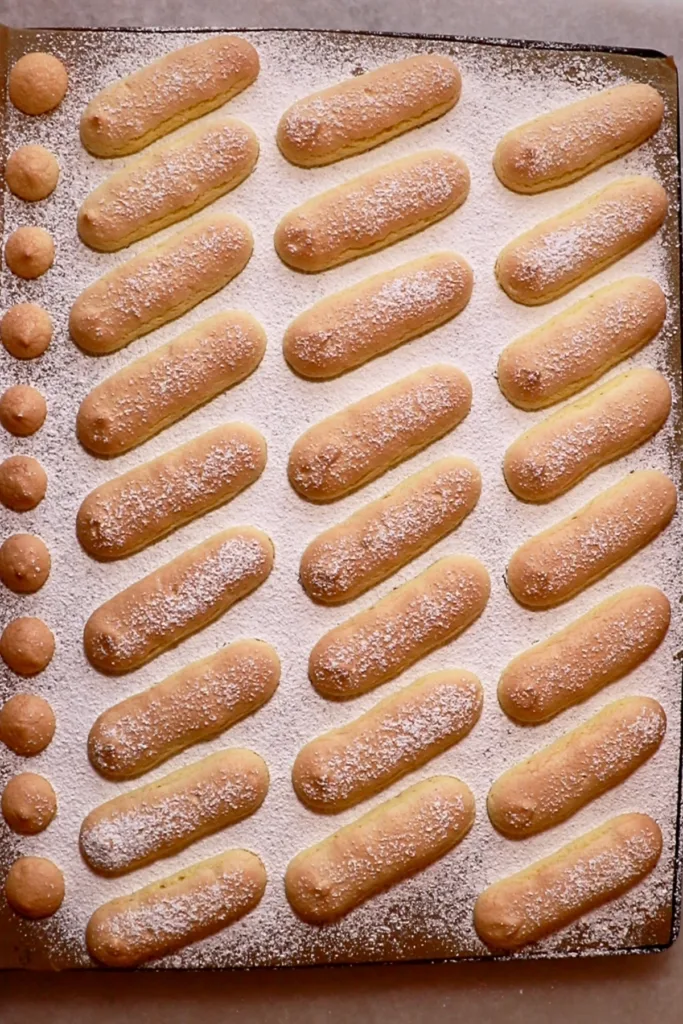
- Pipe it on the prepared baking sheet with parchment paper or a silicone mat into 4 inches in length and 1 inch in thickness.
- Dust the powdered sugar on top all around the surface. Wait for seconds, and dust one or two more times to the spots where the sugar dissolved.


Tips💡
- When using parchment paper, pipe a small amount of the cake batter on the 4 corners of the baking sheet and attach parchment paper on top to prevent it from sliding around as you pipe it.
- The powdered sugar does an important job of making lighter and fluffier ladyfingers with more volume. Don't skip the process!
- You can change the size and thickness as you like. Just note that the thicker or bigger that is, the longer it takes to bake them. Adjust the baking time accordingly.
Bake them.
- Bake them in the preheated oven until the surface gets light golden brown, and bounces back gently when you touch it.
- Take it out and wait until it cools down.
- Use a small cake spatula to remove the ladyfingers from the parchment paper.

Tip💡
I baked them just until they cooked through to enjoy the fluffy texture. You can also bake longer to make them drier and crispier if you prefer.
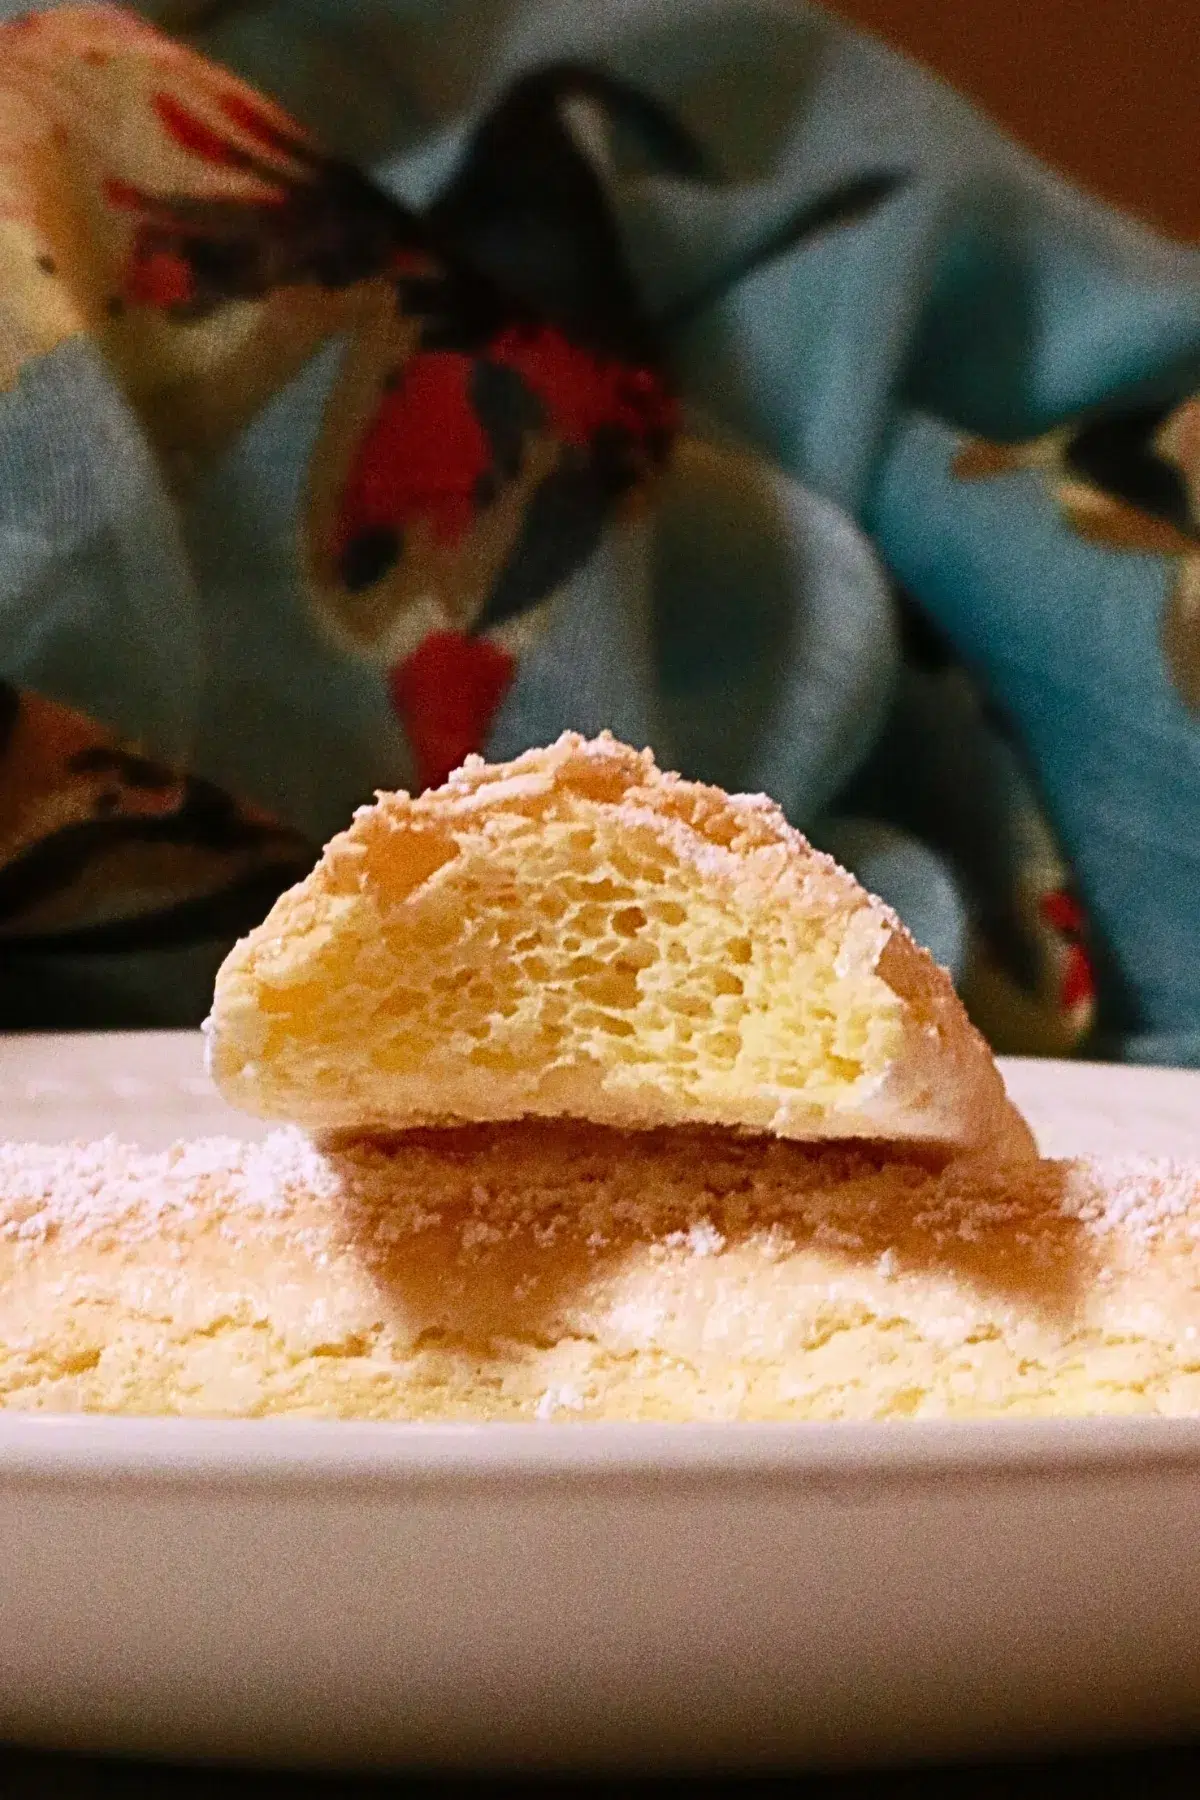
And it is done!! Enjoy them as is with tea or coffee or use them to complete your special cakes. They are such simple yet delicious treats that you can whip up quickly.
📌 How to store it
Store them in an airtight container for up to 2 days at room temperature or 4 - 5 days in the fridge. You can also freeze them for up to a few months.
I recommend consuming them right away or at least within the day if you want to enjoy the fluffy texture. This sponge cake gets dried more quickly than other sponge cake recipes since it is small and does not contain additional liquids or oil to keep it moist. There is no need to worry about it in case you like the crispier texture!
📌 Other variations
Enjoy this delicious ladyfinger in many ways, such as:
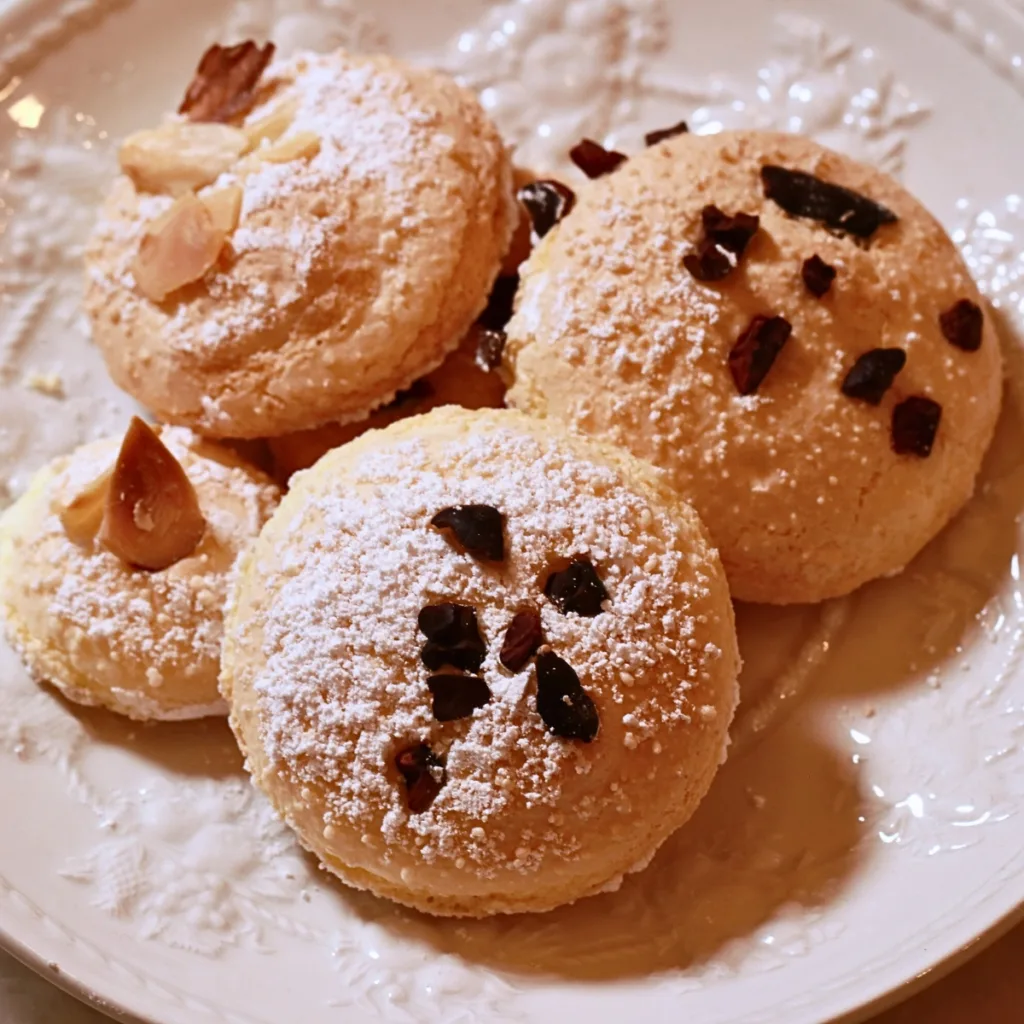
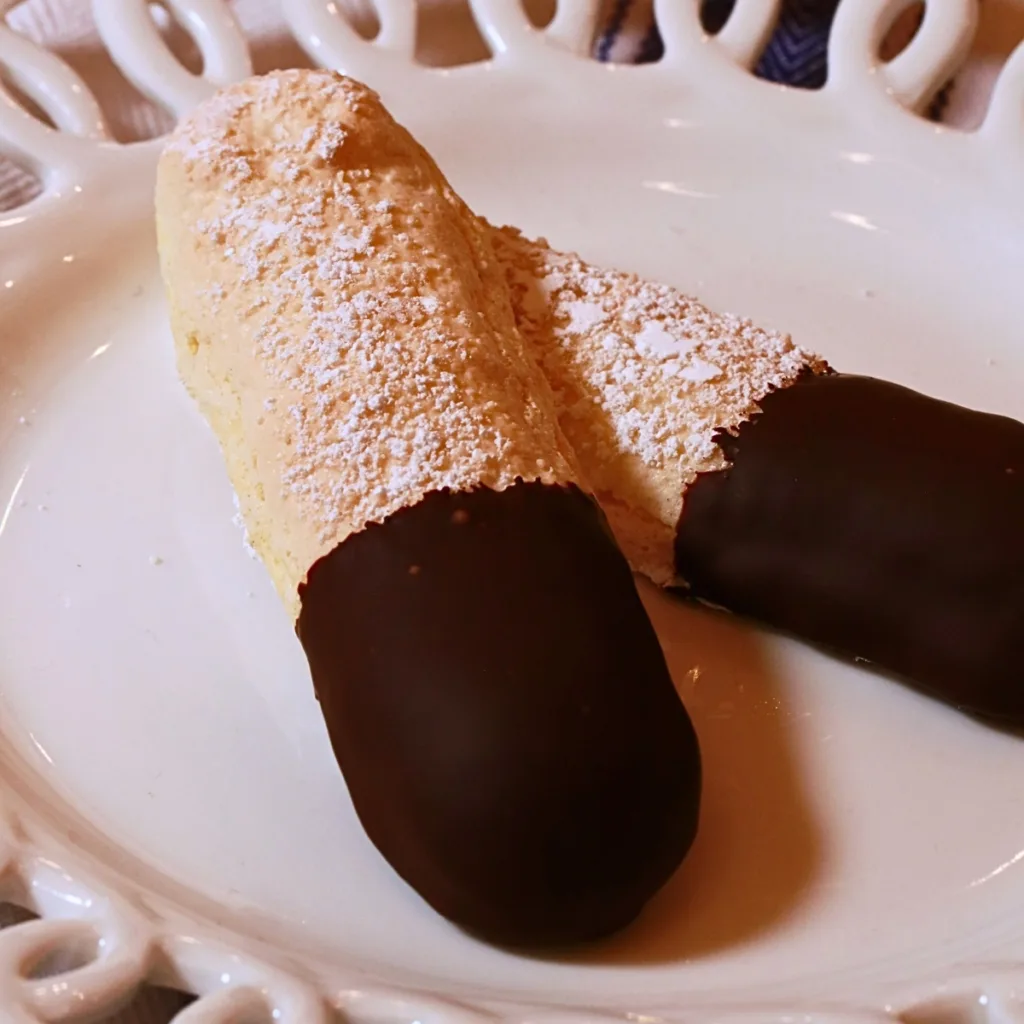
- Dip it in chocolate to make the fancy sponge cookies.
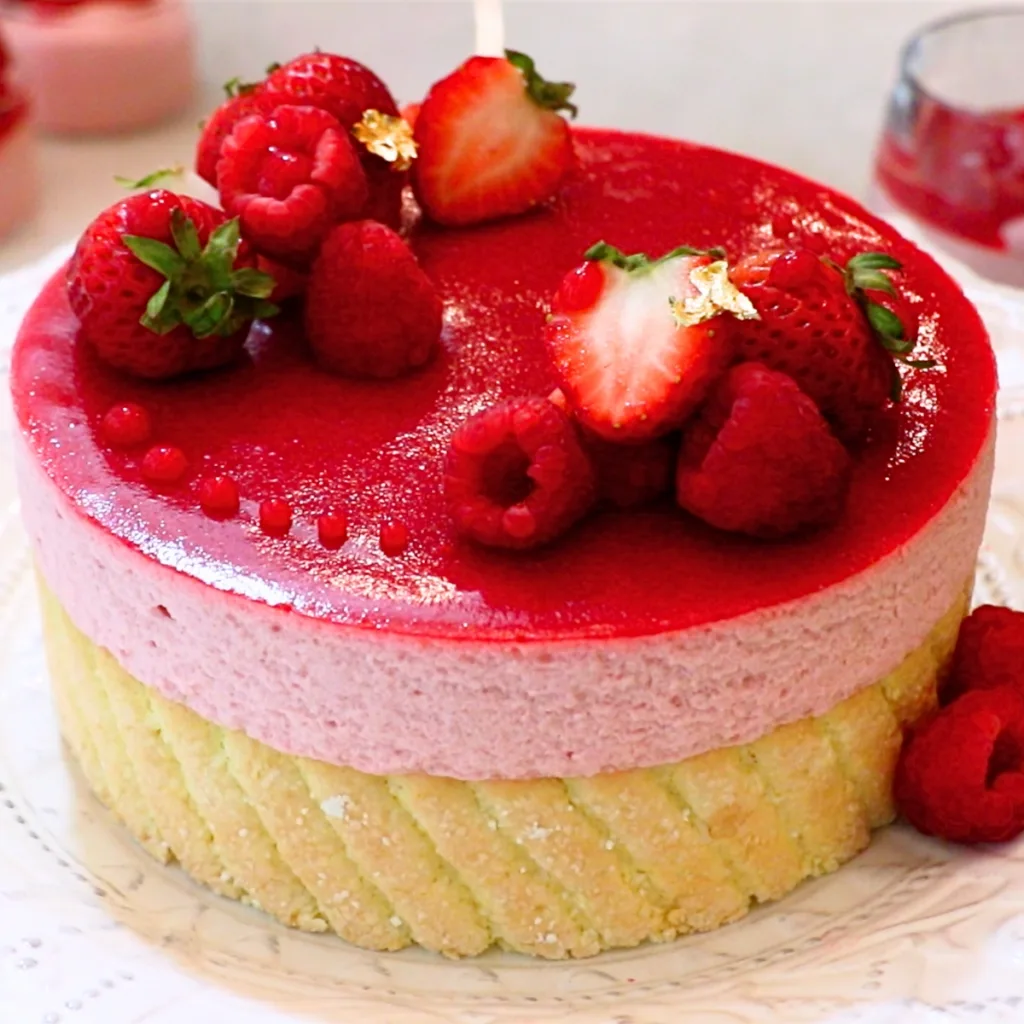
- Use it for whole cakes, such as tiramisu and Charlotte cake.
- Pipe them into any shapes you desire and have fun - circle, heart, animal shapes, etc.
- Sandwich ice cream with it to make a special ice cream sandwich.
You can also make chocolate ladyfingers by adding cocoa powder. Check out the post to see how to make it.

📌 Why is the cake batter loose?
Ladyfingers are so easy to make, but there's one common issue that a lot of people face, which is the loose cake batter. And they end up spreading more in the oven. Although it still tastes good, the texture gets denser and less light and fluffy when it happens.
Here are a couple of possible causes:
- The meringue: Ensure that your meringue is whipped enough until it's fluffy and stiff. When it's much softer, that leads to a loose cake batter.
- The cake butter was over-mixed. Stop folding as soon as you don't see any flour and it's evenly mixed.
- It took too much time before baking them. Because of that, the air bubbles in the meringue got killed a little bit too much. I recommend preparing everything you can in the very beginning. It's going to give you a lot more ease and less stress!

📌 FAQ
Yes! But be careful not to add too much liquid flavor to avoid the cake batter from getting loose. Choose dried flavors instead whenever you have the option. For example, use vanilla beans/paste, lemon zest, and freeze-dried fruits instead of using vanilla extract, lemon juice, and fruit puree.
Yes! The texture gets even lighter with cake flour. The difference is not significant but use cake flour instead if you prefer a lighter texture.
That is mostly because they were baked for a longer time or were stored for a longer time. They dry faster than other sponge cake recipes since it does not contain additional liquids or oil. Consume them right away to enjoy the soft texture. You can intentionally bake longer when you prefer the crispier texture. Just be careful not to burn the surface. Reduce the temperature if needed.
Adding butter or any oil makes the batter loose. I don't recommend doing so if you want to enjoy the light texture.
You don't need it for this recipe. The sponge cake rises solely due to the effect of the whipped meringue - The air bubbles expand as it's heated in the oven and create a light, spongy texture.
Yes! Follow the exact steps in the instructions.
📌 VIDEO: Watch How To Make It!
To learn how to make ladyfingers visually and have a deeper understanding of all, watch the video!
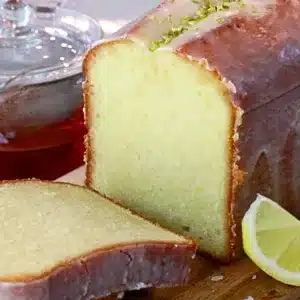
📌 More Sponge Cake Recipes
If you loved this Savoiardi recipe, also try other sponge cake recipes!
📌 Printable recipe
💬 I would appreciate it if you could leave a review here if you tried this homemade ladyfingers recipe and loved it! I always love hearing how you enjoyed it with your friends and family.
Homemade Ladyfingers
Equipment
- Stand mixer with a whisk attachment or hand mixer
- Fine sieve
- Baking sheet pan A full sheet pan or 2 half-sheet pans
- Parchment paper or sillicone matte
- Spatula
- Pastry bag with a round tip
Ingredients
- 4 eggs Egg white 135 g | 4.7 oz
- 4.4 oz Granulated sugar ¼ US cup
- 4 eggs Egg yolk
- 4.2 oz All-purpose flour or cake flour 1 US cup
- Some Powdered sugar
Instructions
- PreparationI recommend finishing all the preparations in the beginning since everything moves quickly after the meringue is done.* Set a piping bag with a round tip. (and plastic wrap to wrap the cake batter if you decide to use it. Check the piping section to see how to use it.)* Set a baking sheet pan. (One batch is enough for a full sheet pan or 2 half-sheet pans.)* Sift flour with a fine sieve.* Set a fine sieve and powdered sugar together.* Separate eggs. Place egg whites in a large mixing bowl and egg yolks in a small bowl.* Preheat the oven to (390°F | 199°C)Tip💡Ensure all the ingredients and tools are clean without yolks, oils, and liquids so that the meringue whips well.

- Make meringue.1. Whip the egg whites at medium to medium-high speed with a whisk attachment. 2. Add about half of the sugar when the meringue looks very fluffy. Add the remaining sugar when it looks even stiffer and fluffier.3. Continue whipping it until it gets very fluffy and stiff. (See the image below.)Tips💡1. Do not add all the sugar at once in the beginning - The sugar has the effect of preventing the meringue from whipping well when it's added too much before it gets whipped enough.2. Making a stiff meringue is very important to make light, airy, and fluffy ladyfingers that can hold the shapes as you pipe them. Loose meringue leads to the loose cake batter!4 eggs Egg white, 4.4 oz Granulated sugar
- Add yolks.Add yolks and mix roughly until about 50% is blended.Tip💡We do not want to take too much time here to keep the meringue nice and airy. Mix them right away while the condition of the meringue is the best. The meringue slowly starts separating as it sits. The process should take seconds!4 eggs Egg yolk
- Add flour.1. Clean the sides of a bowl with a rubber spatula and add the sifted flour.2. Fold it just until you don't see any flour. Clean the spatula, the bottom, and the sides of the bowl on the way to ensure it's mixed evenly.Tip💡How you fold here is very important. We do not want to mix it vigorously to prevent glutens in flour from forming too much, and also to prevent the air bubbles in the meringue from getting eliminated too much. The finished cake batter should look fluffy and thick.4 tips to fold the cake batter:1. Move your spatula like you draw a "J."2. Turn the bowl as you flip the batter with a spatula to mix evenly. 3. Fold it with speed. It helps to break down chunks of flour and more air bubbles remain in the meringue by finishing faster.4. Clean the spatula and bowl on the way to make an even batter. Ensure that no flour is left on the bottom or sides of a bowl.4.2 oz All-purpose flour or cake flour
- Pipe the cake batter.1. Pour the sponge cake batter into a piping bag. Or divide it in half and wrap each with plastic wrap, cut the edge, and insert it into a piping bag. That way, I can finish the piping process faster.2. Pipe it on the prepared baking sheet with parchment paper or a silicone mat into 4 inches in length and 1 inch in thickness.3. Dust the powdered sugar on top all around the surface. Wait for seconds, and dust one or two more times to the spots where the sugar dissolved.Tips💡1. When using parchment paper, pipe a small amount of the cake batter on the 4 corners of the baking sheet and attach parchment paper on top to prevent it from sliding around as you pipe it. 2. The powdered sugar does an important job of making lighter and fluffier ladyfingers with more volume. Don't skip the process!3. You can change the size and thickness as you like. Just note that the thicker or bigger that is, the longer it takes to bake them. Adjust the baking time accordingly.Some Powdered sugar
- Bake them.1. Bake them in the preheated oven until the surface gets light golden brown, and bounces back gently when you touch it.2. Take it out and wait until it cools down.3. Use a small cake spatula to remove the ladyfingers from the parchment paper.Tip💡I baked them just until they cooked through to enjoy the fluffy texture. You can also bake longer to make them drier and crispier if you prefer.


Video
Notes
How to store it:
Store them in an airtight container for up to 2 days at room temperature or 4 - 5 days in the fridge. You can also freeze them for up to a few months. I recommend consuming them right away or at least within the day if you want to enjoy the fluffy texture. This sponge cake gets dried more quickly than other sponge cake recipes since it is small and does not contain additional liquids or oil to keep it moist. There is no need to worry about it in case you like the crispier texture! ** For best results, measure ingredients with a scale. All recipes are designed with weighed ingredients using grams/ounces. Cup measurements are provided for your convenience. **Nutrition
📌 Pin It!
Pin it if you love this recipe, and find so many other recipes on my Pinterest page!

Leave a Reply