
I'm sharing how to make thick and light chocolate ladyfingers with 5 simple steps. Use them to complete your special chocolate desserts, such as chocolate mousse cake, chocolate charlotte cake, chocolate Tiramisu, etc!

📌 Why You’ll Love This Recipe
- You'll only need 6 ingredients you can find easily at grocery stores.
- It's easy to make: Follow the simple 5 steps!
- Piping the sponge batter is fun! Change the thickness or shape and enjoy many versions.
- A good amount of cocoa powder is added to make it taste chocolatey enough without ruining the texture and volume.
Making this chocolate lady fingers does not take too much time and the steps are simple. Enjoy them as little snacks or to make cakes for special occasions.
I'm also sharing essential tips to avoid loose and flat ladyfingers.
Let's get started!
📌 What Are Ladyfingers?
Ladyfinger is a biscuit sponge cake, usually piped into short stripes and dusted with powdered sugar before baking them.
Biscuit sponge cake is made by whipping egg whites and yolks separately and combining them with flour at the end. We call it the Biscuit method.
On the contrary, Genoise sponge cake is made by whipping whole eggs and combining them with flour at the end. It's called the Genoise method.
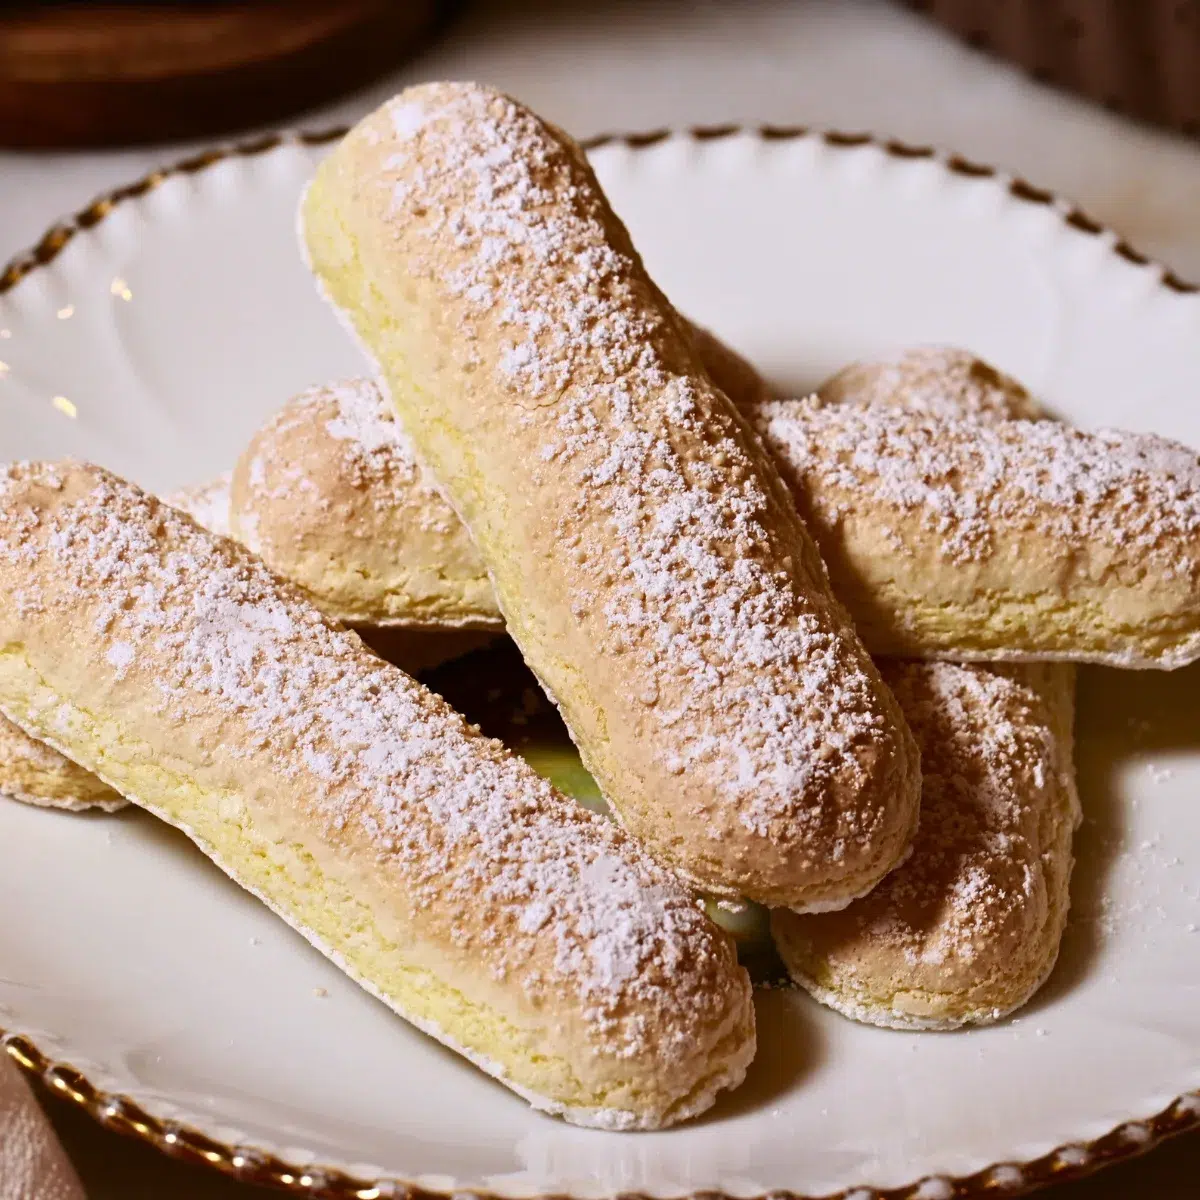
This chocolate ladyfinger recipe was developed from my classic ladyfinger recipe.
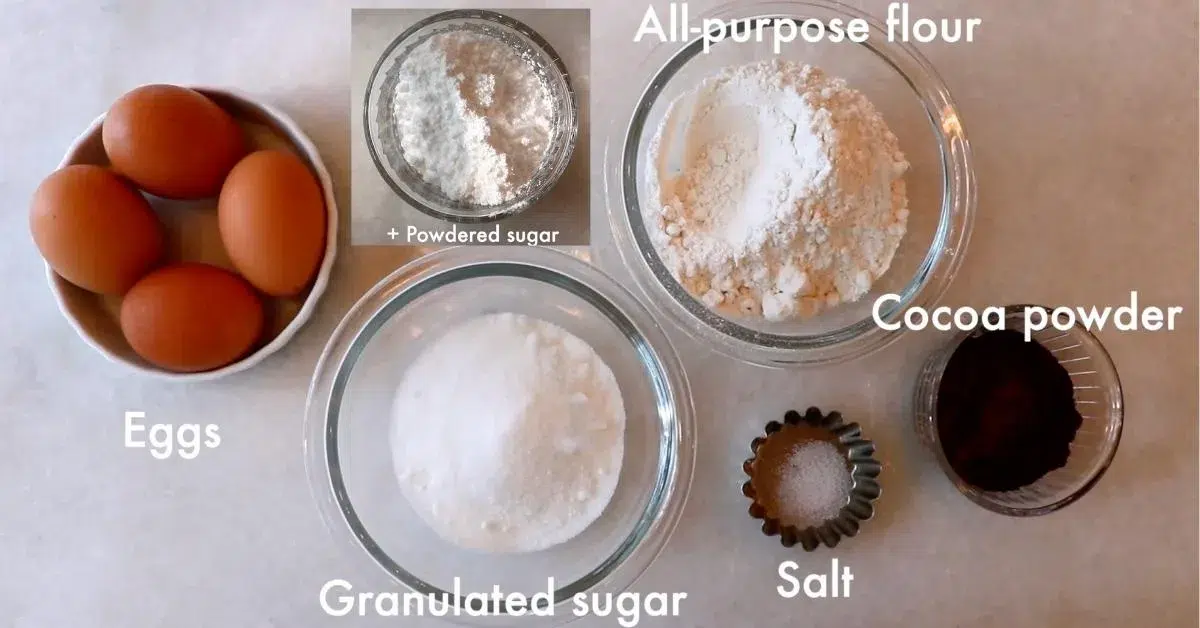
📌 Ingredients You’ll Need
- Egg: Separate it with egg white and yolks and combine them later. Ensure that no yolk, liquids, or dirt is mixed in the egg whites to make a fluffy meringue. Use cold eggs since separating eggs without breaking the yolks can get harder with room temperature eggs.
- Granulated sugar: It's added to the meringue. Use white sugar, such as granulated sugar and caster sugar.
- All-purpose flour: You can also use cake flour instead - The texture of ladyfingers gets softer with it, but gets a bit more mushy after soaking a lot of liquids. Pastry flour is the middle of all-purpose flour and cake flour.
- Cocoa powder: We add a good amount of it so the sponge cake tastes chocolatey enough. You can also add a dash of instant coffee or espresso powder to bring out the richness of the chocolate flavor.
- Salt: It matches so well with the chocolate flavor.
- Powdered sugar: We dust it on top of the sponge batter at the very end before baking it. It helps the sponge to rise more in the oven.
📌 Step-by-Step Instructions To Make Chocolate Ladyfingers
Preparation:
I recommend finishing all the preparations in the beginning since everything moves quickly after the meringue is done.
- Set up parchment paper (or a silicone mat) on a baking sheet.
- Set the piping tip in a pastry bag. (I used a 0.5-inch round tip today.)
- Sift dry ingredients: all-purpose flour, cocoa powder, and salt.
- Set a fine sieve and powdered sugar together.
- Separate eggs. Place egg whites in a large mixing bowl and egg yolks in a small bowl.
- Preheat the oven: to 395ºF (200ºC)

Tip💡
Ensure all the ingredients and tools are clean without yolks, oils, and liquids so that the meringue whips well.
5 Steps To Make Chocolate Ladyfingers
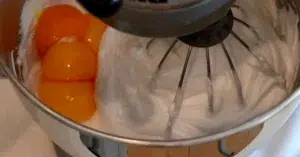
1. Whip egg whites to make meringue.
- Add half of the sugar once the meringue looks bubbly, like shampoo.
- Add the rest of the sugar when it looks very fluffy.
- Whip until it looks very fluffy and stiff.

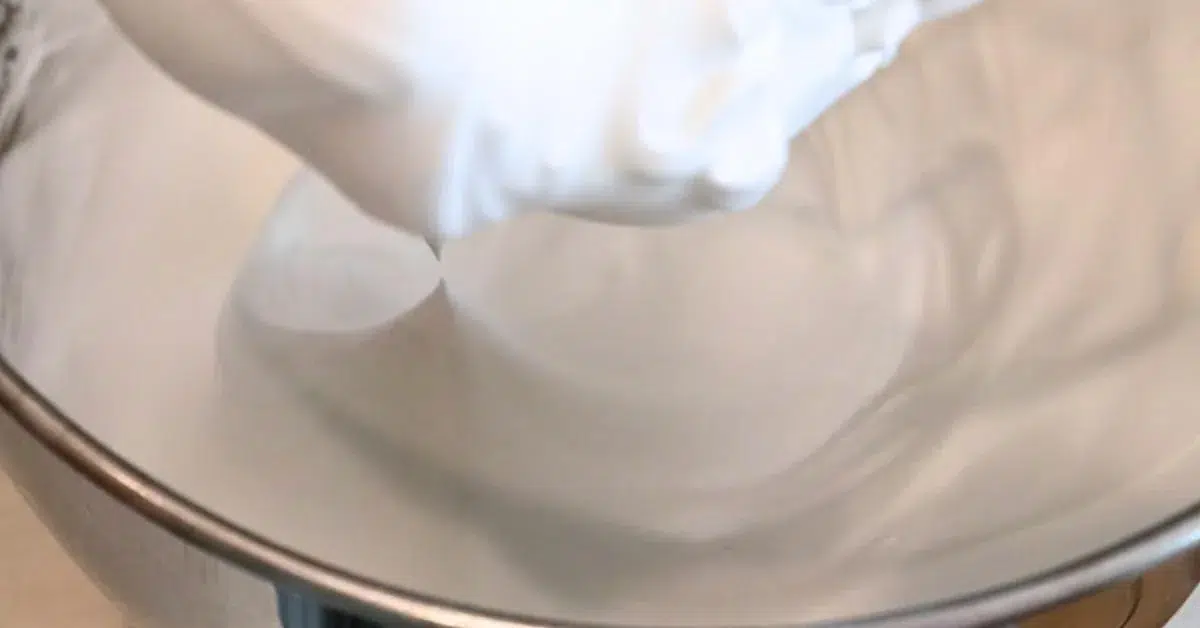
Tip💡
Make a stiff and fluffy meringue since we are piping the sponge batter today. - When you use a loose meringue, the batter gets too sloppy after piping it.
2. Add yolks.
Add yolks to the whipped egg whites and mix roughly. Be careful not to over-mix. Blending about 50% is just enough!


Tip💡
The oil in yolks starts popping air bubbles in the meringue, so we do not want to take too much time here. You can mix very roughly and go to the next process!
3. Add sifted flour and mix.
- Add half of the flour and fold until it's mixed roughly.
- Add the rest and mix just until you don't see any flour. Be careful not to over-mix it!


Tips💡
- It's very important to move as fast as you can after the meringue is done. The air bubbles of meringue slowly disappear, especially after the flour is added.
- It's essential not to over-mix the batter. Once you don't see any flour, stop right away and start piping. The batter gets looser when you overmix.
- Watch the video tutorial of this recipe to check how to fold.
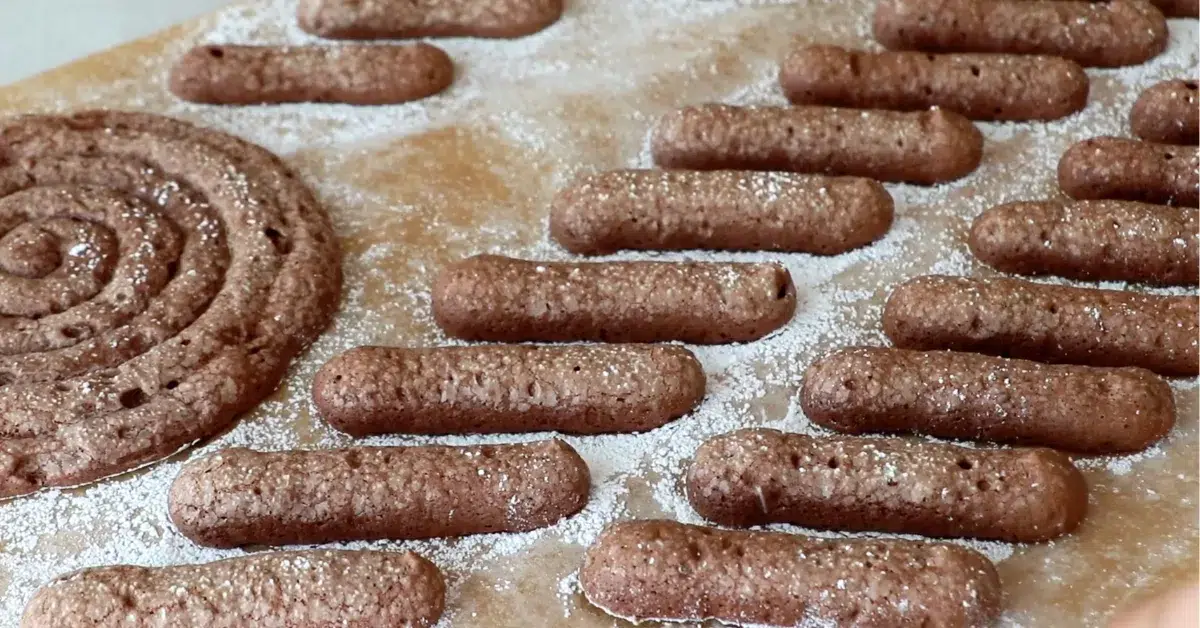
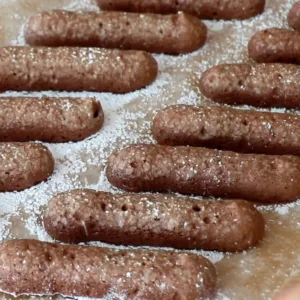
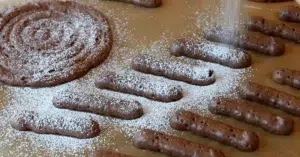
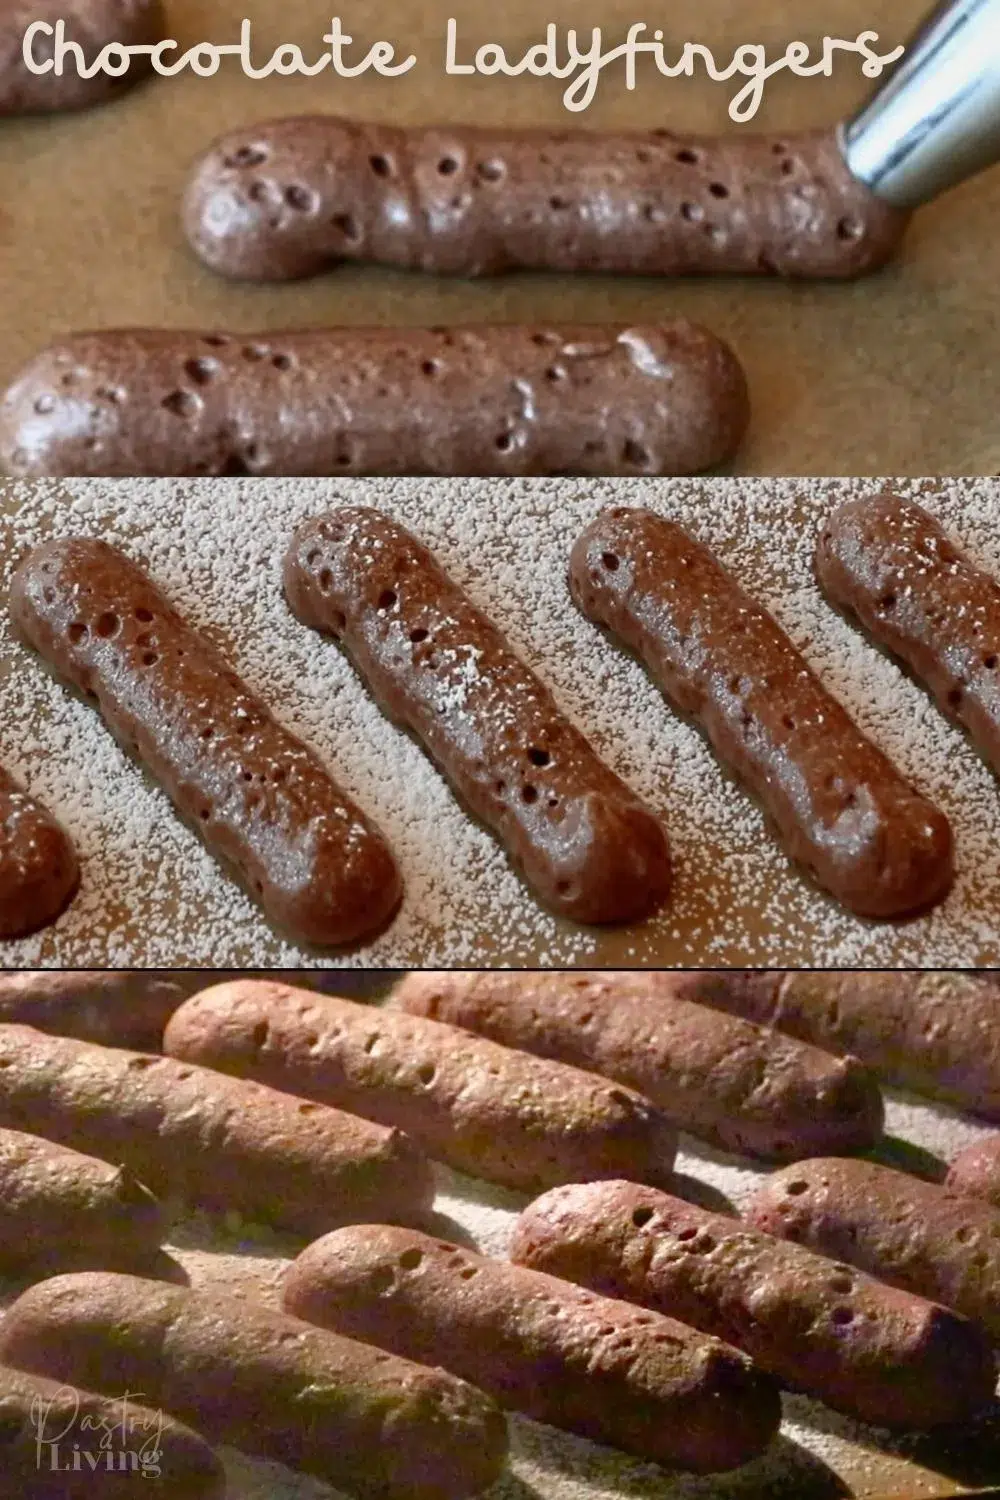
4. Pipe the batter and dust some powdered sugar on top.
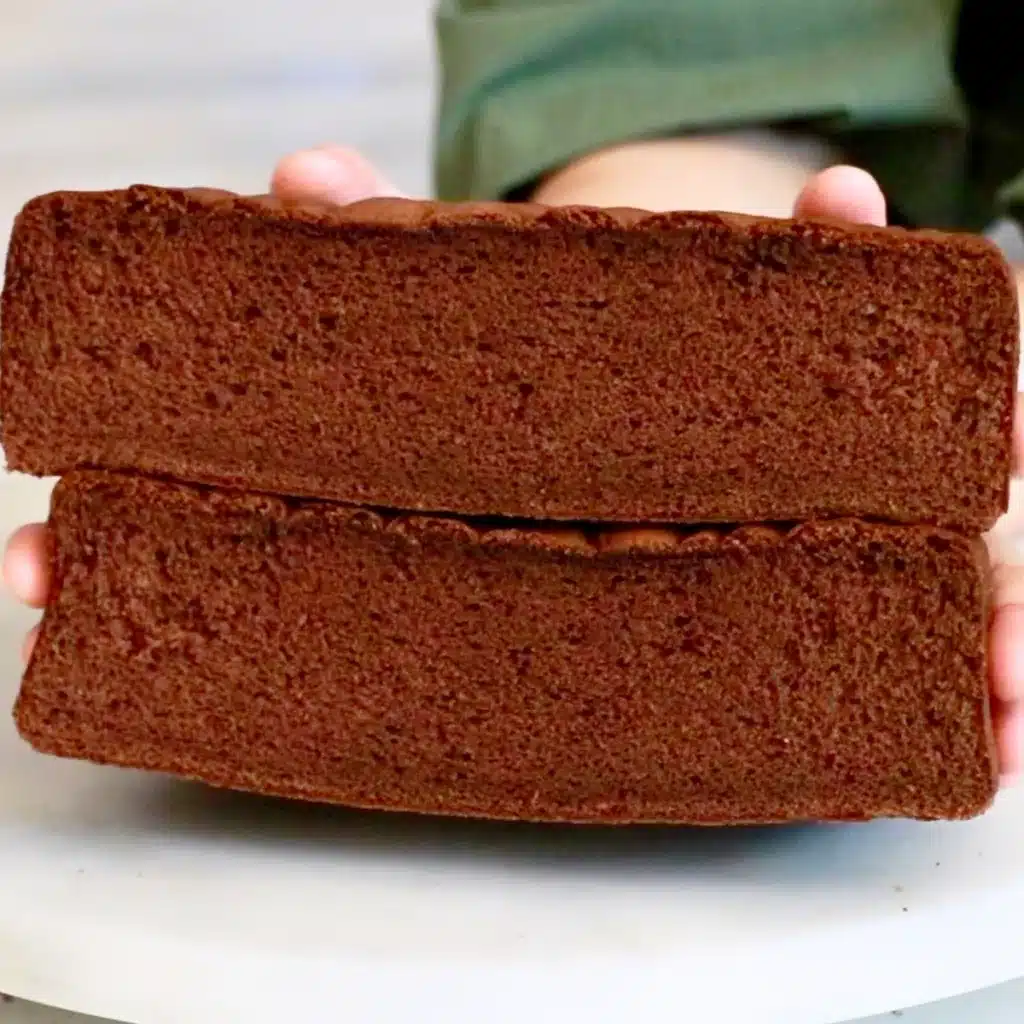
- Pipe it right away! I like to divide the sponge cake batter in half and wrap each of them with plastic wrap to insert them into a piping bag easily. You can pipe about 40 - 48 ladyfingers (a little over 3 inches long) with a 0.5" pastry tip. Use any tip you like!
- Dust powdered sugar on top.


The benefits of dusting powdered sugar on top of ladyfingers
- It helps the sponge to rise more.
- It also makes this sponge a little bit more moist.
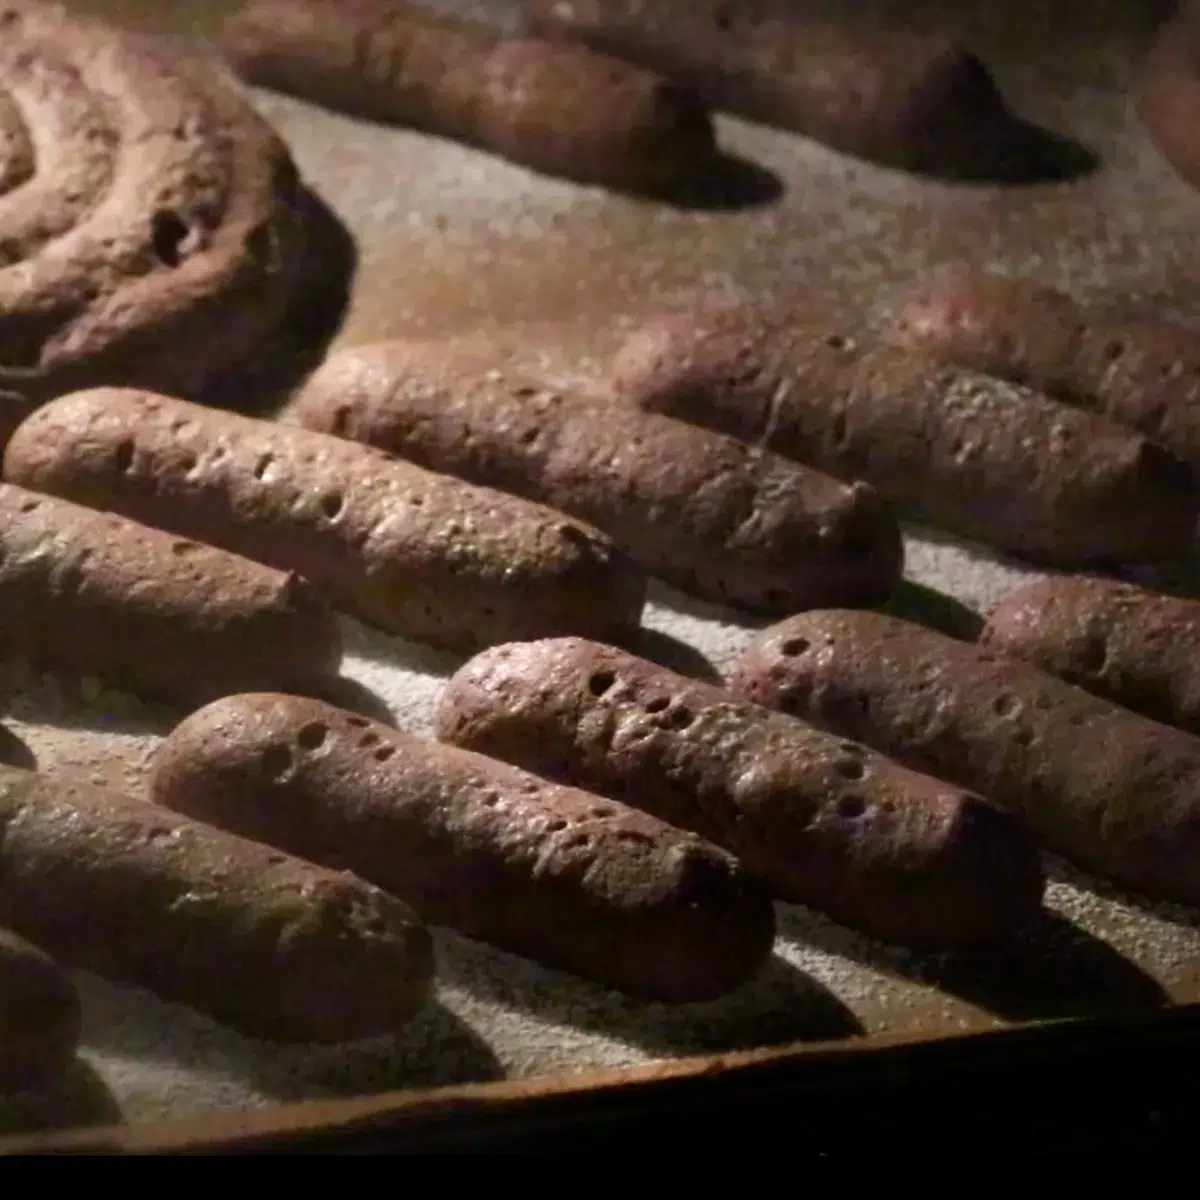
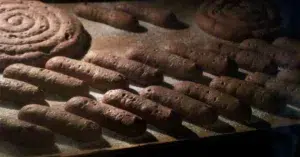
5. Bake them.
- Bake at 395ºF (200ºC) for 6 - 7 mins until the top bounces back very gently when touching it.
- (Adjust the time depending on the size and how thick they are.)
- Let them cool on a cooling rack. And remove them from parchment paper.


Tip💡
Try not to open the oven door until the very end to get the best result.
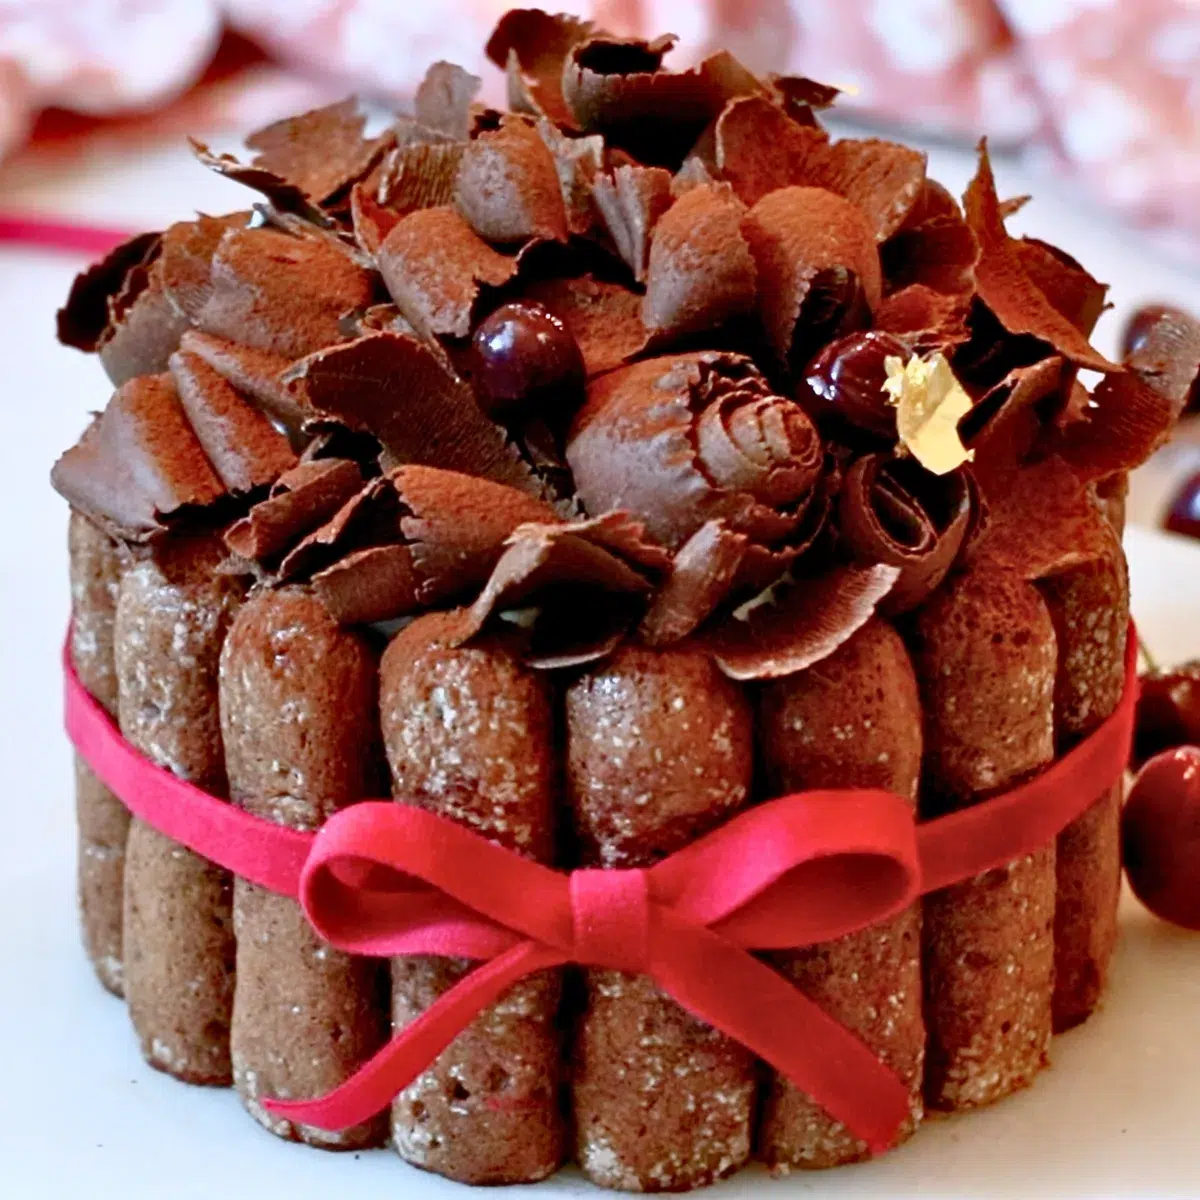
📌 Uses For Chocolate Ladyfingers
Enjoy the homemade ladyfingers in many ways! Here are some ideas:
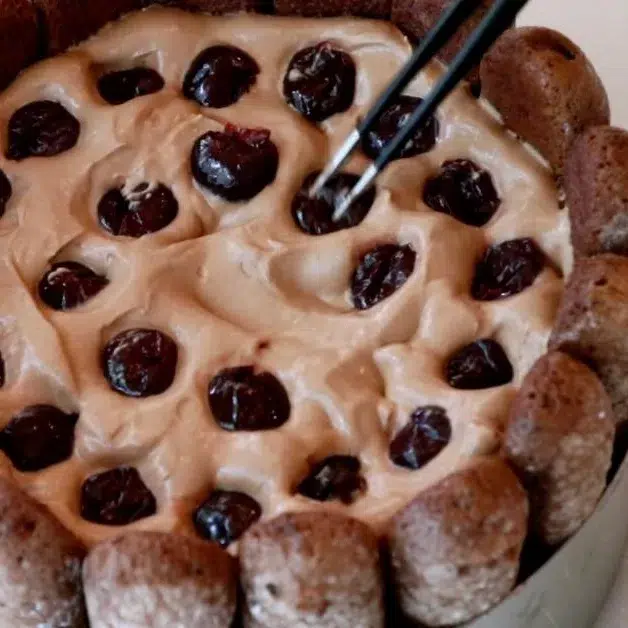
- Chocolate Charlotte Cake: I made a Black Forest Charlotte cake using the chocolate ladyfingers.
- Chocolate Tiramisu: The light sponge cake soaks up a lot of liquids. The classic Italian dessert tastes even more chocolatey with the sponge cakes.
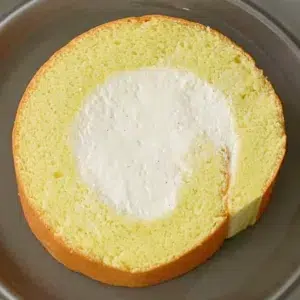
- Chocolate Mousse Cake: Pipe the sponge cake batter into circle layers and assemble the sponge cakes with creamy chocolate mousse in a cake ring! Soak the sponge in cake syrup with a little bit of alcohol to make the cake taste exceptional.
- Ice Cream Cakes: Pipe the batter into circles with any size, to make special chocolate ice cream sandwiches or whole ice cream cake!
- Tea Snack: Just a little something to add with tea/coffee! You can also dip in chocolate to make the decadent version. Or bake it longer to make it very crispy!
- Chocolate-dipped ladyfingers: Dip them in melted chocolate to make decadent treats! Sprinkle cacao nibs, mini-chocolate chips, pistachios, or any of your favorite toppings on top of the chocolate before it sets to make it look extra fancy.

📌 Frequently Asked Questions
How should I store chocolate ladyfingers, and what's the shelf-life?
Wrap them tightly or put them in an airtight container. You can store them for up to a few days in the fridge or a few months in the freezer. Consume them right after they are made for the best taste.
Why is butter not added to ladyfingers?
That is because the butter or oil makes the batter looser. Typically, butter is avoided to hold a nice shape after piping them.
Can I add flavors to the sponge cake batter?
Yes, you can! But be careful not to add too much since it can make the batter looser. Add it before adding flour or at the same time.
Can I also make ladyfingers with an electric hand mixer?
Yes! Follow the exact steps in the instructions.
📌 More Chocolate Recipes
If you are a chocolate lover, also try other delicious chocolate dessert recipes!
- Chocolate Sponge Cake
- Classic Chocolate Cake
- Chocolate Truffles
- Chocolate Mirror Glaze
- Chocolate Creme Brulee
- Opera Cake

📌 VIDEO: Watch How To Make It!
To learn how to make chocolate ladyfingers visually and have a deeper understanding of all, watch this tutorial on black forest Charlotte cake!
Don't forget to subscribe if you liked it 😉
📌 Printable Recipe
💬 If you loved this recipe, please share your feedback on this post! I always love hearing how you enjoyed it with your friends and family.
Chocolate Ladyfingers
Equipment
- Stand mixer with a whisk attachment Or a hand mixer
- Spatula
- Pastry tip with a pastry bag I used a 0.5" round tip.
- Sieve
- Parchment paper Or a silicone mat
Ingredients
Chocolate Biscuit Sponge Cake
- 4 large eggs Egg
- 3.5 oz Granulated sugar ½ US cup
- 3.5 oz All-purpose flour ¾ US cup
- 0.7 oz Cocoa powder ⅙ US cup
- ⅛ teaspoon Salt
- Some Powdered sugar
Instructions
Preparation
- I recommend finishing all the preparations in the beginning since everything moves quickly after the meringue is done.* Set up parchment paper (or a silicone mat) on a baking sheet.* Set the piping tip in a pastry bag. (I used a 0.5-inch round tip today.)* Sift dry ingredients: all-purpose flour, cocoa powder, and salt.* Set a fine sieve and powdered sugar together.* Separate eggs. Place egg whites in a large mixing bowl and egg yolks in a small bowl.* Preheat the oven: to 395ºF (200ºC)Tip💡Ensure all the ingredients and tools are clean without yolks, oils, and liquids so that the meringue whips well.


5 Steps To Make Chocolate Ladyfingers
- Whip egg whites to make meringue:1. Add half of the sugar once the meringue looks bubbly, like shampoo.2. Add the rest of the sugar when it looks very fluffy.3. Whip until it looks very fluffy and stiff.Tip💡Make a stiff and fluffy meringue since we are piping the sponge batter today. - When you use a loose meringue, the batter gets too sloppy after piping it.4 large eggs Egg, 3.5 oz Granulated sugar
- Add yolks:Add yolks to the whipped egg whites and mix roughly. Be careful not to over-mix. Blending about 50% is just enough!Tip💡The oil in yolks starts popping air bubbles in the meringue, so we do not want to take too much time here. You can mix very roughly and go to the next process!
- Add sifted flour and mix:1. Add half of the flour and fold until it's mixed roughly. 2. Add the rest and mix just until you don't see any flour. Be careful not to over-mix it!Tips💡1. It's very important to move as fast as you can after the meringue is done. The air bubbles of meringue slowly disappear, especially after the flour is added.2. It's essential not to over-mix the batter. Once you don't see any flour, stop right away and start piping. The batter gets looser when you overmix.3. Watch the video tutorial of this recipe to check how to fold.3.5 oz All-purpose flour, 0.7 oz Cocoa powder, ⅛ teaspoon Salt
- Pipe the batter and dust some powdered sugar on top:1. Pipe it right away! I like to divide the sponge cake batter in half and wrap each of them with plastic wrap to insert them into a piping bag easily. You can pipe about 40 - 48 ladyfingers (a little over 3 inches long) with a 0.5" pastry tip. Use any tip you like!2. Dust powdered sugar on top.The benefits of dusting powdered sugar on top of ladyfingersIt helps the sponge to rise more. It also makes this sponge a little bit more moist.Some Powdered sugar
- Bake them: 1. Bake at 395ºF (200ºC) for 6 - 7 mins until the top bounces back very gently when touching it. (Adjust the time depending on the size and how thick they are.)2. Let them cool on a cooling rack. And remove them from parchment paper.Tip💡Try not to open the oven door until the very end to get the best result.


Video
Notes
How to store it:
Use it right away or wrap tightly and store it in the fridge for up to a few days. You can also freeze them to store for a longer time. ** For best results, measure ingredients with a scale. All recipes are designed with weighed ingredients using grams/ounces. Cup measurements are provided for your convenience. **Nutrition
📌 Pin It!
Pin it if you love this homemade chocolate ladyfingers recipe, and find so many other recipes on my Pinterest page!


Leave a Reply